*Video: [Next Level by Performers](https://www.youtube.com/watch?v=-22PcRAMKTg), the full demo.*
- [Download Next Level from CSDb](https://csdb.dk/release/?id=232976)
- Ranked #1 in [CSDb's Top Demos](https://csdb.dk/toplist.php?type=release&subtype=%281%29) at time of writing
- Runtime: approx 21mins
- 4x 35-track disk sides (2 disks)
- Code ([Axis](https://csdb.dk/scener/?id=331), [Bitbreaker](https://csdb.dk/scener/?id=1678), [Knut M. Clausen](https://csdb.dk/scener/?id=10522), [Krill](https://csdb.dk/scener/?id=8104), [Mahoney](https://csdb.dk/scener/?id=3701), [Peiselulli](https://csdb.dk/scener/?id=14944), [The Human Code Machine](https://csdb.dk/scener/?id=9589), [Trap](https://csdb.dk/scener/?id=1051), [YPS](https://csdb.dk/scener/?id=24534))
- Graphics ([Bitbreaker](https://csdb.dk/scener/?id=1678), [DeeKay](https://csdb.dk/scener/?id=8058), [Facet](https://csdb.dk/scener/?id=21388), [Joe](https://csdb.dk/scener/?id=1672), [Prowler](https://csdb.dk/scener/?id=16567), [ptoing](https://csdb.dk/scener/?id=11032), [redcrab](https://csdb.dk/scener/?id=22995), [Veto](https://csdb.dk/scener/?id=6936))
- Music ([dEViLOCk](https://csdb.dk/scener/?id=2185), [Jammer](https://csdb.dk/scener/?id=8105), [Linus](https://csdb.dk/scener/?id=10025), [LMan](https://csdb.dk/scener/?id=23279))
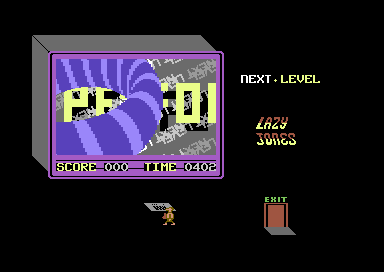
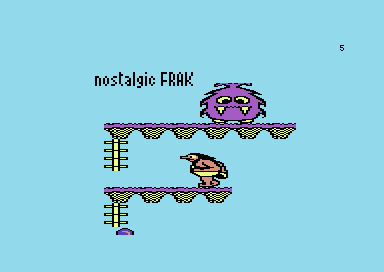
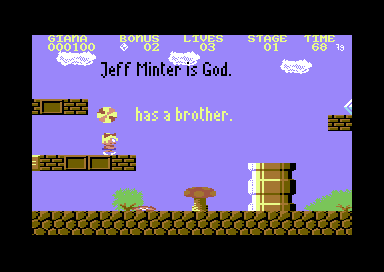
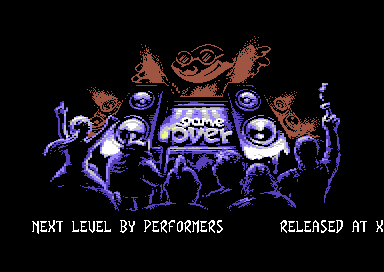
From the get-go, you quickly realise that this demo is another game-themed release from Performers (their previous being the 2016 X demo, [Concert](https://csdb.dk/release/?id=151274) which came #4 in that year's compo). Performers hadn't had an X-winner previously - but you could see that they'd gone all-out this time to try to get the top spot.
Other than a PETSCII demo in 2022 ([Formula Petscii](https://csdb.dk/release/?id=225762)), Performers hadn't actually released any demos since the last X in 2018 ([C=Bit 18](https://csdb.dk/release/?id=170950), coming #3). So they'd had a pretty solid 5 years to pull this demo together - and it shows.
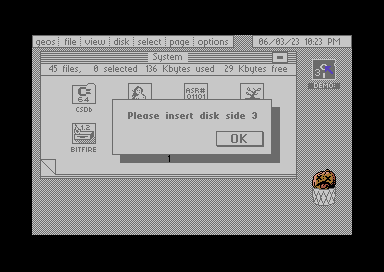
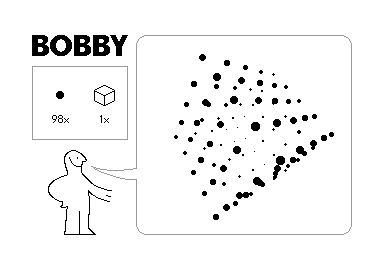
The stand-out for most is the 100-games part that files side 2. I feel a little differently as, really, although the amount of work involved in that is considerable, and the compression work impressive, I just find it a little "dull". Sorry Mahoney, hope you can understand, it's just something that personally I would fast-forward past if I'm able to (ie. if watching on YouTube or emulator).
Personally I really liked the vector 3D parts. Largely because I've personally never coded such on C64 so, for me, they're always impressive - when they're largely realtime at least (which they seem to be here - please correct me if I'm wrong).
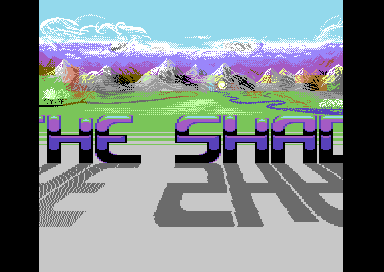
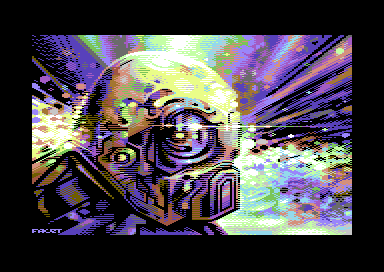
The audio throughout is fantastic, the graphics quite stunning (though of course they had to borrow Genesis Project's Facet - his work shines throughout this), and there's plenty of "code p0rn", too.
A deserved winner I have to say.
My score: **93%**
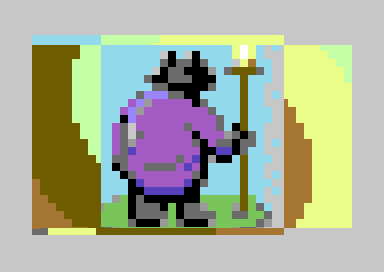
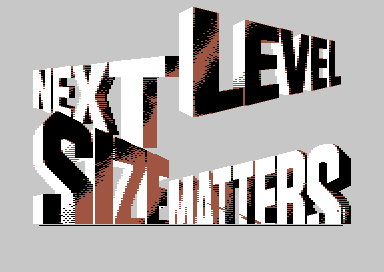
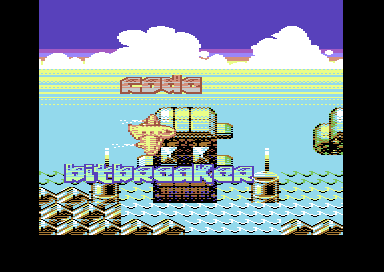
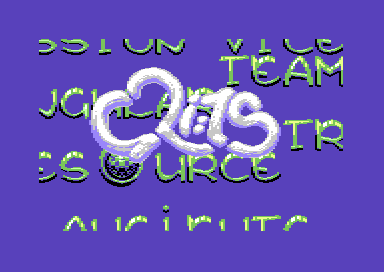
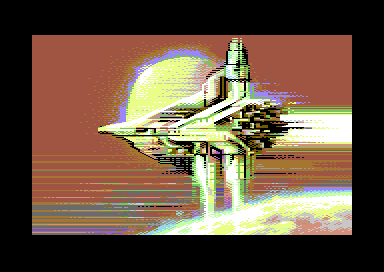
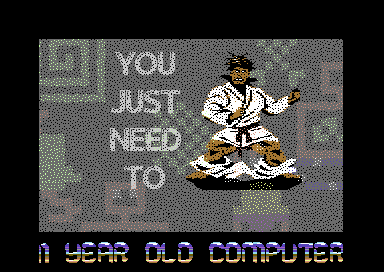
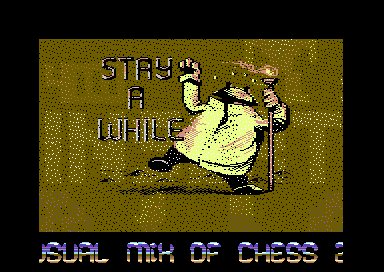
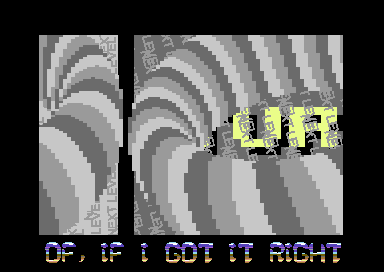


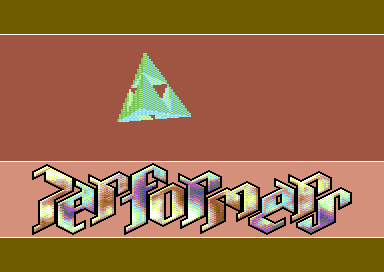

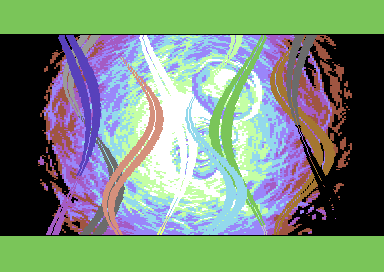
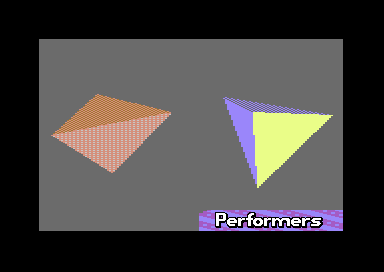
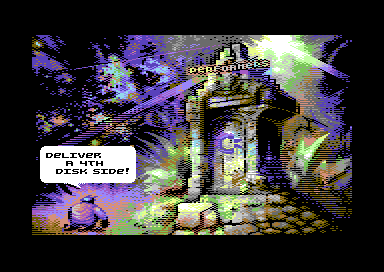
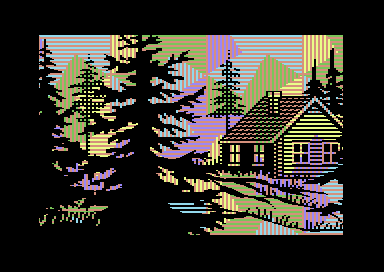
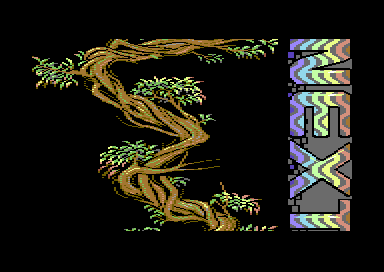
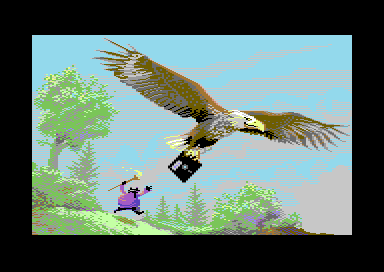
---
### 2. Mojo by Pretzel Logic and Bonzai
Video:
*Video: [Mojo by Bonzai and Pretzel Logic](https://www.youtube.com/watch?v=HXi3oJ9huiI), the full demo.*
- [Download Mojo from CSDb](https://csdb.dk/release/?id=232966)
- Ranked #2 in [CSDb's Top Demos](https://csdb.dk/toplist.php?type=release&subtype=%281%29) at time of writing
- Runtime: approx 16mins 30secs
- 3x 40-track disk sides plus 1x 35-track disk side (2 disks)
- Code ([Honcho](https://csdb.dk/scener/?id=34209), [Rico](https://csdb.dk/scener/?id=873), [The Syndrom](https://csdb.dk/scener/?id=1028), [Trap](https://csdb.dk/scener/?id=1051), [Walt](https://csdb.dk/scener/?id=1857))
- Graphics ([Mikael](https://csdb.dk/scener/?id=734), [Spiham](https://csdb.dk/scener/?id=5307), [The Sarge](https://csdb.dk/scener/?id=8086))
- Music ([Laxity](https://csdb.dk/scener/?id=677), [SMC](https://csdb.dk/scener/?id=1283), [The Syndrom](https://csdb.dk/scener/?id=1028), [Xiny6581](https://csdb.dk/scener/?id=12697))
Bonzai had released quite a few demos over the years since X, helping keep the scene alive with a good mix of technical and graphical demo releases. So many in fact that, come X 2023, they'd largely run out of steam - hence the team up with Pretzel Logic.
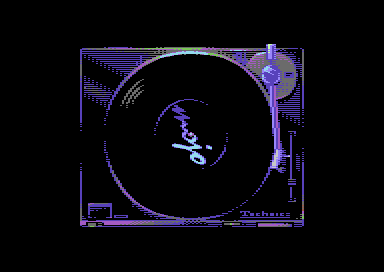
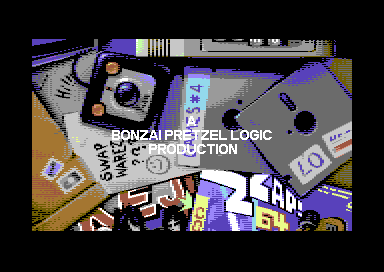
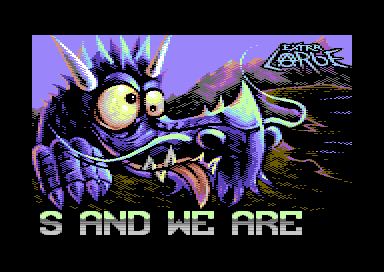
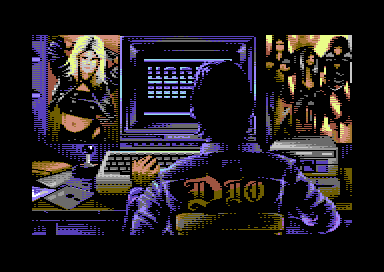
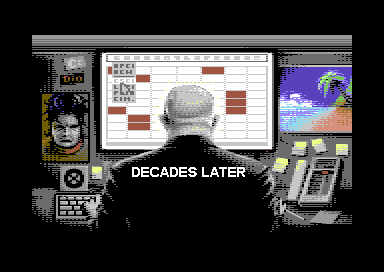
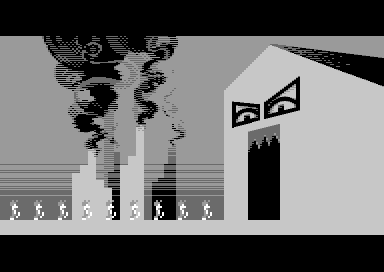
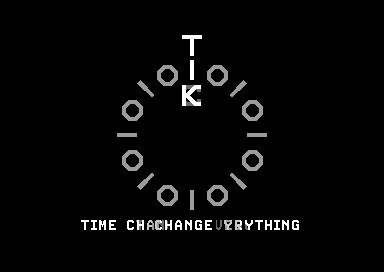
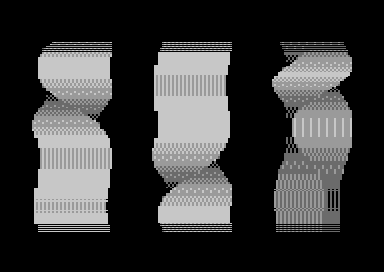
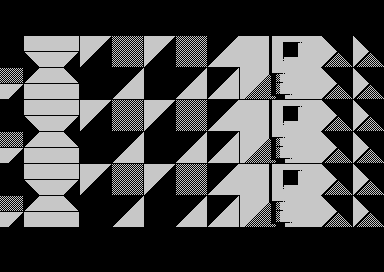
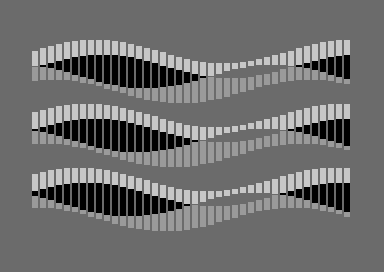
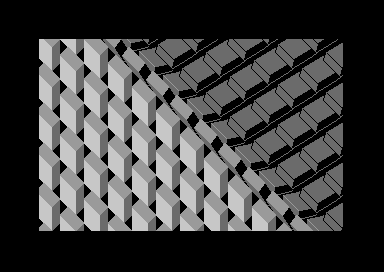
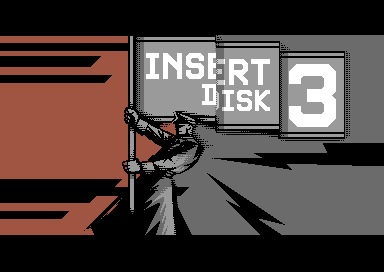
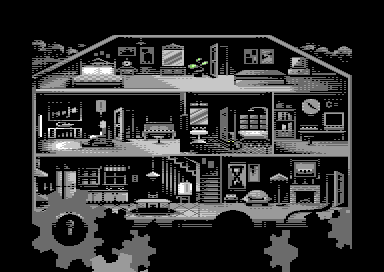
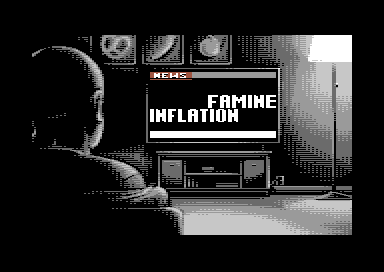
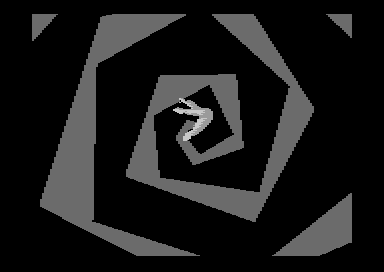
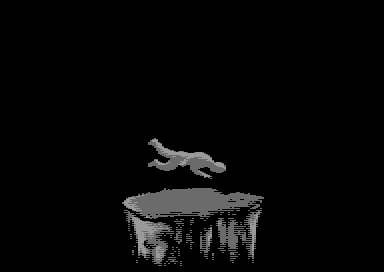
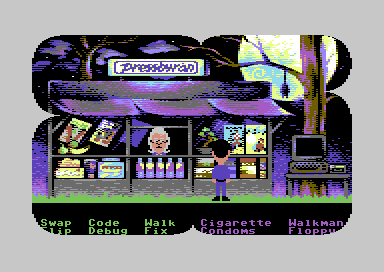
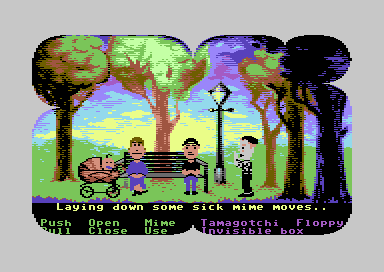
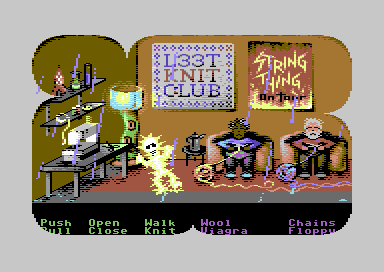
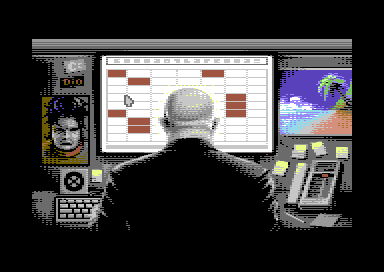
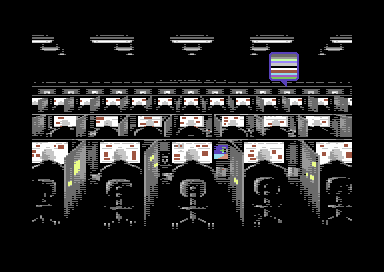
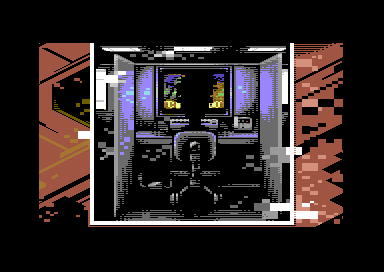
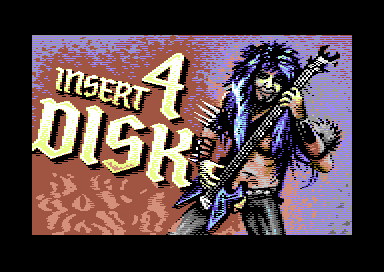
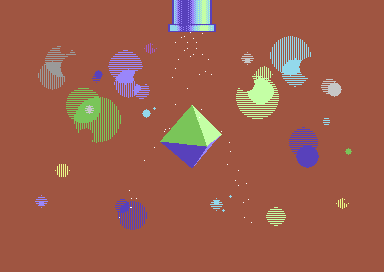
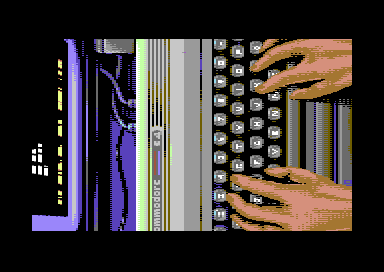
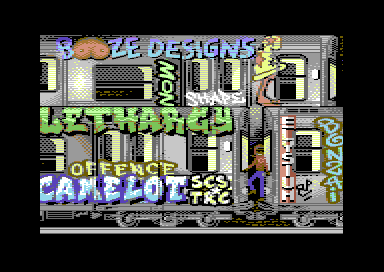
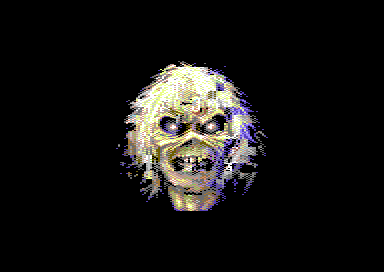
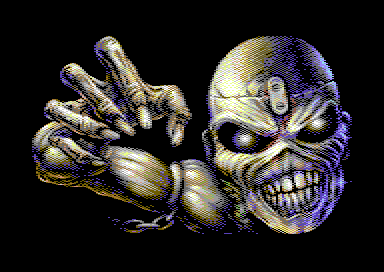
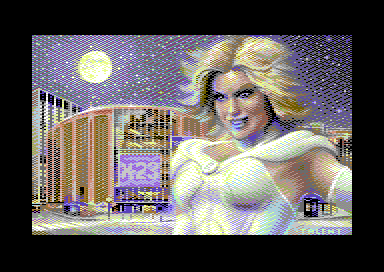
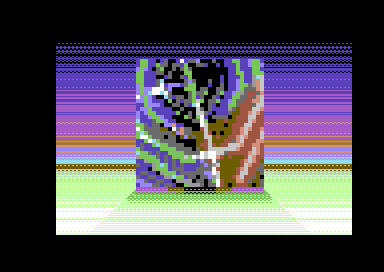
You can see from the screenshots below the ridiculous amount of artwork throughout this demo. They really went to town with artwork - giving the coders a bit of a break (although of course displaying, animating and scrolling art on the C64 also involves considerable coding work).
For me personally this demo was lacking in the code p0rn area. It's not until side 3 that we get the perspective up-scroller (you can see a similar effect in [Anniversary](https://csdb.dk/release/?id=216864) from Finnish Gold - though, actually, Trap had made the effect first and had mistakenly sent Proton a preview.. doh!). There's really not much following that, either, other than the circular scroller and the dot scroller on side 4.
The design, artwork and music really make this demo and, for those alone, this demo stands tall.
My score: **83%**











---
### 3. Wonderland XIV by Censor Design
Video:
*Video: [Wonderland XIV by Censor Design](https://www.youtube.com/watch?v=oKn_UcLwKCY), the full demo.*
- [Download Wonderland XIV from CSDb](https://csdb.dk/release/?id=232980)
- Ranked #3 in [CSDb's Top Demos](https://csdb.dk/toplist.php?type=release&subtype=%281%29) at time of writing
- Runtime: approx 16mins 30secs
- 4x 40-track disk sides (2 disks)
- Code ([Bob](https://csdb.dk/scener/?id=358), [Edhellon](https://csdb.dk/scener/?id=506), [Firehawk](https://csdb.dk/scener/?id=528), [Krikkit](https://csdb.dk/scener/?id=27363), [Lavazza](https://csdb.dk/scener/?id=24462), [Magnar Harestad](https://csdb.dk/scener/?id=16913), [Oswald](https://csdb.dk/scener/?id=8139), [Peacemaker](https://csdb.dk/scener/?id=807), [Swallow](https://csdb.dk/scener/?id=2547))
- Graphics ([Carrion](https://csdb.dk/scener/?id=501), [Creeper](https://csdb.dk/scener/?id=413), [DeeKay](https://csdb.dk/scener/?id=8058), [LMan](https://csdb.dk/scener/?id=23279), [Magnar Harestad](https://csdb.dk/scener/?id=16913), [Soya](https://csdb.dk/scener/?id=27690), [Talent](https://csdb.dk/scener/?id=37125), [The Sarge](https://csdb.dk/scener/?id=8086))
- Music ([LMan](https://csdb.dk/scener/?id=23279), [Magnar Harestad](https://csdb.dk/scener/?id=16913), [Makke](https://csdb.dk/scener/?id=9169), [psych858o](https://csdb.dk/scener/?id=12931), [Swallow](https://csdb.dk/scener/?id=2547))
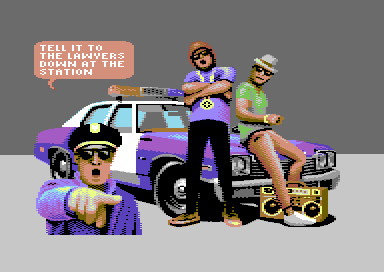
Censor of course were winners at X 2018 with "Star Wars Demo", narrowly beating Bonzai's Unboxed. Some believe that Bonzai deserved to win X 2018, which I'm on the wall about personally (both demos are pretty even-par for me).. but I -do- believe that X 2016's top 2 should've been reversed - for me, Censor's demo should've been a clear winner that year.. but Bonzai won people's hearts simply by returning to the scene at that time so perhaps that played a part.
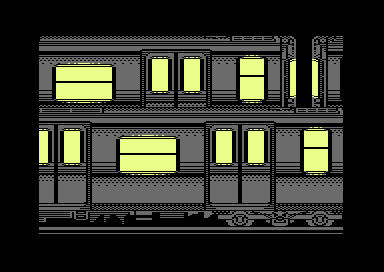
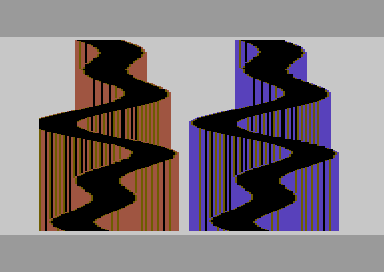
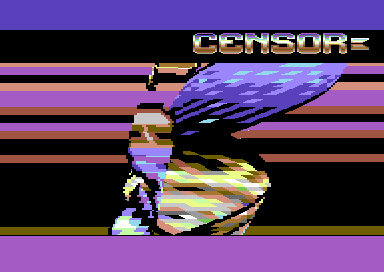
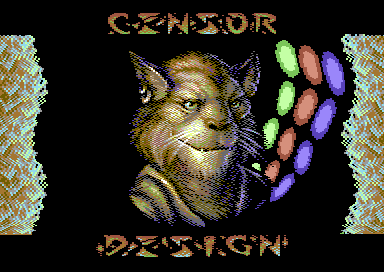
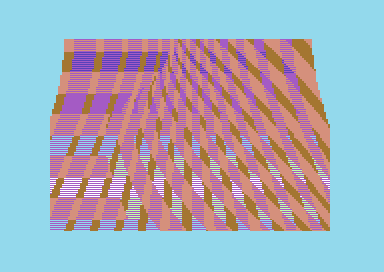
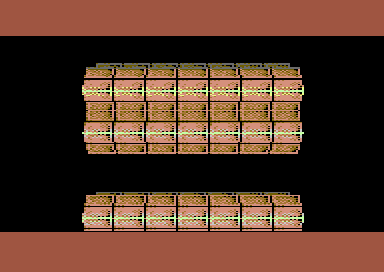
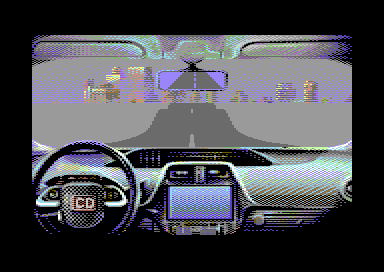
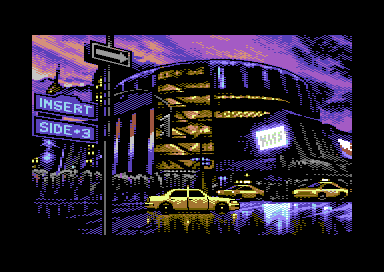
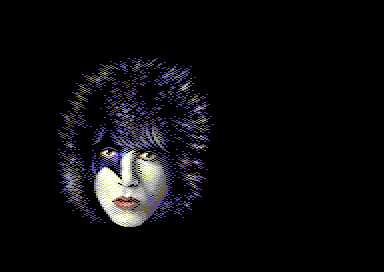
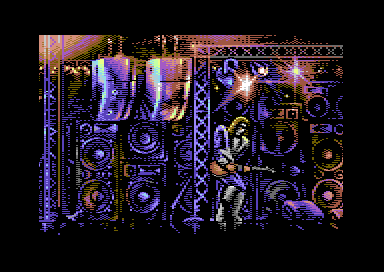
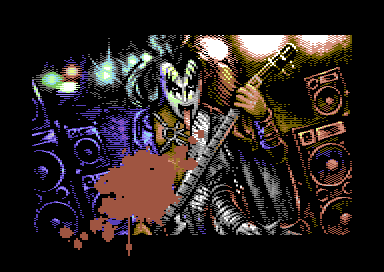
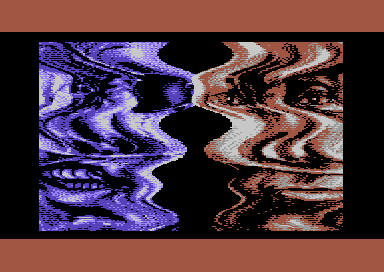
I really like Wonderland XIV, it's possibly my favourite from X 2023 actually. As with other groups, there are several parts that have become tropes for Censor - the colour cyclers, the wavy bitmaps, bitmap scrollers and such. No problem here as it seems that each has advanced a little since the last time we saw them.
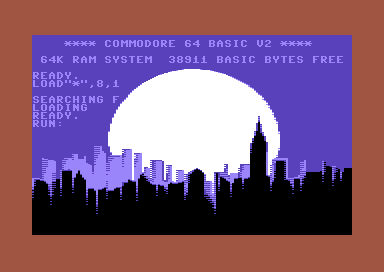
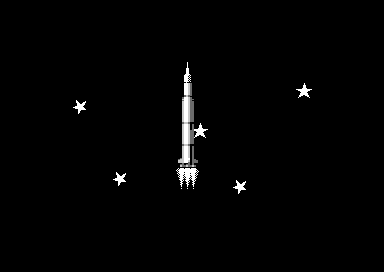
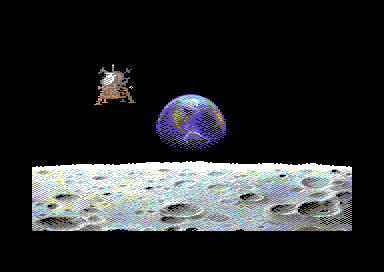
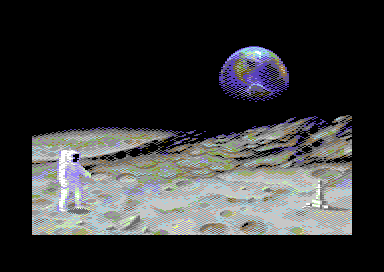
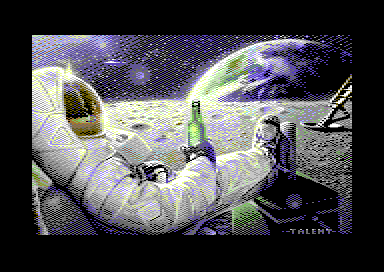
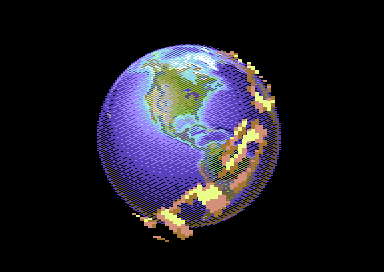
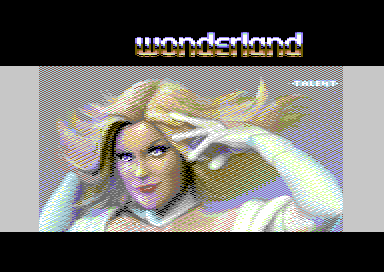
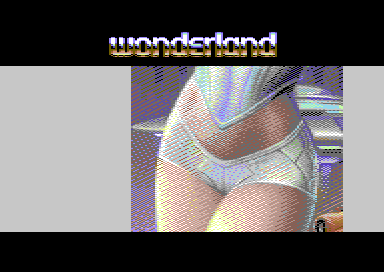
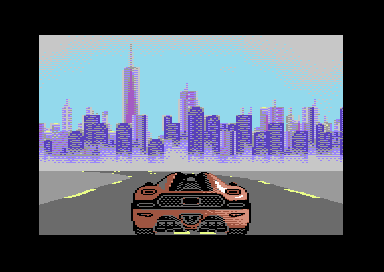
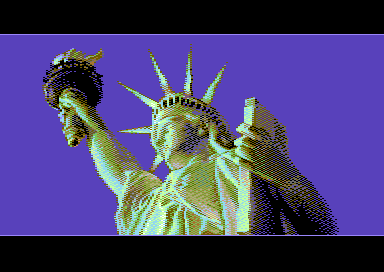
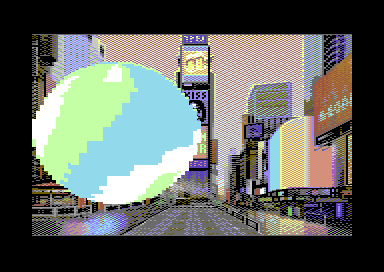
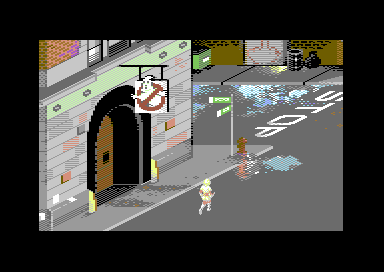
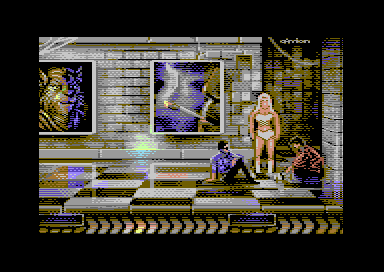
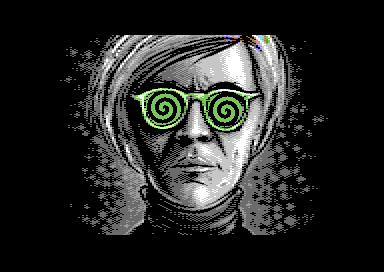
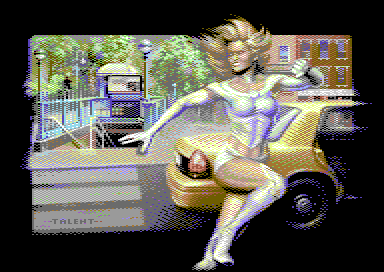
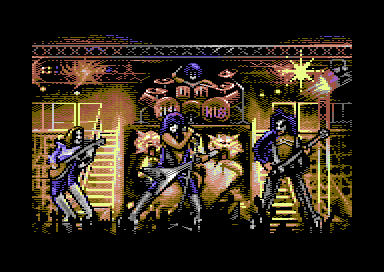
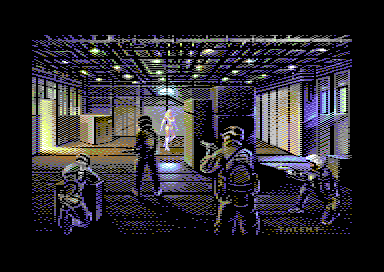
Censor picked up Talent, their new graphic artist and someone new to the scene, in 2022. His art shines throughout here - and there's an incredible amount of it. All hitting a very high bar and with his unique dithering style.
There's a really good mix of new and old code p0rn throughout, clearly a lot of love and work went into this demo on all sides - code, music and art.
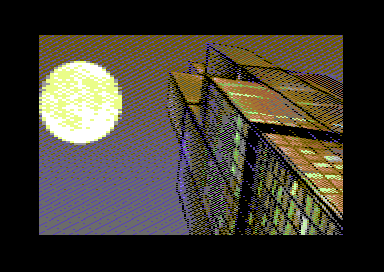
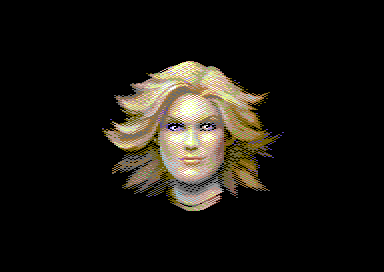
The absolute showstopper, though, is *that* end part. Amazing, just jaw droppingly fantastic in every way.
My score: **89%**






---
### 4. No Bounds by Genesis Project
Video:
*Video: [No Bounds by Genesis Project](https://www.youtube.com/watch?v=VEwcyjrxJX8), the full demo.*
- [Download No Bounds from CSDb](https://csdb.dk/release/?id=232957)
- Ranked #6 in [CSDb's Top Demos](https://csdb.dk/toplist.php?type=release&subtype=%281%29) at time of writing
- Runtime: approx 10mins 30secs
- 2x 35-track disk sides (1 disk)
- Code ([Elder0010](https://csdb.dk/scener/?id=22731), [Raistlin](https://csdb.dk/scener/?id=848), [Sparta](https://csdb.dk/scener/?id=29482))
- Graphics ([Elder0010](https://csdb.dk/scener/?id=22731), [Facet](https://csdb.dk/scener/?id=21388), [Raistlin](https://csdb.dk/scener/?id=848), [Razorback](https://csdb.dk/scener/?id=27344), [redcrab](https://csdb.dk/scener/?id=22995), [Scrap](https://csdb.dk/scener/?id=1929), [Sparta](https://csdb.dk/scener/?id=29482))
- Music ([acrouzet](https://csdb.dk/scener/?id=34424), [psych858o](https://csdb.dk/scener/?id=12931), [Stinsen](https://csdb.dk/scener/?id=23584))
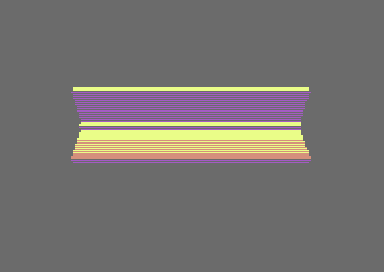
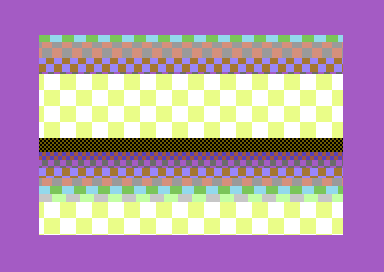
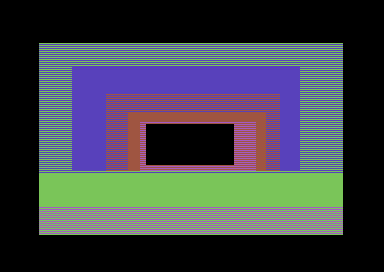
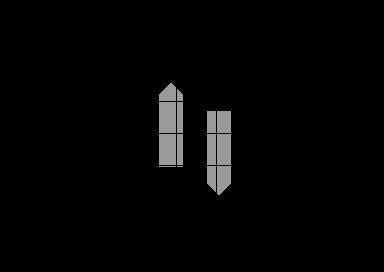
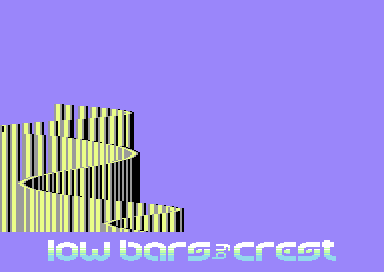
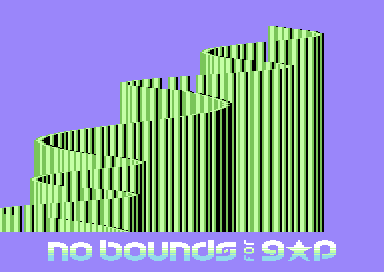
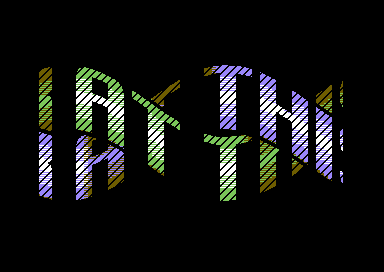
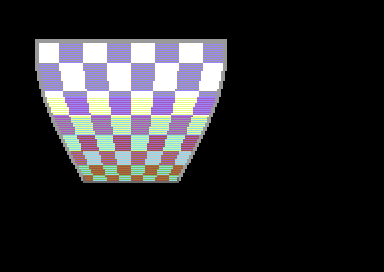
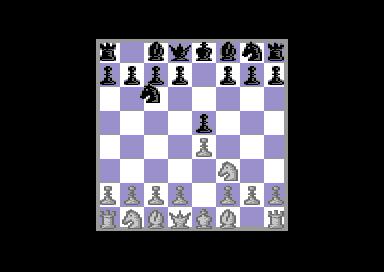
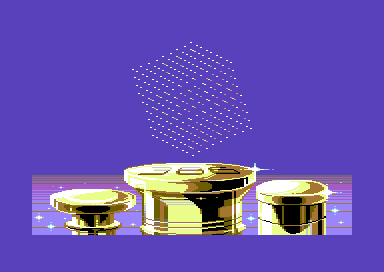
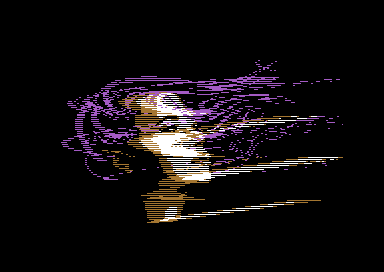
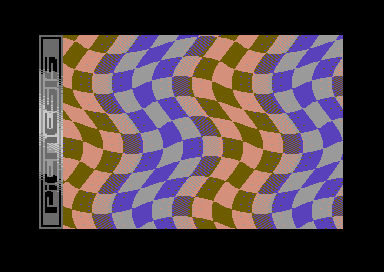
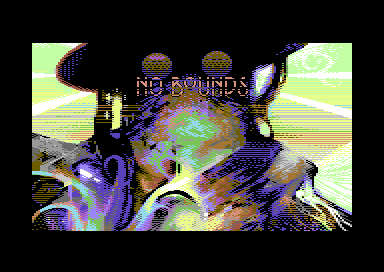
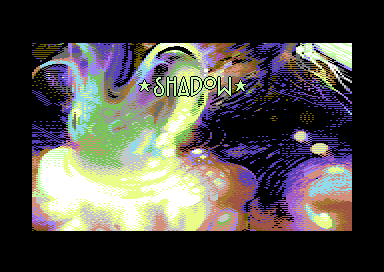
Rather than review a demo that I worked on, I'll instead just explain a few of the reasons why we wanted to make this demo "different". With most of the recent demos that I'd worked on, there'd been some recurring comments from rival groups - "amazing graphics, not enough code", "the kings of disk swap!" and such... and we'd had some great comments on our previous demo, [Memento Mori](https://csdb.dk/release/?id=195841), as well - such as "really nice, fast pace!" and "the whole pace makes it look as if it's an Amiga OCS demo".
Taking these comments on board, we made some rules:-
- no static bitmaps for any more than a few seconds
- compress as much as possible
- don't waste disk space
- don't dwell on an effect for more than 20 seconds, regardless of how many months' work it was
- try to avoid C64 tropes, no long boring scrollers
- total runtime close to 10mins
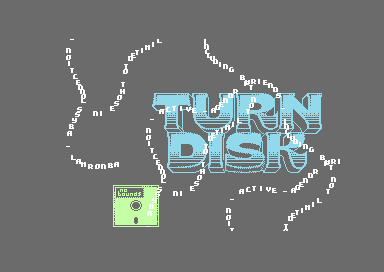
We did fail on a few of these in places .. the turn-disk part, for example, is of course a very long greetings scroller .. it also was very similar to what we'd done in our previous demo .. but we wanted to include the part as it was a significant improvement and, well, it just looked cool.
Would we do this again? I'm not sure. Every other group had huge amounts of art and were flipping sides quicker than a mad pancake chef.. and they all did well at X without the negative comments... so... we'll see!
My score: **Withheld**


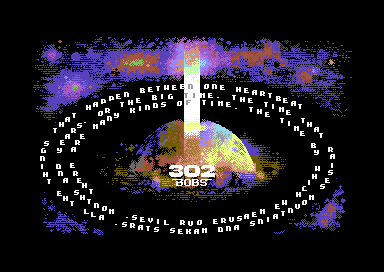
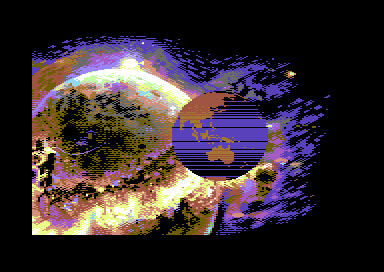
---
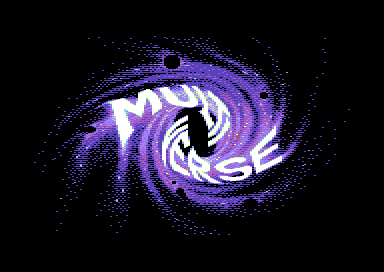
### 5. Multiverse by Nah-Kolor
Video:
*Video: [Multiverse by Nah-Kolor](https://www.youtube.com/watch?v=6-AF72Vqlwg), the full demo.*
- [Download Multiverse from CSDb](https://csdb.dk/release/?id=232973)
- Ranked #127 in [CSDb's Top Demos](https://csdb.dk/toplist.php?type=release&subtype=%281%29) at time of writing
- Runtime: approx 18mins
- 4x 35-track disk sides (2 disks)
- Code ([Bonefish](https://csdb.dk/scener/?id=31690), [CRT](https://csdb.dk/scener/?id=7007), [Deetsay](https://csdb.dk/scener/?id=2282), [Dr. Science](https://csdb.dk/scener/?id=4457), [Hedgehog](https://csdb.dk/scener/?id=31250), [KK](https://csdb.dk/scener/?id=29058), [Magnar Harestad](https://csdb.dk/scener/?id=16913), [Pellicus](https://csdb.dk/scener/?id=38548), [Profi 1](https://csdb.dk/scener/?id=9076))
- Graphics ([Facet](https://csdb.dk/scener/?id=21388), [Hammerfist](https://csdb.dk/scener/?id=22828), [Iridon](https://csdb.dk/scener/?id=33009), [Jacksnipe of Evil](https://csdb.dk/scener/?id=29227), [Joe](https://csdb.dk/scener/?id=1672), [JonEgg](https://csdb.dk/scener/?id=30134), [NTSC](https://csdb.dk/scener/?id=38550), [Profi 1](https://csdb.dk/scener/?id=9076), [Tudor](https://csdb.dk/scener/?id=38549))
- Music ([Flex](https://csdb.dk/scener/?id=530), [Magnar Harestad](https://csdb.dk/scener/?id=16913), [Wiklund](https://csdb.dk/scener/?id=22004))
I'd heard so much about this demo over the years .. originally planned for X 2018, it had had an incredible development cycle. So much so that artists involved with the demo had given up hope of it releasing - I'd received a few pieces from this demo for consideration for our own, in fact, and it's lucky that we didn't include them!
Anyway, this really is a hot mix of so many different groups and sceners, with Magic commanding the workers involved and even convincing some of Nah Kolor's Amiga coders to come onboard to learn C64 coding on-the-fly.
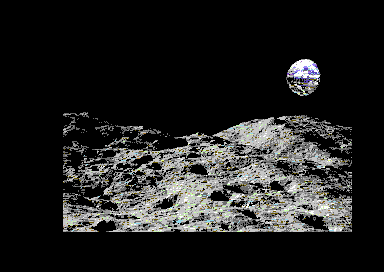
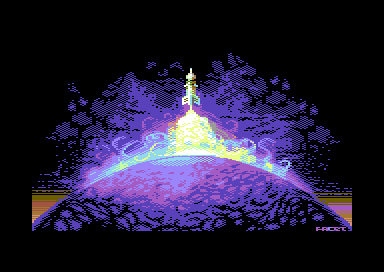
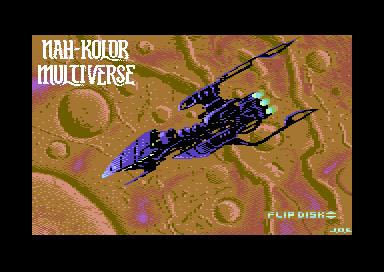
Artwork throughout is really nice - mostly coming from Genesis Project's Facet, Wrath Design's Joe and Genesis Project's JonEgg.
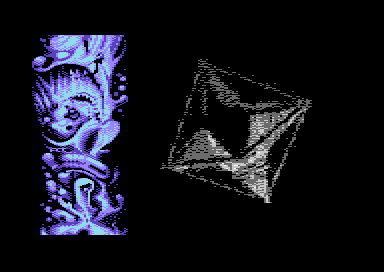
There are a few parts that stand out, such as a really cool sun animation and the Coma Fight sequence (which could've benefited from a bit more animation and higher framerate).
What I think really let the demo down, though, was that so many of the parts seemed like almost identical copies of things that other groups had done before - mostly Censor, to be honest! The colourful scroller, in particular, is just their [Daah, Those Acid Pill!](https://csdb.dk/release/?id=118639) scroller - I can't see that anything is improved or different here at all, making me wonder simply "why??". Likewise, the wibbly scroller seems to be just the [Space Beer](https://csdb.dk/release/?id=175656) one but with some added (unintentional) glitching?
It's great to see Nah Kolor entering, and coming in with such a sizeable demo.. but I hope next time there can be a cleaner design and more originality.
My score: **70%**





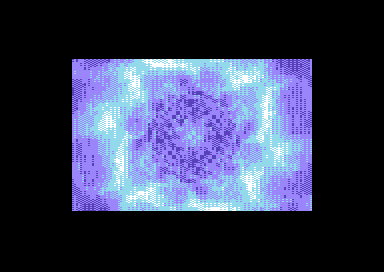
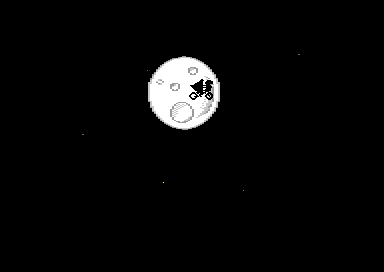
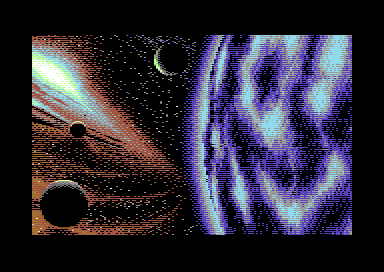
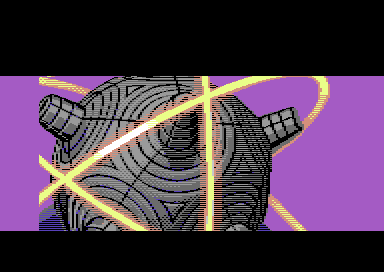
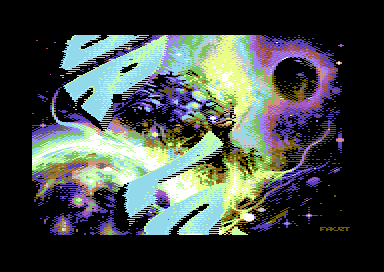

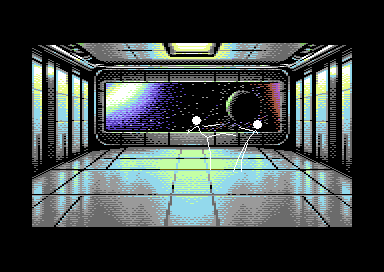
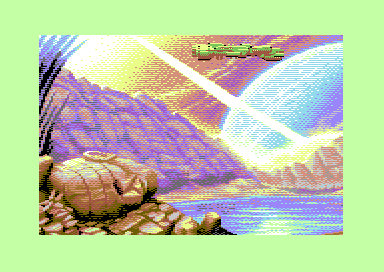
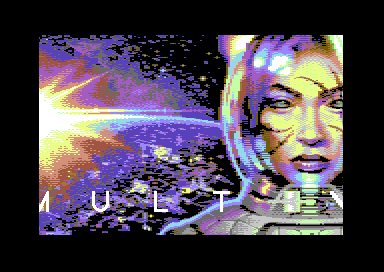
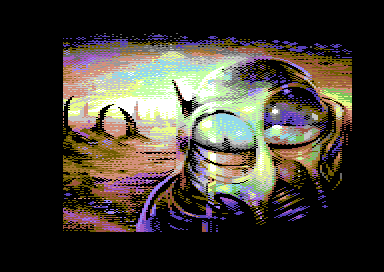
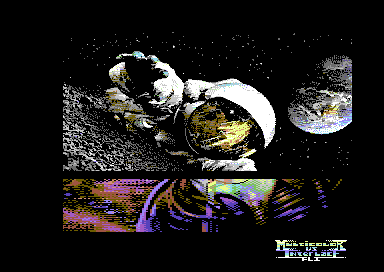

---
### A Quick Note
I did actually write some paragraphs for one of the C64's scene mags (Vandalism News) a while back .. but asked to retract them when the editor had suggested to edit the wording on one of the reviews (the review for the demo that that editor had personally been involved with). At first I asked that my words could either be taken in their entirety or not at all - but since they weren't accepting that, I simply asked to pull my reviews completely. That issue of Vandalism News hasn't been released yet so I don't know whether they respected those wishes.
---
### Personal Demo Post-Mortem (for No Bounds)
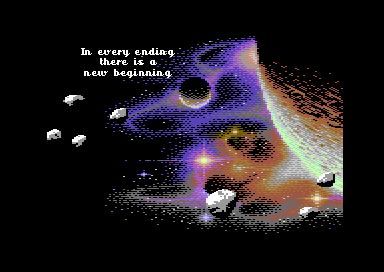
A new trend is definitely to feature a lot of art in each demo - just look at the screenshots above for evidence of that. Plus, 15+ mins per demo seems to be "the new norm" for the bigger demos. So, in hindsight, I can take the blame for G*P's demo running short and focusing too heavily on code p0rn - others had suggested that we should have more in there and, yeah, it does look like it would've helped.
I am still a strong believer that the best demos should feature a lot of code p0rn. A few of the above seem to show that that isn't everyone's view of course. But.. that's one thing that I'm not going to give up on easily as, for me, that's the fun part .. I'm not an entertainer here, I'm in this to try to push the C64 to new limits, to remove imagined bounds and so forth.. if that's the sword that my demoscening efforts die on - so be it ;p
X 2023 was a fantastic compo to enter, honestly, and anyone who enters deserves a pat on the back just for getting there I think. Reaching the top 10 even more so - because it's really not easy and is a HELL of a lot of work.
Congrats to all this years entrants - and we'll no doubt see you in battle at a future X :-)
---
### CSDb Voting, Commenting and Interaction
If you're a scener and haven't voted on any of the above demos, or any other releases from X 2023, please do so - it means so much for us sceners to read people's thoughts (good or bad). I've had a few people tell me of late that they don't comment on CSDb any more because they prefer to just write privately - that's a really lame excuse, to be honest.. please, go support the scene and comment.
One scener that I know really well (he's -not- in Genesis Project and that's as much as I'll say) told me pretty much that he wouldn't vote or comment on several demos due to "retaliatory voting". Grow some balls and stop worrying about charts, I say :p .. seriously.
---
### Inviting Feedback
Please, if you completely disagree with me, if you have your own favourites from the compo, if you think the demo scene is rubbish.. whatever.. please leave a comment!
---
# Remastering Sabre Wulf - Part Two
- URL: https://c64demo.com/remastering-sabre-wulf-part-two/
- Author: Raistlin (Genesis Project)
- Published: 2023-10-24
- Series: Remastering Sabre Wulf
- Level: intermediate
- Tags: 6502, c64, game dev, retro gaming, sprites
- Licence: CC BY 4.0 for text, CC BY 4.0 or MIT for code (https://creativecommons.org/licenses/by/4.0/)
- Releases: Sabre Wulf Remastered Preview V0.1 by Genesis Project (2022) https://csdb.dk/release/?id=225069; Sabre Wulf Remastered Preview V0.5 by Genesis Project (2025) https://csdb.dk/release/?id=258098
> Sabre Wulf Remastered part two: reading the C64 keyboard and joystick, 16-bit player movement, and driving Sabre Man's animations.
Assumes: Remastering Sabre Wulf, part one (https://c64demo.com/remastering-sabre-wulf-part-one/); CIA keyboard and joystick ports
## Summary
Once the map and screens were in place, as detailed in [Part 1](/remastering-sabre-wulf-part-one/), we of course chose that the player sprite should be added - then we could start to look at walking around the map, streaming data from disk as needed.
---
## Keyboard and Joystick Control
Adding keyboard and joystick checking needed a bit of a refresher for me .. as a demo coder, I would barely use either in my old coding efforts - most of the time, we only cared about the SPACE bar..! After much reading of [C-Hacking](https://codebase64.org/doku.php?id=magazines:chacking6#three-key_rollover_for_the_c-128_and_c-64) and [Codebase64](https://codebase64.org/doku.php?id=base:scanning_the_keyboard_the_correct_and_non_kernal_way), along with various C64 coding forums, I eventually ended up with the following - which needs calling once per frame:-
```asm6502
Control_Joystick: .byte $00
Control_Keys_Rows: .fill 8, $00
KeyRowMap: .fill 8, $ff - (1 << i)
UpdateKeyboardAndJoystick:
lda #$ff
sta $dc02 //; Port A: read and write
lda #$00
sta $dc03 //; Port B: read only
//; update keyboard
ldx #$07
!loop:0
lda KeyRowMap, x
sta $dc00
lda $dc01
sta Control_Keys_Rows, x
dex
bpl !loop-
//; update joystick
lda #$00
sta $dc02 //; Port A: only
lda $dc00
and #$1f
eor #$1f
sta Control_Joystick
rts
```
Honestly, I don't know much about how this stuff works .. but I know that I "mostly" get the data out that I require.. I can detect the keys that I need to, and the joystick movements, and I will revisit this at a later date if I need to... for example, to optimise out that KeyRowMap table.
The 8 rows for the keyboard relate to the following table (from the afore-mentioned c-hacking article):-
||$80|$40|$20|$10|$08|$04|$02|$01|
|---:|:---:|:---:|:---:|:---:|:---:|:---:|:---:|:---:|
|0: $fe|DOWN|F5|F3|F1|F7|RIGHT|RETURN|DELETE|
|1: $fd|LEFT-SH|E|S|Z|4|A|W|3|
|2: $fb|X|T|F|C|6|D|R|5|
|3: $f7|V|U|H|B|8|G|Y|7|
|4: $ef|N|O|K|M|0|J|I|9|
|5: $df|,|@|:|.|-|L|P|+|
|6: $bf|/|^|=|RGHT-SH|HOME|;|*|\|
|7: $7f| STOP | Q | COMM | SPC | 2 | CTRL | _ | 1 |
With this function and the table above it's easy to check for various keys ... for example, I want to detect the M key in order to bring up the in-game map.. so I'm looking for row 4 and bit $10. I do that with just:-
```asm6502
lda Control_Keys_Rows + 4
and #$10
beq MKeyPressed
```
Note that the bit is CLEAR when M is pressed.. the BEQ triggers only if AND #$10 returns ZERO.
---
## Player Movement
With that done, the next thing is to add in movement of our player character, the little Sabre Man guy. Here we're going to add in another little improvement over the original game with 16-bit movement, just to make everything feel just a little bit more smooth.
I use something like the following to store sprite positions for the player, critters and everything else:-
```asm6502
SpriteXPosLo: .fill 8, $00
SpriteXPosHi: .fill 8, $00
SpriteXPosMSB: .fill 8, $00
SpriteYPosHi: .fill 8, $00
SpriteYPosLo: .fill 8, $00
```
Along with some code like below that takes the above data to update the VIC registers (I do this safely in an IRQ triggered somewhere in the top border):-
```asm6502
SpriteMSBPairs: .fill 8, [$00, (1 << i)]
UpdateVICSprites:
.for (var i = 0; i < 8; i++)
{
lda SpriteXPosHi + i
sta VIC_Sprite0X + (i * 2)
lda SpriteYPosHi + i
clc
adc #(50 + 8)
sta VIC_Sprite0Y + (i * 2)
}
lda SpriteXPosMSB + 0
.for (var i = 1; i < 8; i++)
{
ldy SpriteXPosMSB + i
ora SpriteMSBPairs + (i * 2), y
}
sta VIC_SpriteXMSB
```
The following values define the movement speeds for the player - I left these as global variables in case I later need to change them or to add further variations.
```asm6502
.var PlayerMoveSpeed_X_Running = $02a0
.var PlayerMoveSpeed_X_Fighting = $0230
.var PlayerMoveSpeed_Y_Running = $0230
.var PlayerMoveSpeed_Y_Fighting = $01c0
PlayerMoveSpeeds_Index: .byte $00
PlayerMoveSpeedsXLo: .byte PlayerMoveSpeed_X_Running, >PlayerMoveSpeed_X_Fighting
PlayerMoveSpeedsYLo: .byte PlayerMoveSpeed_Y_Running, >PlayerMoveSpeed_Y_Fighting
```
And we handle movement with something along the lines of this:-
```asm6502
Move_NW: jsr WalkW
Move_N: jmp WalkN
Move_NE: jsr WalkN
Move_E: jmp WalkE
Move_SE: jsr WalkE
Move_S: jmp WalkS
Move_SW: jsr WalkS
Move_W: jmp WalkW
WalkW:
ldy bIsPlayerFighting
lda NewSpriteXPosLo + PlayerSpriteIndex
sec
sbc PlayerMoveSpeedsXLo, y
sta NewSpriteXPosLo + PlayerSpriteIndex
lda NewSpriteXPosHi + PlayerSpriteIndex
sbc PlayerMoveSpeedsXHi, y
sta NewSpriteXPosHi + PlayerSpriteIndex
lda NewSpriteXPosMSB + PlayerSpriteIndex
sbc #$00
sta NewSpriteXPosMSB + PlayerSpriteIndex
rts
//; plus similar code for WalkE, WalkN and WalkS.
```
A quirk with Sabre Wulf is that the "fight direction" is retained.. technically you only sword-fight left (West) and right (East) - but if you travel only up (North) or down (South) while holding the FIRE button, you will continue to fight facing the way that you were previously .. so if the player was swinging his sword while moving to the right, and then started moving up, their sword would continue swinging to the right. This is an important gameplay mechanic to help the player when travelling upward and downward through small passages. This mechanic is handled neatly with a simple variable that's set in the WalkE/WalkW functions:-
```asm6502
WalkW:
lda #FACE_DIR_W
sta CurrentPlayerFaceDirection
```
The WalkW function is called when moving NorthWest, West or SouthWest .. and WalkE called for NorthEast, East and SouthEast... so it's only when moving directly North or South that it won't be updated - and so the old direction is retained.
---
## Player Animation
Here's the (current) complete set of animation frames for our main character, Sabre Man, showing our new animations on the left and the original on the right:-
|Animation|New|Original|
|:---:|:---:|:---:|
|Idle
2 Frames
(No Original)|||
|Running East
6 Frames
(3 Original)|||
|Running West
6 Frames
(3 Original)|||
|Running North
4 Frames
(3 Original)|||
|Running South
4 Frames
(3 Original)|||
|Fighting East
4 Frames
(6 Original)|||
|Fighting West
4 Frames
(6 Original)|||
|Lifting An Amulet
2 Frames
(No Original)|||
|Death (Facing East)
3 Frames
(3 Original)|||
|Death (Facing West)
3 Frames
(3 Original)|||
The code that I use for dealing with the animations in game is surprisingly simple. The main animation-driver for the player is just:-
```asm6502
PlayerSpriteAnimDelayCounter: .byte $00
PlayerSpriteAnimVal: .byte StaticSprites_SabreMan_WalkE
PlayerSpriteAnimNumFrames: .byte StaticSprites_SabreMan_WalkE_Num
PlayerSpriteAnimDelay: .byte 4
DoPlayerAnim:
AnimDelayCounter:
ldy #$00
iny
ldx PlayerSpriteAnimFrame
cpy PlayerSpriteAnimDelay
bcc NotNewAnim
ldy #$00
inx
NotNewAnim:
cpx PlayerSpriteAnimNumFrames
bcc NotEndFrame
ldx #$00
NotEndFrame:
stx PlayerSpriteAnimFrame
txa
clc
adc PlayerSpriteAnimVal
sta SpriteVals + 0
sty AnimDelayCounter
rts
```
For each animation, we have a certain number of frames (as shown in the table above). We store this in **PlayerSpriteAnimNumFrames** and, of course, update this whenever the player's animation state changes. We have an animation delay, **PlayerSpriteAnimDelay**, which is the number of display frames that need to pass before using a new animation frame. Right now, we're delaying by 4 frames for most animations (meaning they're updating at 12.5fps on PAL) and 8 frames for the idle animation (6.25fps). **PlayerSpriteAnimVal** simply gives the sprite index for the first frame of the current animation.
Choosing the actual animation is a simple matter of acting on the joystick input and, along with moving the player sprite, selecting the correct animation set. Likewise, for special events - such as picking up an amulet or dying - we need to override joystick control completely (freeze the player and hijack the animation).
---
## Driving Player Movement And Animation
In order to keep things as simple as possible, I use an "action table" that's driven by the joystick control system in order to both move the player and to activate the relevant animation frames. The gist of this is seen below:-
```asm6502
.var MOVE_DIR_NIL = 0
.var MOVE_DIR_N = 1
.var MOVE_DIR_NE = 2
.var MOVE_DIR_E = 3
.var MOVE_DIR_SE = 4
.var MOVE_DIR_S = 5
.var MOVE_DIR_SW = 6
.var MOVE_DIR_W = 7
.var MOVE_DIR_NW = 8
Joystick_To_ActionTableIndex: .byte (MOVE_DIR_NIL * 6), (MOVE_DIR_N * 6), (MOVE_DIR_S * 6), (MOVE_DIR_NIL * 6)
.byte (MOVE_DIR_W * 6), (MOVE_DIR_NW * 6), (MOVE_DIR_SW * 6), (MOVE_DIR_W * 6)
.byte (MOVE_DIR_E * 6), (MOVE_DIR_NE * 6), (MOVE_DIR_SE * 6), (MOVE_DIR_E * 6)
.byte (MOVE_DIR_NIL * 6), (MOVE_DIR_N * 6), (MOVE_DIR_S * 6), (MOVE_DIR_NIL * 6)
JoystickActionTable: .byte MOVE_DIR_NIL, Move_NIL, StaticSprites_SabreMan_Idle, StaticSprites_SabreMan_Idle_Num, 8
.byte MOVE_DIR_N, Move_N, StaticSprites_SabreMan_WalkN, StaticSprites_SabreMan_WalkN_Num, 4
.byte MOVE_DIR_NE, Move_NE, StaticSprites_SabreMan_WalkN, StaticSprites_SabreMan_WalkN_Num, 4
.byte MOVE_DIR_E, Move_E, StaticSprites_SabreMan_WalkE, StaticSprites_SabreMan_WalkE_Num, 4
.byte MOVE_DIR_SE, Move_SE, StaticSprites_SabreMan_WalkS, StaticSprites_SabreMan_WalkS_Num, 4
.byte MOVE_DIR_S, Move_S, StaticSprites_SabreMan_WalkS, StaticSprites_SabreMan_WalkS_Num, 4
.byte MOVE_DIR_SW, Move_SW, StaticSprites_SabreMan_WalkS, StaticSprites_SabreMan_WalkS_Num, 4
.byte MOVE_DIR_W, Move_W, StaticSprites_SabreMan_WalkW, StaticSprites_SabreMan_WalkW_Num, 4
.byte MOVE_DIR_NW, Move_NW, StaticSprites_SabreMan_WalkN, StaticSprites_SabreMan_WalkN_Num, 4
lda Control_Joystick
and #$0f
tay
ldx Joystick_To_ActionTableIndex, y
lda JoystickActionTable + 0, x
sta CurrentPlayerMoveDirection
lda JoystickActionTable + 1, x
sta JumpToMoveHere + 1
lda JoystickActionTable + 2, x
sta JumpToMoveHere + 2
lda JoystickActionTable + 3, x
sta PlayerSpriteAnimVal
lda JoystickActionTable + 4, x
sta PlayerSpriteAnimNumFrames
lda JoystickActionTable + 5, x
sta PlayerSpriteAnimDelay
JumpToMoveHere:
jsr Move_NIL
```
**JoystickActionTable** is really the driving factor here. From there I can store off the current move direction of the player (needed for code that I will talk about at a later date), lo/hi JMP addresses for the movement function we'll use for the player, the starting sprite index for the animation to be used, the number of frames for the animation, and the animation delay. Joystick_To_ActionTableIndex simply maps from the 16 values that we get from **Control_Joystick** into the relevant move function.
The move functions that we're jumping into here are the same ones I described much earlier.
---
## Wrapping Up
Note that I'm not giving you here the complete code to write your own game, or your own Sabre Wulf, I'm just meandering my way around the code as I write this, probably forgetting about huge, important chunks of it... but hopefully some of this helps.
As I said in Part 1, I'm honestly NOT a _game coder_. Despite nearly 30 years in the industry, I've spent 95% of my time working on engine code, optimizations, editor tools and that sort of thing .. other than the first game that I worked on, Destruction Derby, I've barely touched what I would call "game code". If you're a season game developer and you're looking at what I'm doing here in abject horror, feel free to reach out and let me know. Sabre Wulf Remastered still has quite some way to go to be finished - so you still have time to help us make it into something awesome :-)
Until next time!
---
# Remastering Sabre Wulf - Part One
- URL: https://c64demo.com/remastering-sabre-wulf-part-one/
- Author: Raistlin (Genesis Project)
- Published: 2023-09-13
- Series: Remastering Sabre Wulf
- Level: intermediate
- Tags: 6502, c64, game dev, retro gaming, bitmap
- Licence: CC BY 4.0 for text, CC BY 4.0 or MIT for code (https://creativecommons.org/licenses/by/4.0/)
- Releases: Sabre Wulf Remastered Preview V0.1 by Genesis Project (2022) https://csdb.dk/release/?id=225069; Sabre Wulf Remastered Preview V0.5 by Genesis Project (2025) https://csdb.dk/release/?id=258098
> Starting Sabre Wulf Remastered on the C64: why we rewrote the game, converting the map to LDtk, and a screen blit at twice the speed.
Assumes: Multicolour bitmap mode: bitmap, screen and colour RAM
## Summary
In this series, I plan to (eventually) write about the development work going into Sabre Wulf Remastered, our little fan project where we try to update Sabre Wulf to be a more beautiful, smooth and fun experience for all. A full remaster of the original with hugely improved graphics (by the amazing Jon Eggelton), an amazing new soundtrack and audio (from Marcin Majdzik) and new code from myself.
---
## How It Began
To cut a long story short, I spoke to Jon several years ago after seeing his fantastic picture for Sabre Wulf.. the game was an old favourite of mine, one that I would play at a friend's house on his ZX Spectrum, so this new screen really got me thinking about what was possible.
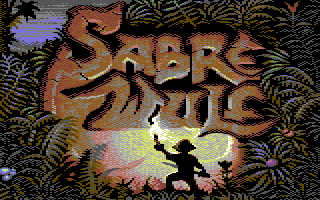
Which was actually part of a whole series of these reimagined loading screens for various retro C64 games... these really showed off his stellar pixel skills. The demoscene hadn't really seen much from Jon prior to these but, wow, everyone was desperate for more.
Anyway, on speaking with Jon, he soon told me that he hadn't just stopped at making the new loading screen for the game - he'd already begun repixelling much of the in-game tiles, too, as well as the player character sprites! My jaw dropped when I saw these... simply, I knew that I -had- to help Jon put these to good use!
---
## The Initial Plan
Originally, I thought that it would be a fairly simple job .. hack the game, find where the graphic tiles are held and replace the data with Jon's graphics. But that's when I started to notice a few problems with how the C64 version of the game was made.
Most notably, the graphic format used, although being multicolour bitmap format - the same as Jon's replacement graphics - there were less colours being used per char square (4x8px MC blocks). Instead of the usual 3 + BKG, there were only 2 + BKG... this allowed some memory to be saved and meant that the COL screen ($d800 data) didn't need to be updated in-game - saving some CPU too.
Also, pretty much all the memory of the C64 was filled .. Sabre Wulf is a large 256-screen game, using bitmap graphics, so you can imagine how much RAM was needed. This was a problem for us as we'd need some extra memory to store the extra colour data that we required.
While digging into all of this, I also noted that the code for blitting the screens as you moved around the map was ... well ... "poor". Basically, it was using pretty THE worst addressing modes for reading and writing every byte of data to draw the screen... I couldn't leave it like that, for sure, if this update was going to be liked by sceners and gamers, I really needed to improve on this.
There were several other things here and there that we noticed .. that some of the characters in the game, in particular the hippo and the sabre wulf itself, were being drawn using blitting rather than using hardware sprites... meaning that, each frame, each of these would need to be erased from their previous screen position and then redrawn in the new - this was happening without any clever beam-chasing techniques so, basically, it flickered like a bugger.
---
## The New Plan
Given all of the above, and several other things, I decided that it would be easier - and much much better - to just remake the game completely. With better techniques we could:-
- bring the new graphics in;
- improve the rendering speed so that it would be much faster and smoother to traverse the map;
- overhaul the control mechanism to make gameplay smoother and more responsive;
- increase the screen resolution - Sabre Wulf on C64 used the same 256x176px screen that the Spectrum version used .. we wanted to push this out to the full 320x200px or as close to that as we could without breaking the game;
- add background music and more fitting sound effects;
- fix a small "hack" that the original game had where the player would be "pushed" slightly (8 pixels, actually) as he entered certain screens. This was a hack by the coders to avoid having to fix a load of the game's screens;
- add new features - such as the "fog of war" map;
- add an intro to the game .. just something to explain in a simple way the predicament that the player is in and how they came to be there..;
- add an outro;
- more.
The one thing that we definitely wanted to keep the same was the map... so we would need to increase the size of many of the tiles slightly - but, underneath that, the map would be essentially the same as the original.
So, yeah, it was suddenly turning into a much bigger project.
---
## Converting and Updating The Map
The first thing we did was to export the original game's map. We'd need the map to be editable so I needed to export the map into file formats compatible with a suitable off-the-shelf map editor. LDtk seemed to be the ideal candidate for that - so I set to work on making some code for decoding the original game's data and to export into LDtk's format, as well as PNG and more.
Here's how the map looked from the original version of the game:-
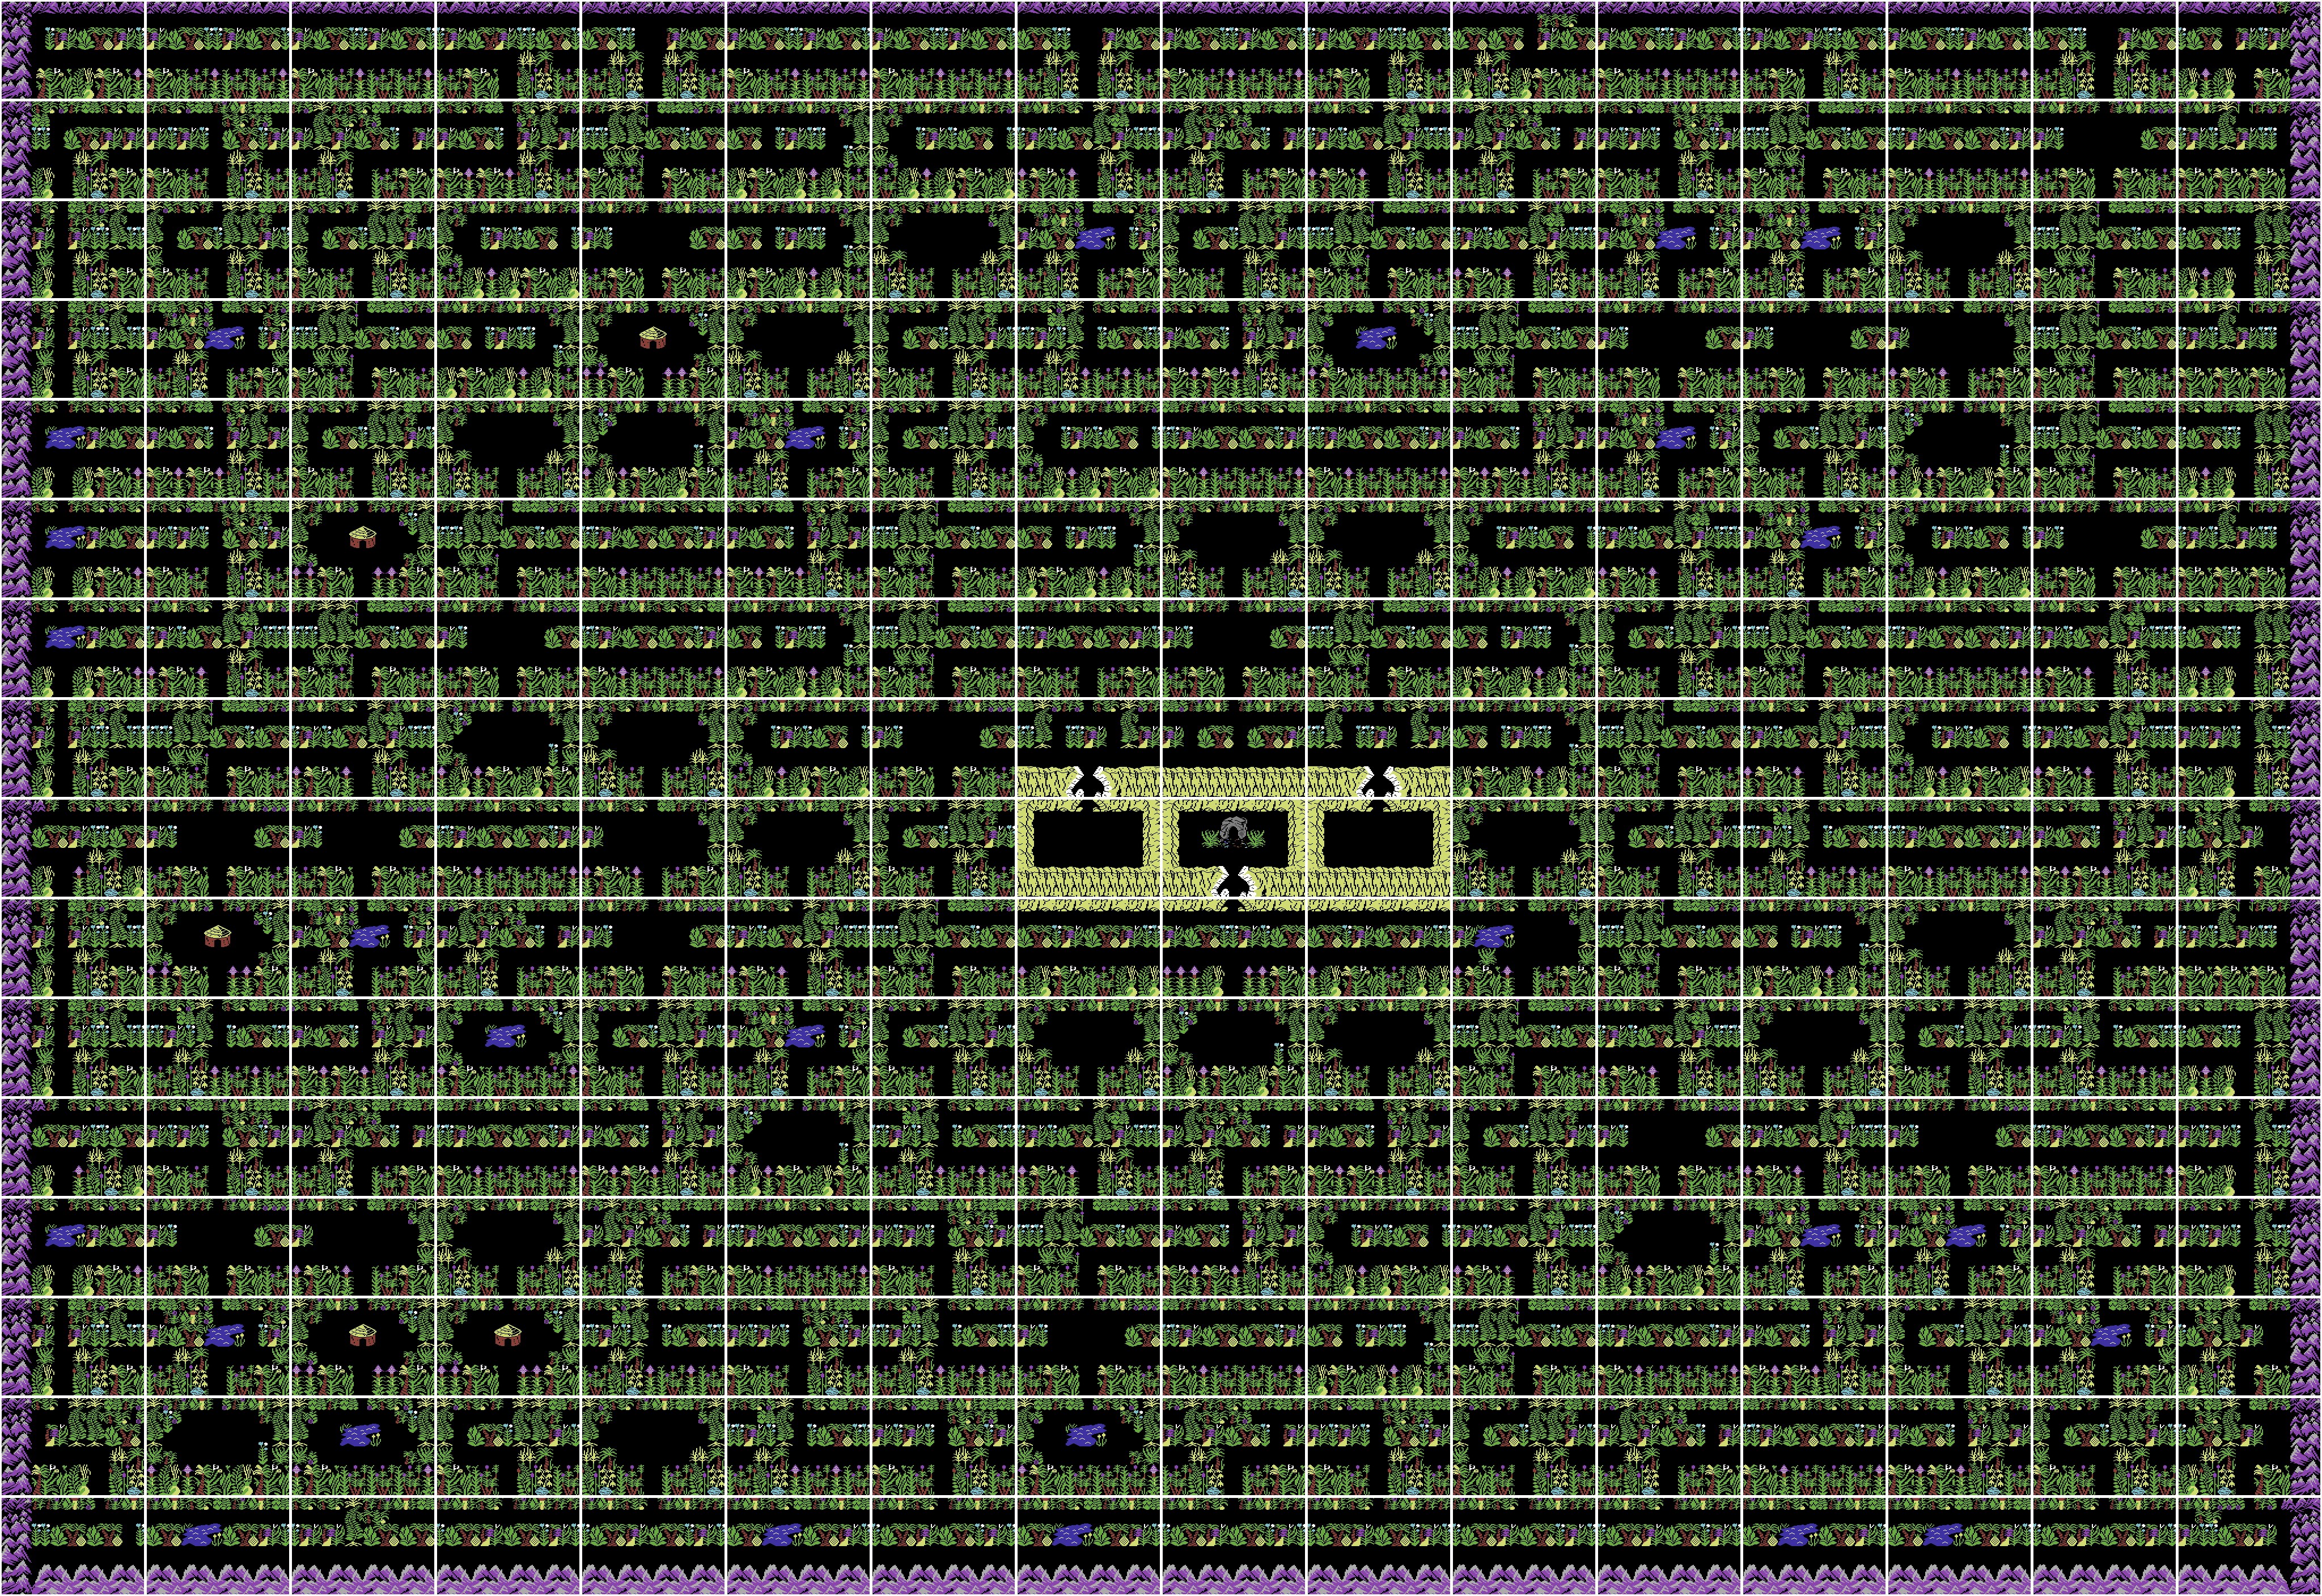
Once that was all done, it was relatively easy to get the map working in LDtk.. then, while I moved ahead with some other things, I was able to pass the LDtk file to Jon so that he could be working on getting his new tiles working - and for us to push the game to the 320px-wide that the C64 version really deserved. He was also able to fix the little "bug" present in the original game to do with entry/exit from certain screens - which I can show here:-
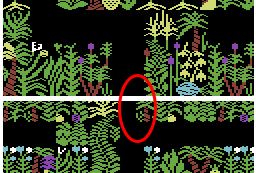
As you can imagine, if the player was walking on the right side of that path as he passed from the top screen to the bottom, without a small fix to his position, he'd be stuck in the shrubbery. The proper fix is of course to simply to make the path width consistent. I'm not totally sure why that wasn't done with the original game, instead of hacking the player's position, but I'm sure that there would've been "reasons" - and likely "good reasons"...
Here's how the new updated map is currently:-
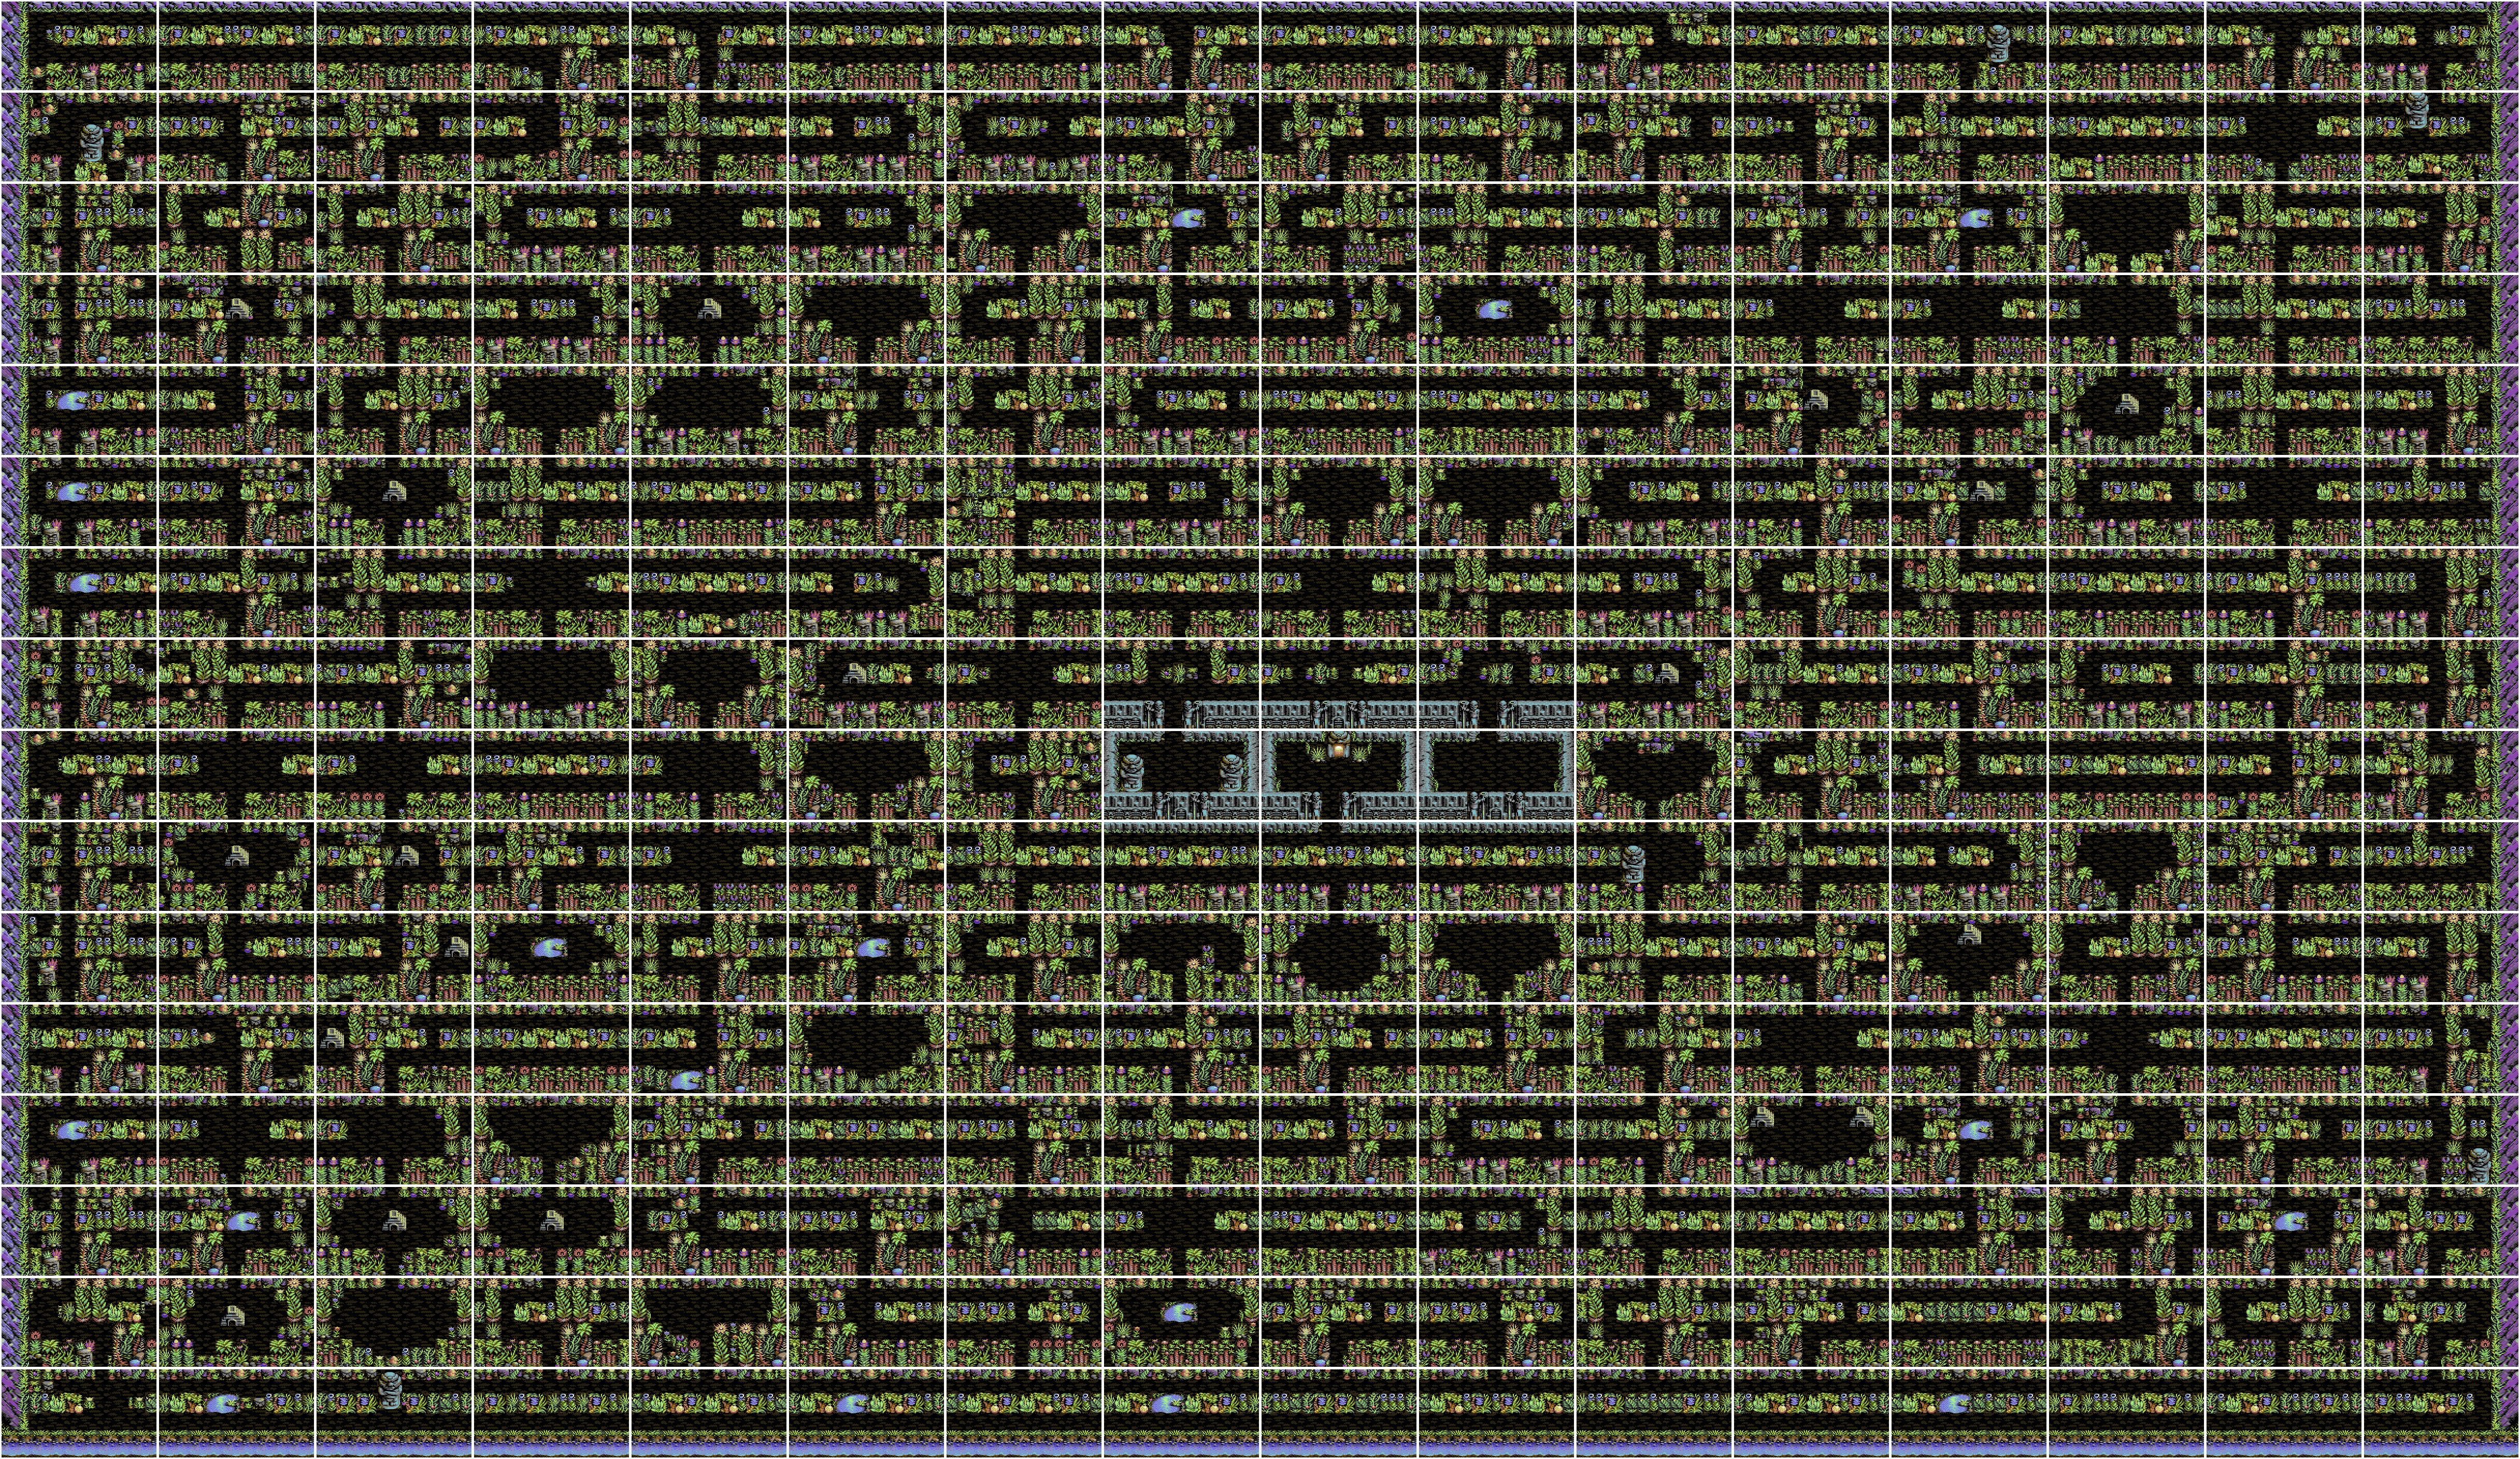
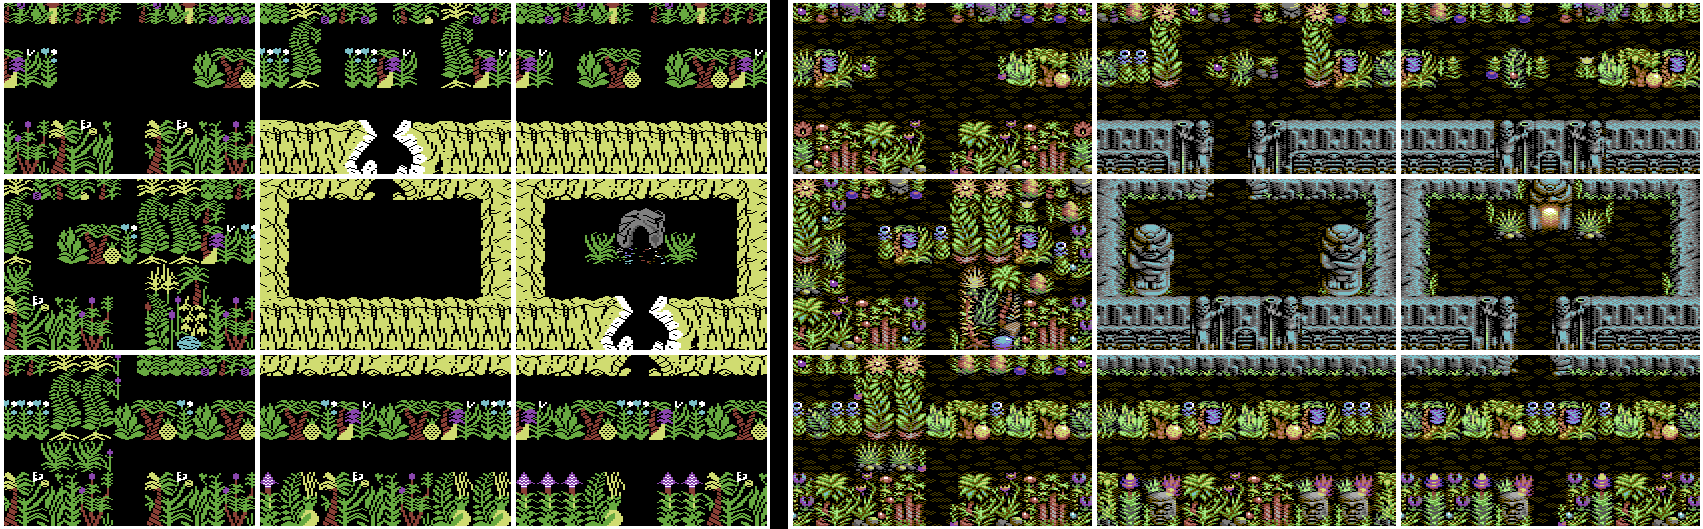
Here's a side-by-side comparison of just a small portion of the map so that you can see the difference between old and new:-
---
## Optimising the Screen Update
I'd like to show a "small" snippet of the original's screen update code to show how we were able to optimise it as much as we have:-
```asm6502
ldy #$00
Loop:
lda ($59, x)
sta ($53), y
inc $59
bne Not256
inc $5a
Not256:
iny
cpy $03
bne Loop
```
It's just really hard to know where to start when describing how bad this is in terms of CPU use ... LDA (ind,x) and STA(ind),y are the most expensive load and store instructions available on 6510... on top of that, for every single byte (of which there are over 5,500), there's overhead for updating the zeropage addresses and doing the looping... it's just bad, very very bad.
For comparison, here's my code (non-final - so may be optimised further before release):-
```asm6502
OuterLoop:
ldy TileWidthMul8
dey
CopyBitmapDataLoop:
lda $abcd, y //; Self Modified Address
sta $abcd, y //; Self Modified Address
dey
bpl CopyBitmapDataLoop
```
That's approx 14 cycles per byte compared to the original's 28. Double the speed - much more than that, actually, since the surrounding code is also much simpler. Even with a larger screen area (320px wide instead of 256px) and additional data to write for the extra colour data, we are still able to update the screen much faster when moving around the map. And we've done so without sacrificing memory, too.
---
### Coming Up...
I'm really just getting started with writing about Sabre Wulf Remastered. There's still quite a bit to cover to get to where the game currently is .. beyond that, though, I hope to use this blog to inspire myself to continue, to finally get the game finished. I owe it to Jon and others to finally do that. And, hell, I owe it to myself - despite nearly 30 years working in the video games industry, I have never actually coded a full game alone. My first game (Destruction Derby on PlayStation) needed 4 full time coders .. and every game that I've made since has needed incrementally more and more people. Sabre Wulf is something that, I hope, I can handle alone.
We'll see...
Until next time!
---
# Scrolling Bob Scroller
- URL: https://c64demo.com/scrolling-bob-scroller/
- Author: Raistlin (Genesis Project)
- Published: 2023-06-08
- Series: No Bounds
- Level: intermediate
- Tags: 6502, c64, bobs, scrollers
- Licence: CC BY 4.0 for text, CC BY 4.0 or MIT for code (https://creativecommons.org/licenses/by/4.0/)
- Releases: No Bounds by Genesis Project (2023) https://csdb.dk/release/?id=232957
> How the No Bounds bob scroller repeats on a diagonal: one shape plotted to a C64 charset, ten screens and $d018 doing the scrolling.
Assumes: DXYCP scrollers (https://c64demo.com/dxycp-scrollers/); Smooth scrolling with $d011 and $d016
## Summary
If you haven't already read the [blog post about DXYCP scrollers](/dxycp-scrollers/), I'd recommend reading that first. Here I will be explaining how I added the infinite/repeating scroll element seen in our **No Bounds** demo (released at X2023).
You can see the finished product in action here:-
Video:
*Video: [No Bounds by Genesis Project](https://www.youtube.com/watch?v=VEwcyjrxJX8&t=251), from 4:11: the bob scroller with its repeating diagonal scroll.*
---
## The Idea
I really didn't want to make another bob scroller, I promise .. because I've made quite a few of these before:-
- a 96 bob scroller in Delirious 10
- an improved 96 bob scroller in Delirious 11
- a 128 bob scroller in X Marks the Spot
- a 212 bob scroller in The Dive
- Memento Mori's larger, more interesting bob scroller..
- 232 chars in the shape of a Christmas tree for Christmas Megademo
- 140 bobs in Tree of Peace ("Sprites Only")
But anyway... one more couldn't hurt ;-) ... I just needed to find some new edge to it.. some way to make it a little more interesting.
I figured that there were two ways that this could be taken..
1. to strip the effect right back to basics and simply go for the ultimate world record
1. to try to push it in a new and more interesting direction.
For No Bounds, I did both. The idea for the new direction came from my own surprise at how this effect could still look great with lots of intersections of the bobs - the tree in Christmas Megademo had been very well received so I started to think about how I could improve on that.
It came to me that if the scroller was repeated on the screen, with certain displacements horizontally and vertically, it would actually be possible to manage. If the scrollers are spaced out by 80px in X and Y, as an example, there's then just a need to be able to scroll the screen by 0-79px (we in fact can scroll by much more - since the screen scrolled by 80px looks identical to how it did in the starting position).
---
## First Steps
I played around for a while with different shapes trying to find something that would work well... creating an interesting shape, easily repeatable, and which would have overlaps between displaced copies of itself - but not so many to make the text unreadable.
Here's what I came up with and what you'll see in the final demo:-
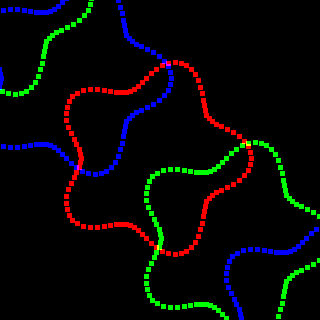
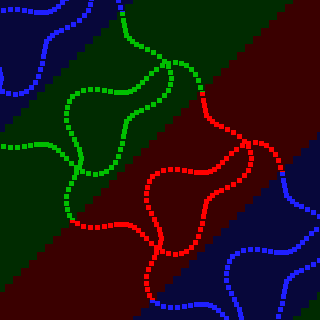
This has a nice rounded-star bob pattern and copies of that are created displaced by 80px (10 chars) in both X and Y. Since the whole shape is being displaced by such, the combined image will repeat at the same distance. Here's an image that highlights how that works:-
And here's one of the segments isolated:-
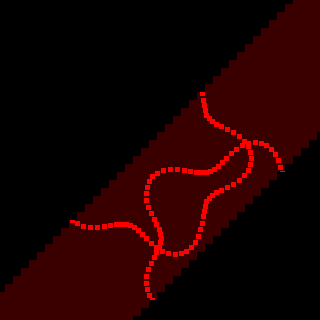
This shows nicely what is needed to actually be plotted. By repeating the shape on-screen, all that has really changed is that there are now some points where the overlap needs to be dealt with. That is, these points here:-
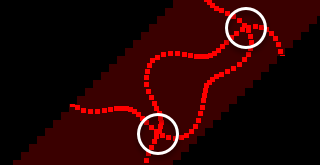
It's pretty clear, then, that this isn't going to cost much extra CPU - the overlap points are quite negligible in this case.
There is, however, one small hurdle left to consider...
---
## What To Plot To..?
My previous bob scrollers were either plotting to sprites (allowing them to be easily moved around over bitmaps and such) or to bitmap.
To allow duplicate copies for low cost, definitely I couldn't use bitmap as an output target. There's simply no good way of doing it.
Sprites might be possible .. but it would add a restriction on the total size of each bob shape since you can, of course, only have 8 sprites on each horizontal line of the screen.
Instead, we can plot to a character set (hopefully some reading this will be screaming "well, duh!"..). So long as the repeating shape above can be plotted to 256 characters or less, all is good. And it -is- good - for that shape, only 144 characters are needed in total.
---
## The Final Steps
Plotting to that char-data is of course quite easy... that's already detailed in the DXYCP blog post that I linked to earlier.
We can create our screen of repeated shapes by simply writing the 144 char values to our screen data, repeating them at displacements of 10 chars in both X and Y. For the exact effect that I made, you'd need a couple of duplicates of the shape to the top-left and a couple to the bottom-right to make sure that the whole screen is covered.
To do the diagonal scrolling, we can simply create 10 40x25 char screens and displace the shapes for each.. screen 0 with no displacement, screen 1 with 1 char displacement in X and Y, screen 2 with 2 chars displacement, ... screen 9 with 9 chars displacement. This makes the scrolling super cheap - simply change $d018 to point to the appropriate screen (using *((sinevalue / 8) % 10)* to give the screen index) and set $d016 and $d011 to give your horizontal and vertical smooth-scroll.
---
## Wrapping Up
That's it! A surprisingly easy effect to create, if you've already mastered the art of bob scrollers, and I think it looks pretty cool.
Until next time!
---
# Finite Bobs
- URL: https://c64demo.com/finite-bobs-nobounds/
- Author: Raistlin (Genesis Project)
- Published: 2023-06-05
- Series: No Bounds
- Level: hard
- Tags: 6502, c64, bobs, badlines, raster irqs, code generation
- Licence: CC BY 4.0 for text, CC BY 4.0 or MIT for code (https://creativecommons.org/licenses/by/4.0/)
- Releases: No Bounds by Genesis Project (2023) https://csdb.dk/release/?id=232957
> The finite bobs part from No Bounds: a bob trail plotted into charsets over an AGSP-scrolled C64 background, restored behind it as it goes.
Assumes: AGSP: linecrunch and VSP; Charset splits with $d018; Unrolled bob plotting (https://c64demo.com/dxycp-scrollers/)
## Summary
There's a lot to talk about from our No Bounds demo, for sure, but one part I was particularly happy with, out of those that I made myself, was the Finite Bobs part - or "Not Bob's Bobs" as we called it.
This was similar to the old "infinite bobs" effects that the Amiga is famous for - but we clear the end of the bobs, out of sight, so that it's actually "finite bobs" or a "bob trail", I guess?
Here's the effect in action, from our No Bounds demo:-
Video:
*Video: [No Bounds by Genesis Project](https://www.youtube.com/watch?v=VEwcyjrxJX8&t=519), from 8:39: the Finite Bobs part.*
There are several things coming together to make this part work so let's take a look at them in turn...
---
## The Background
The background image, seen below, was drawn by the amazing Razorback (Kristoffer Frisk). 512x448px in size and using only 3 colours in total.

In order to fit everything in memory, I asked that he make a pic that was mirrored along the centre - so this is what he came up with. I also made it a little more restrictive than usual in that it should be just **3** colours rather than the typical 4. The reason being that I wanted to reserve an extra colour (white) that my bobs could use to make sure that they "popped out" on top of the background. We played with a few colour combinations here, including red bobs, green, etc ... all looked pretty good - but having the bobs be mostly black with little highlights turned out best (thanks to **Ksubi** for the suggestion here).
We display the picture using charsets. 14 of them at 512x32px (64x4 chars) each:-














That's 28k of data which we need to spread across 2 VIC banks, just for what you see on-screen.
---
## AGSP Background Scrolling
To get this moving, and leaving us with enough spare CPU to put our effect on top, we use AGSP ("Any Given Screen Position"). That is, we use linecrunch (to give quick vertical scrolling) plus VSP (horizontal scrolling).
First, let's consider what we might need for a typical screen. Since the picture is broken up into 64x4 char blocks, if we're displaying the top-left of the picture, our screen would be showing something like:-
| | Col 0 | Col 1 | Col 2 | | Col 36 | Col 37 | Col 38 | Col 39 |
|:---:|:---:|:---:|:---:|:---:|:---:|:---:|:---:|:---:|
| row 0 | $00 | $01 | $02 | ... | $24 | $25 | $26 | $27 |
| row 1 | $40 | $41 | $42 | ... | $64 | $65 | $66 | $67 |
| row 2 | $80 | $81 | $82 | ... | $A4 | $A5 | $A6 | $A7 |
| row 3 | $C0 | $C1 | $C2 | ... | $E4 | $E5 | $E6 | $E7 |
| row 4 | $00 | $01 | $02 | ... | $24 | $25 | $26 | $27 |
| ... | ... | ... | ... | ... | ... | ... | ... | ... |
| row 23 | $C0 | $C1 | $C2 | ... | $E4 | $E5 | $E6 | $E7 |
| row 24 | $00 | $01 | $02 | ... | $24 | $25 | $26 | $27 |
Since the char rows repeat every 4 lines, vertical scrolling becomes easy - if we agree not to show the full screen height, in fact, we can get away without updating any screen rows at all - we just use 32px of vertical movement (linecrunch) couple with setting $d018 appropriately at the splits.
Horizontally, in order to display the full 512px wide image on our 304px (38 char coloumns) wide screen, we need to be able to scroll by 0-207 pixels (0-25 chars plus the 0-7px smooth scroll). Remember that the screen automatically loses 8px (1 char) on the left due to the borders being pulled in on both sides.
So, we have our plan. Our AGSP code that achieved this is below. Important note: when setting $d011, we use illegal graphic modes to stop corrupted pixels appearing on screen - with the illegal modes, we will simply get black pixels (and hence why, in my demo part, I went with a screen design where I had thick black bars at top and bottom).
```asm6502
.align 256
IRQ_AGSP:
IRQManager_BeginIRQ(1, 0) //; our macro for initialising the IRQ, pushing registers and stabilising the rasterbeam
lda #$57 //; nb. invalid graphics mode
ldy #$51 //; nb. invalid graphics mode
nop
nop $ff
LCDistance:
ldx #0
loop0:
beq endloop0
sty $d011
iny
nop
nop
nop
.for (var rep = 0; rep < 6; rep++)
{
pha
pla
}
lda #$57 //; nb. invalid graphics mode
dex
bpl loop0
endloop0:
sta $d011
VSPDistance:
ldx #$ff
stx VSPDist + 1
nop
bit $ff
lda #$36
WaitD012:
cmp $d012
bne WaitD012
VSPDist:
beq Next
Next:
.for (var i = 0; i < 19; i++)
{
lda #$a9
}
lda #$a5
nop
dec $d011
inc $d011
SetD011Value:
lda #$00
sta VIC_D011
SetScreenColour:
lda #ColourDark
sta VIC_ScreenColour
lda #$3d
sta VIC_D012
lda #IRQ_AGSPB
sta ZP_IRQVECTOR + 2
IRQManager_EndIRQ()
rti
```
Aligning the function (".align 256" at the very top) will save you headaches later on.. you need to make sure that all the branches (bne, bpl, bmi, whatever) have predictable timing. If your code layout changes so that a branch is jumping across pages (256-byte boundaries), stuff will just start breaking, badly, and you'll waste time trying to figure out what's happened. The reason for all this is that branches cost an extra cycle when jumping across pages - and this is very easy to forget. I wish there was a better way to do this in ASM, while keeping code clean and tidy.
Anyway.. before this IRQ is called, we need to fill in the linecrunch distance (number of char rows to 'crunch', ie. 0, 1, 2 or 3) to "LCDistance + 1" and the VSP distance (number of char columns to shift) to "VSPDistance + 1". If copy/pasting this into your own code, note that you'll most likely need to make small timing adjustments, particularly at the top of the function, to get all the D011 writes happening at the right points within your own demo setup.
With this working, we also need to update the screen columns at the edge of the screen to bring in the correct data. VSP works by making the VIC "forget" about the chars at the top-left of the screen..
As an example ... If your screen is at $0400-07e7 normally, and you do 4 chars' worth of VSP, your new screen will be $0404-07eb. The majority of the screen has moved almost for free - but you'll now see that, for every screen line, the left hand side has moved up and to the right. What you now see on screen will be using these chars:-
| | Col 4 | Col 5 | Col 6 | | Col 40 | Col 41 | Col 42 | Col 43 |
|:---:|:---:|:---:|:---:|:---:|:---:|:---:|:---:|:---:|
| row 0 | $04 | $05 | $06 | ... | *$40* | *$41* | *$42* | *$43* |
| row 1 | $44 | $45 | $46 | ... | *$80* | *$81* | *$82* | *$83* |
| row 2 | $84 | $85 | $86 | ... | *$C0* | *$C1* | *$C2* | *$C3* |
| row 3 | $C4 | $C5 | $C6 | ... | *$00* | *$01* | *$02* | *$03* |
| row 4 | $04 | $05 | $06 | ... | *$40* | *$41* | *$42* | *$43* |
| ... | ... | ... | ... | ... | ... | ... | ... | ... |
| row 23 | $C4 | $C5 | $C6 | ... | *$00* | *$01* | *$02* | *$03* |
| row 24 | $04 | $05 | $06 | ... | *$40* | *$41* | *$42* | *$43* |
So we need something like the below to update some of the screen columns - basically, the ones that are scrolling in under the border on left or right. Note that we update 2 screens because we've spread our character sets across 2 banks and, naturally, the screen needs to be in both banks as well.
```asm6502
//; A = value to write, X = screen column to update
FillVerticalScreenLine:
.for (var i = 0; i < 24; i += 4)
{
sta ScreenAddress0 + ( i * 40), x
sta ScreenAddress1 + ( i * 40), x
}
eor #$40
.for (var i = 1; i < 24; i += 4)
{
sta ScreenAddress0 + ( i * 40), x
sta ScreenAddress1 + ( i * 40), x
}
eor #$c0
.for (var i = 2; i < 24; i += 4)
{
sta ScreenAddress0 + ( i * 40), x
sta ScreenAddress1 + ( i * 40), x
}
eor #$40
.for (var i = 3; i < 24; i += 4)
{
sta ScreenAddress0 + ( i * 40), x
sta ScreenAddress1 + ( i * 40), x
}
rts
```
In our particular case, it just so happens that the value that we want to be writing into these columns is identical to the screen column that we should be write to.. so we use something like this:-
```asm6502
PicMovingRight:
lda VSPDistance + 1
jmp DoVertLineFill
PicMovingLeft:
lda VSPDistance + 1
clc
adc #39
DoVertLineFill:
tax
jsr FillVerticalScreenLine
```
Done right, for the example above where we've done 4 chars' worth of VSP, what we see on screen should now be:-
| | Col 4 | Col 5 | Col 6 | | Col 40 | Col 41 | Col 42 | Col 43 |
|:---:|:---:|:---:|:---:|:---:|:---:|:---:|:---:|:---:|
| row 0 | $04 | $05 | $06 | ... | *$28* | *$29* | *$2A| *$2B* |
| row 1 | $44 | $45 | $46 | ... | *$68* | *$69* | *$6A* | *$6B* |
| row 2 | $84 | $85 | $86 | ... | *$A8* | *$A9* | *$AA* | *$AB* |
| row 3 | $C4 | $C5 | $C6 | ... | *$E8* | *$E9* | *$EA* | *$EB* |
| row 4 | $04 | $05 | $06 | ... | *$28* | *$29* | *$2A* | *$2B* |
| ... | ... | ... | ... | ... | ... | ... | ... | ... |
| row 23 | $C4 | $C5 | $C6 | ... | *$E8* | *$E9* | *$EA* | *$EB* |
| row 24 | $04 | $05 | $06 | ... | *$28* | *$29* | *$2A* | *$2B* |
So, with the addition of setting $d016 for 0-7px smooth scrolling (if you've read this far and not fallen asleep, I think I can probably leave that as an exercise for the reader :p), we now have AGSP working as it needs to.
---
## Screen Character Set Splitting
Our picture is 448px tall.. and our screen much less. So we now need to implement character set splitting. That is, updating $d018 at various points on the screen (spaced out by exactly 32px) to make sure we display the correct character set.
For this, I have two separate IRQ functions. The first, below, is the one that's setup at the end of the AGSP IRQ above. This one occurs at the top of the visible screen area and sets the correct character set for there. It also turns off the "illegal display mode" so that the picture actually starts to be drawn.
```asm6502
.align 128
IRQ_AGSPB:
IRQManager_BeginIRQ(1, 0)
SetD011ValueB:
lda #$00
ldx #$3f
D012WaitToShowScreen:
cpx VIC_D012
bne D012WaitToShowScreen
sta VIC_D011
SetD012Value:
ldx #$00
WaitForFirstD012:
cpx VIC_D012
bne WaitForFirstD012
FirstIndex:
ldy #1
lda D018Values, y
sta NextD018Value + 1
lda DD02Values, y
sta NextDD02Value + 1
iny
sty NextIndex + 1
compensateForJitter(-9)
FirstDD02Value:
ldy #$00
FirstD018Value:
lda #$00
sta VIC_D018
sty VIC_DD02
stx RestX + 1
RestX:
lda #$00
clc
adc #32
sta NextD012 + 1
sta VIC_D012
ldx #IRQ_UpdateD018
stx ZP_IRQVECTOR + 1
sty ZP_IRQVECTOR + 2
IRQManager_EndIRQ()
rti
```
"D018Values" and "DD02Values" are simply tables giving the correct values for pointing at our screen, character set and VIC bank.
Our second function deals with all the other splits down the screen:-
```asm6502
.align 128
IRQ_UpdateD018:
IRQManager_BeginIRQ(1, 0)
NextD018Value:
ldx #D018Value1
stx VIC_D018
NextDD02Value:
lda #DD02Value0
sta VIC_DD02
NextIndex:
ldy #1
lda D018Values, y
sta NextD018Value + 1
lda DD02Values, y
sta NextDD02Value + 1
inc NextIndex + 1
ldx #IRQ_UpdateD018
NextD012:
lda #$00
clc
adc #32
sta NextD012 + 1
dec CallCount
bne AllGood
lda #$f8
ldx #IRQ_Main
bne EndIRQ
AllGood:
lda NextD012 + 1
EndIRQ:
sta VIC_D012
stx ZP_IRQVECTOR + 1
sty ZP_IRQVECTOR + 2
IRQManager_EndIRQ()
rti
```
CallCount is setup within our main IRQ, each frame, to be "4"... so, with the intial set in the first function, and the 4 from the second, plus an additional set that we do "off-screen", we're setting $d018 6 times per frame. We have a visible screen height of 161px during the part - so we will always have 6 character sets visible on screen, even if only 1 pixel of one of them.
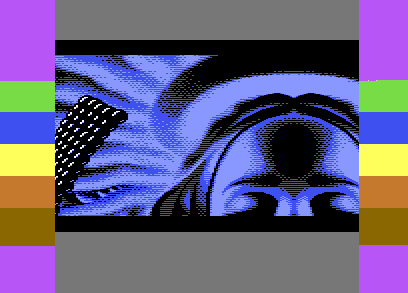
An example frame showing where we change $d018 to change the visible charset:-
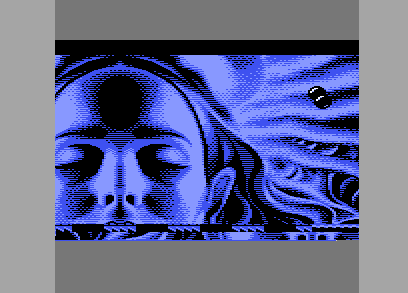
With the AGSP and $d018 splits working, we just needed to clean the bottom of the screen. As the linecrunch is bringing in "strange" and offset data, we want to cover that section up. For ease, I simply placed and X and Y expanded black sprites down there, neatly concealing things. Here's how it looks without those sprites:-
With all that done, it's very easy of course to just hook up some sinus movement patterns for both X and Y.
---
## Bob Plotting
Now we come to the interesting part. The whole reason for splitting the screen in this way, for me (maybe somebody has a better and simpler method?), was so that I could blit the bobs directly into the character set data with ease.
My original idea was actually to go with an infinite bobs effect. This is similar to the final effect that we ended up with - but it would be simpler, like Amiga demos, in that we wouldn't need to clear the end of the bob trail - we would just let it build up with more and more bobs, drawing over the screen. I wasn't quite sure.. I thought it might look ok - but there was quite a large risk that it could look awful. I'll save you the time of trying this: yes, it looks awful. At this point I very nearly gave up (!), it was that bad. But I wondered, still, whether something like Bob's Bobs might work?
---
## Interlude
I should at this point show you a few demos that were doing similar things and inspired us. The first is, of course, **Bob**'s Bobs. He's done this effect a few times - but let's take a look at the one in **We Come In Peace** from **Censor Design** and friends:-
Video:
*Video: [We Come in Peace by Fairlight, Censor and Offence](https://www.youtube.com/watch?v=xWvCxSRvubQ&t=212), from 3:32: Bob's Bobs.*
The first time I saw this effect my jaw totally dropped. It was released at Revision 2018 - the perfect party for it. It of course won the oldschool demo compo - I can only imagine the shock that all the Amiga fans at Revision would've experienced in seeing this on the less-powerful C64 ;-)
Anyway, Bob's Bobs is very similar to Infinite Bobs routines - but it clears the end of the trail. It also, actually, gets away without having multiple frames of animation. Regular Infinite Bobs routines need at least 3, ideally more, frames in order that they don't simply look like the screen is being "stamped" with bobs. Bob gets away with this by swinging the screen around wildly with AGSP, following the fast-moving bobs. By making sure that there's an end of the trail that's off screen, away from the direction of travel, he's also able to invisibly and quickly clear the end of the bob trail.. all adding up to this awesome effect.
Bob's bobs are always plotted onto a blank canvas, though, whether that be bitmap, chars or sprites - I believe he's done all of these in different demos.
**Hoaxers**, in 2016, made a different effect in their demo **fREUd** (yes, you needed an REU in order to run this demo).
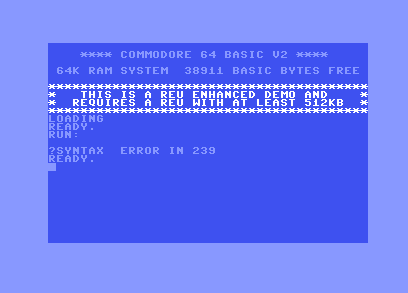
With a REU attached, here's what you get:-
Video:
*Video: [fREUd by Hoaxers (C64 + 512KB REU)](https://www.youtube.com/watch?v=9BJvH9Z92uk&t=201), from 3:21: infinite bobs over a background picture.*
(fantastic graphics here by **Joe** by the way)
So this one's Infinite Bobs over a background. It does have multiple frames, though, which is why they can do the relatively slow movement - and why the bobs can also animate each frame (they simply blit a different animation frame of the bob into each of their frames). I'll never say "never" (hi, Crossbow, HCL, .. ;p) but, yeah, I can't imagine how this could ever be possible on an unexpanded C64.
To fit with the theme of our demo we were thinking to call out Bob (or Censor Design) and Hoaxers in our demo, before the part.. along the lines of "No Background For Censor" and "Hoaxers Needed REU". For various reasons we couldn't (more to do with time than with us wanting to be kind ;p).
So, yeah, some great inspiration for us here from these two demos. I just needed to find out whether having a bob trail plotted onto a moving background would break the illusion that it was a moving trail. A sensible man might've prototyped this on PC first, of course - I'm not that man ;p. Next time I will be - because I'd very nearly spent a serious amount of time on an effect that, simply, would look terrible.
---
## Back to the Bob Plotting
Sorry about that...
So, yeah, let's see how we deal with plotting the bobs. The bobs can move pretty much anywhere within the image and, since it's a multicolour image, they just need to move in 2px increments in X of course.
The solution that I used for this was to do 2 things. I fully unrolled the bob-plot, actually using the bob graphic data within the generated function, and created 4 versions of the function for the 4 smooth-pixel coordinates that the bob could have (0, 2, 4 or 6).
Here's the bob by the way:-

Below is the C++ code that was used to generate the ASM .. it's not the full code, of course, I have image classes and code-generation classes that this calls into, as described in my other blog posts, but this gives you the basis. By having this in C++, I'm easily able to change the bob image to try out different ideas.
```clike
void InfiniteBobs_ConvertBobToASM(char* InBobImageFilename, LPTSTR OutBobASMFilename)
{
static const int NumBobs = 4;
GPIMAGE BobImage(InBobImageFilename);
int BobWidth = BobImage.Width;
int BobHeight = BobImage.Height;
int BobCharWidth = (BobWidth + 7) / 8;
unsigned char* OutBob = new unsigned char [2 * NumBobs * BobHeight * BobCharWidth];
CodeGen OutCodeASM(OutBobASMFilename);
for (int bob = 0; bob < NumBobs; bob++)
{
int xshift = bob * 2;
for (int xchar = 0; xchar < BobCharWidth; xchar++)
{
for (int y = 0; y < BobHeight; y++)
{
unsigned char CurrentByte = 0;
unsigned char CurrentMask = 0;
for (int xpixel = 0; xpixel < 8; xpixel += 2)
{
int x = xchar * 8 + xpixel - xshift;
bool bMaskedOut = false;
if ((x < 0) || (x >= BobWidth))
{
bMaskedOut = true;
}
else
{
unsigned int Col = BobImage.GetPixel(x, y);
if (Col == 0xff00ea)
{
bMaskedOut = true;
}
else
{
unsigned char OutBits = 0;
switch (Col)
{
case 0x00ffffff:
OutBits = 2;
break;
case 0x00808080:
OutBits = 1;
break;
case 0x00000000:
OutBits = 3;
break;
}
CurrentByte |= (OutBits << (6 - xpixel));
}
}
if (bMaskedOut)
{
CurrentMask |= (3 << (6 - xpixel));
}
}
int OutBobMaskOffset = (((0 * NumBobs) + bob) * BobHeight + y) * BobCharWidth + xchar;
int OutBobDataOffset = (((1 * NumBobs) + bob) * BobHeight + y) * BobCharWidth + xchar;
OutBob[OutBobMaskOffset] = CurrentMask;
OutBob[OutBobDataOffset] = CurrentByte;
}
}
}
for (int bob = 0; bob < NumBobs; bob++)
{
OutCodeASM.OutputFunctionLine(fmt::format("BlitBob_Shift{:d}", bob));
int AValue = -1;
for (int xchar = 0; xchar < BobCharWidth; xchar++)
{
OutCodeASM.OutputCodeLine(LDY_IMM, fmt::format("#${:02x}", xchar * 8));
OutCodeASM.OutputBlankLine();
for (int y = 0; y < BobHeight; y++)
{
int OutBobMaskOffset = (((0 * NumBobs) + bob) * BobHeight + y) * BobCharWidth + xchar;
int OutBobByteOffset = (((1 * NumBobs) + bob) * BobHeight + y) * BobCharWidth + xchar;
unsigned char MaskValue = OutBob[OutBobMaskOffset];
unsigned char ByteValue = OutBob[OutBobByteOffset];
bool bMaskIs00 = (MaskValue == 0x00);
bool bMaskIsFF = (MaskValue == 0xff);
bool bDataIs00 = (ByteValue == 0x00);
if ((!bMaskIsFF) || (!bDataIs00))
{
if (!bMaskIs00)
{
OutCodeASM.OutputCodeLine(LDA_IZY, fmt::format("ZP_BobOutY{:d}", y));
AValue = -1;
if (!bMaskIsFF)
{
OutCodeASM.OutputCodeLine(AND_IMM, fmt::format("#${:02x}", MaskValue));
}
if (!bDataIs00)
{
OutCodeASM.OutputCodeLine(ORA_IMM, fmt::format("#${:02x}", ByteValue));
}
}
else
{
if (ByteValue != AValue)
{
OutCodeASM.OutputCodeLine(LDA_IMM, fmt::format("#${:02x}", ByteValue));
AValue = ByteValue;
}
}
OutCodeASM.OutputCodeLine(STA_IZY, fmt::format("ZP_BobOutY{:d}", y));
OutCodeASM.OutputBlankLine();
}
}
}
OutCodeASM.OutputCodeLine(RTS);
OutCodeASM.OutputBlankLine();
OutCodeASM.OutputBlankLine();
}
delete[] OutBob;
}
```
And here is the resultant ASM:-
```asm6502
BlitBob_Shift0:
ldy #$00 //; 2 ( 0) bytes 2 ( 0) cycles
lda (ZP_BobOutY0),y //; 2 ( 2) bytes 5 ( 2) cycles
and #$fc //; 2 ( 4) bytes 2 ( 7) cycles
ora #$03 //; 2 ( 6) bytes 2 ( 9) cycles
sta (ZP_BobOutY0),y //; 2 ( 8) bytes 5 ( 11) cycles
lda (ZP_BobOutY1),y //; 2 ( 10) bytes 5 ( 16) cycles
and #$f0 //; 2 ( 12) bytes 2 ( 21) cycles
ora #$0f //; 2 ( 14) bytes 2 ( 23) cycles
sta (ZP_BobOutY1),y //; 2 ( 16) bytes 5 ( 25) cycles
lda (ZP_BobOutY2),y //; 2 ( 18) bytes 5 ( 30) cycles
and #$c0 //; 2 ( 20) bytes 2 ( 35) cycles
ora #$3e //; 2 ( 22) bytes 2 ( 37) cycles
sta (ZP_BobOutY2),y //; 2 ( 24) bytes 5 ( 39) cycles
lda (ZP_BobOutY3),y //; 2 ( 26) bytes 5 ( 44) cycles
and #$c0 //; 2 ( 28) bytes 2 ( 49) cycles
ora #$39 //; 2 ( 30) bytes 2 ( 51) cycles
sta (ZP_BobOutY3),y //; 2 ( 32) bytes 5 ( 53) cycles
lda #$fb //; 2 ( 34) bytes 2 ( 58) cycles
sta (ZP_BobOutY4),y //; 2 ( 36) bytes 5 ( 60) cycles
lda #$e7 //; 2 ( 38) bytes 2 ( 65) cycles
sta (ZP_BobOutY5),y //; 2 ( 40) bytes 5 ( 67) cycles
... more code
```
In total, for all 4 functions, this came to 932 bytes and 1672 cycles .. ie. approximately 418 cycles per bob. Pretty good!
As you see, I have some zeropage pointer setup for each line of the bob.
The x-char of each plot is determined by setting Y to be $00, $08, $10, ..., $f8 (chars 0-31) and by setting the the high pointer of each ZP_BobOutY value to be +0 or +1.
The y-pixel coordinate of each plot is added into the low and high pointers of each ZP_BobOutY.
That's pretty much it for the actual plot .. it's then just a matter of having the sinetables setup to feed all of this data in to plot the bobs at good positions.
---
## Clearing the End of the Bob Trail
Since we have a background image behind the bobs, of course, "clearing" the bob trail isn't as simple as just blanking an area of memory out. We need to restore the charset data back to how it was before we plotted bobs on top.
That means that we need to keep a clean copy of the character set data in memory. And now maybe you understand why the image needs to be mirrored - we have 28kb of character set data so, if we simply duplicated that, we're at 56kb. Without considering code, music, sinetables, etc. That is.. it isn't happening ;)
So instead we need to squeeze 14kb of un-mirrored image data into memory, along with code/tables for re-mirroring that.
Now is perhaps a good time to look at our memory layout for the demo part:-
```asm6502
//; MEMORY MAP
//; - Loaded
//; ---- Generated at runtime
//; ---- $02-04 Sparkle (Only during loads)
//; ---- $fc-fd Music ZP
//; ---- $fe-ff Music frame counter
//; - $0160-03ff Sparkle (ALWAYS)
//; - $0800-08ff Disk Driver
//; - $0900-1fff Music
//; - $2000-3aff Code
//; - $3d00-3dff FlipBits
//; - $3e00-3eff FlipY
//; - $4000-77ff CharSets 0 <-------- 14kb of charsets in bank 1
//; - $7800-7bff Screen 0
//; - $7c00-7dff Sprites
//; - $8000-b7ff Image Data <-------- our 14kb of unmirrored image data
//; - $b800-bfff SinTables
//; - $c000-f7ff CharSets 1 <-------- 14kb of charsets in bank 3
//; - $f800-fbff Screen 1
```
That's pretty tight, right..? Still a few pockets of memory free - maybe I can use those if I ever do a "Not Bob's Bobs++" in the future..?
Anyway, back to the task .. we need to somehow clear the end of the trail. What I ended up with was a simple solution of resetting whole horizontal char lines (25% of a character set) at a time at points where I determined that it was safe to do so - ie. when that line has gone off screen and isn't going to be coming back for a while.
Without too much explanation, here's how I did that, along with the mirroring:-
```asm6502
OutYCharTableHi:
.byte >(CharAddress0 + (0 * 64 * 8)), >(CharAddress0 + (1 * 64 * 8)), >(CharAddress0 + (2 * 64 * 8)), >(CharAddress0 + (3 * 64 * 8))
.byte >(CharAddress1 + (0 * 64 * 8)), >(CharAddress1 + (1 * 64 * 8)), >(CharAddress1 + (2 * 64 * 8)), >(CharAddress1 + (3 * 64 * 8))
//; ... more ...
.byte >(CharAddress13 + (0 * 64 * 8)), >(CharAddress13 + (1 * 64 * 8)), >(CharAddress13 + (2 * 64 * 8)), >(CharAddress13 + (3 * 64 * 8))
RestoreHorizontalLine:
ldx FrameY + 1
ldy ADDR_SinTable_ScreenY_Clear, x //; <------ my sinetable defining which lines are safe to clear on any given frame
bmi SkipClear
tya
clc
adc #>ADDR_ImageData
sta RestoreReadAddr + 2
lda OutYCharTableHi, y
sta RestoreWriteAddrLeft + 2
ora #$01
sta RestoreWriteAddrRight + 2
ldy #$00
RestoreLineLoop:
RestoreReadAddr:
lax ADDR_ImageData + (12 * 256), y
RestoreWriteAddrLeft:
sta $ab00, y
lda ADDR_FlipBits, x //; <------------- ADDR_FlipBits simply points to my table for flipping all the bits in the char
ldx ADDR_FlipY, y
RestoreWriteAddrRight:
sta $ab00, x
iny
bne RestoreLineLoop
SkipClear:
rts
```
The FlipY table is basically just a way to map from the left-chars to the right-chars.. so it's an 'EOR #$f8' essentially as we want to leave the bottom 3 bits (which contain the y-pixel) alone. In order to save disk space, an important consideration for this demo, we generated this table in the demo part's init() code:-
```asm6502
ldy #$00
SetFlipYLoop:
tya
eor #$f8
sta ADDR_FlipY, y
iny
bne SetFlipYLoop
```
The FlipBits table is also fairly easy to create.. for this one, we need to flip the multicolour pixels from each byte ... so we would swap %AABBCCDD to be %DDCCBBAA.
```asm6502
ldy #$00
SetFlipBitsLoop:
//; step 1: 01234567 -> 76543210
sty ZP_FlipBit
ldx #8
FlipAll8Bits:
lsr ZP_FlipBit
rol
dex
bne FlipAll8Bits
//; step 2: 76543210 -> 67452301 by making -7-5-3-1 and or'ing it with 6-4-2-0-
pha
and #$55
asl
sta V0 + 1
pla
and #$aa
lsr
V0:
ora #$00
sta ADDR_FlipBits, y
iny
bne SetFlipBitsLoop
```
Many thanks to Sparta for his help here - I'm honestly not a coder who could ever compete in such a 4k competitions.. as you can see above, and from my other parts, I tend to fill the entire memory ... so Sparta helped compact this snippet right down :-)
And with this done, we now have bobs swinging around the screen in a nice trail!
---
## Final Complication - Sinus Movements
Finding actual sinus patterns for both the bob plotting location and for screen movement offset was much harder than I'd imagined .. if you weren't careful, you'd end up with movements that left no room for clearing the bobs without the clear being visible. Double-sinuses would result in the bobs being visible "sliced", for example.
As we were only going to be showing the effect for 20 seconds or so - No Bounds does that throughout, trying not to dwell too long on effects, no matter how much we'd like to - we went with a simple circular movement in the end for both bobs and screen. To make the movement slightly more interesting, I made the tables a slightly different length (not just 256) so that the movement would slowly start to offset. If you want to see how it can go wrong after too long, go hack the code and figure out how to disable the ease-out trigger. We run with this version during development and, honestly, in less than a minute you'll see the problem I described creeping in.
---
## Wrapping Up
I believe that's everything, really? Apart from the glue that brings all of these things together - but that's the simple part, right?
I hope this was of some help and interest to some of you. We're a niche of a niche within a niche that actually cares about this.. there are of course those who like the final demo - that's a very small group since, let's face it, modern generations simply won't understand the interest in a 40 year old computer. But within this small pocket of people there's an even smaller section that really wants to know *how*.
Regardless.. if the final pocket is just one person, myself, I can at least look back on this 10 years from now, in the old people's home, and marvel at how my dying brain used to be able to do this almost pointless stuff ;-)
Until next time!
---
# Stopping Music Popping
- URL: https://c64demo.com/stopping-music-popping/
- Author: Raistlin (Genesis Project)
- Published: 2023-06-01
- Series: No Bounds
- Level: intermediate
- Tags: 6502, c64, music, sid, raster irqs, tools
- Licence: CC BY 4.0 for text, CC BY 4.0 or MIT for code (https://creativecommons.org/licenses/by/4.0/)
- Releases: No Bounds by Genesis Project (2023) https://csdb.dk/release/?id=232957; Memento Mori by Genesis Project (2020) https://csdb.dk/release/?id=195841
> Finding and fixing uneven music play calls in C64 demos, using VICE monitor traces to spot missed, doubled and drifting calls.
Assumes: Raster IRQs and the music init and play calls; The VICE monitor
## Summary
Music playback on C64 is one of the simplest things in the world to achieve ... usually just 2 calls to be made, MusicInit, done once, and MusicPlay, once per frame (though some music can be setup for different play rates).
Something as simple as the following can play most tunes (with init at $1000, play at $1003):
```asm6502
.var MusicInit = $1000
.var MusicPlay = $1003
sei
lda #$00
jsr MusicInit
!w:
lda #$ff
cmp $d012
bne !w-
jsr MusicPlay
jmp !w-
```
We're calling MusicPlay on the rasterline 255 every frame - with the time between each call being ~19,656 cycles (a PAL screen is made up of 312 raster lines, each being 63 cycles long, giving us 312 * 63 = 19,656).
In complex demos where the music crosses across several demo parts, and those demo parts have varied IRQ setups, we should be careful with these MusicPlay calls - to keep the music sounding smooth, we need to make sure that we're keeping the distance between calls as close to 19,656 cycles as possible.
One demo part might be doing graphical work in the top and bottom border area in order to prepare data ready for the next screen ... other parts might be doing graphical work across the whole screen area. So we can't always consistently call MusicPlay at the same point .. so how do we deal with that?
---
## Music Play Timing
It's common, particularly during initialisation of a new demo part, transition into a new part, or simply in the final switch (swapping IRQ vectors) to miss or duplicate a MusicPlay call. If you miss a call, that could mean you've left a gap of 19,000 cycles or more between calls. The opposite of that would be that you call MusicPlay twice where the gap between is much less than the holy grail of 19,656.
Many people can't tell that this has happened - but some of us can. And, to us, it can totally ruin the fluidity of a demo.
---
## Using 'VICE mon' to Detect Music Popping
The following lines, kindly given to me by Groepaz, are a Godsend.
```markup
logname "music.txt"
trace exec 1006
log on
```
Essentially, the first line is creating our log file, the next is setting a trace for all calls to $1006 and the third is simply turning on the logging.
We then run the demo for a while and then disable logging with:-
```markup
log off
```
The log file that's been generated will contain something like this - but likely much much longer (I mention the length because, even in 2023, Visual Studio Pro struggles with these long files ... so you might want to fire up Notepad+ or your editor of choice instead).
```markup
(C:$fd84) log off
(C:$fd84) x
#1 (Trace exec 1006) 206/$0ce, 24/$18
.C:1006 A9 00 LDA #$00 - A:00 X:B1 Y:71 SP:ed ..-..I.C 123924426
#1 (Trace exec 1006) 206/$0ce, 24/$18
.C:1006 A9 00 LDA #$00 - A:00 X:B1 Y:71 SP:ed ..-..I.. 123944082
#1 (Trace exec 1006) 206/$0ce, 24/$18
.C:1006 A9 00 LDA #$00 - A:00 X:B1 Y:71 SP:ed ..-..I.C 123963738
#1 (Trace exec 1006) 206/$0ce, 24/$18
.C:1006 A9 00 LDA #$00 - A:00 X:B1 Y:71 SP:ed ..-..I.. 123983394
#1 (Trace exec 1006) 206/$0ce, 24/$18
.C:1006 A9 00 LDA #$00 - A:00 X:B1 Y:71 SP:ed ..-..I.C 124003050
#1 (Trace exec 1006) 206/$0ce, 24/$18
.C:1006 A9 00 LDA #$00 - A:00 X:B1 Y:71 SP:ed ..-..I.. 124022706
```
What we need to care about here are those numbers at the end ... 123924426, 123944082 etc. These are the CPU clock counts for the point where we hit the music play address - so we can use these to determine the spacing of each call. With a little bit of text-editing, we can pull these numbers into a spreadsheet and garner the information that we need... see the snippet below from our spreadsheet. Note that "CyclesTaken" is simply ClockTick minus the previous ClockTick:-
| Frame | ClockTick | CyclesTaken |
|:---:|:---:|:---:|
| ... | ... | ... |
| 1691 | 46093367 | 19655 |
| 1692 | 46113024 | 19657 |
| 1693 | 46132679 | 19655 |
| 1694 | 46152337 | 19658 |
| 1695 | 46187167 | **34830** |
| 1696 | 46206823 | 19656 |
| 1697 | 46226479 | 19656 |
| 1698 | 46246135 | 19656 |
| 1699 | 46265791 | 19656 |
| ... | ... | ... |
| 5398 | 118954566 | 19656 |
| 5399 | 118958163 | **3597** |
| 5400 | 118977819 | 19656 |
| ... | ... | ... |
Some observations about this:-
- the first 4 entries show "pretty good" timings. These are essentially calls coming from IRQs where we don't have jitter correction. This is 100% fine;
- the last 4 entries show "perfect" timings. These are bang on - but at the loss of some cycles to get stable raster timing. While I might help some people's OCD to know that these are perfect, there's zero point since the musicplay function itself won't be writing to SID quite so precisely ;-)
- the final and most important thing to note here is that 34,830 value. That one -could- definitely be heard, could cause problems and should almost definitely be fixed.
I made a graph showing the ranges that we were hitting on Memento Mori's 1st disk side. We didn't (sorry!) do any testing at the time to find out how our music calls were spaced - shame on us, really, as it does look like we dropped the ball a few times.
On the graphs, you can clearly see where we:-
- missed a PlayMusic call (the bar is close to "39312")
- called twice in short succession ("close to "0")
- changed the raster location of PlayMusic calls (the mid-height spikes above and below the baseline)
- had invariance (the sections where we're fuzzing above and below the baseline)
- were near to perfect (no bars showing far from baseline)



For comparison, here're equivalent graphs from No Bounds, our latest demo that was released at X 2023 (2-4 June, 2023). With this demo, we made a concerted effort to try to remove any "spikes" to make sure that there was no popping. A huge improvement I hope you'll agree. That's evident in the demo, too - you're very unlikely to notice anything untoward in the music playing throughout.


---
## PlayMusic Variance
One problem that you should absolutely avoid when playing music is to make the call to PlayMusic at a highly variable point per frame. For example, don't put the call after blocks of code that can have variable timing. If you see CyclesTaken values coming through that are all over the place during an effect, that's a big warning sign that you're doing this.
```asm6502
MainIRQ:
//; ... push A/X/Y/$01
jsr PlotCube //; could take 3,000 cycles.. could take 5,000
jsr DoScrolling //; approx 500 cycles every 8 frames - otherwise close to 0
jsr PlayMusic //; <-- UNSTABLE music call
//; ... pop A/X/Y/$01
```
If you're doing it, stop. Either move PlayMusic to be the first issued call .. or create another IRQ for it. You need to get that timing stabilised or you'll hear strange hissing/warbling from the music.
```asm6502
MainIRQ:
//; ... push A/X/Y/$01
jsr PlayMusic //; <-- STABLE music call
jsr PlotCube //; could take 3,000 cycles.. could take 5,000
jsr DoScrolling //; approx 500 cycles every 8 frames - otherwise close to 0
//; ... pop A/X/Y/$01
```
---
## Fixing the Music Popping
So now that we have a trace and output to help isolate the frames where the popping is happening, we have a very good starting point. There are many ways to use VICE's monitor to help you track down the exact problem. You could just keep breaking into VICE and using the "r" command to tell you what the current clock cycle is - a simple trial and error of breaking in and figuring out what's happening in the demo around the area of the pop.
My process for this was:-
- set a breakpoint on PlayMusic calls:-
```markup
bk 1003
```
- set a watch on changes to $d012:-
```markup
w store d012
```
In most cases this was enough to pinpoint the exact problem. And usually an easy fix to make.
---
## Sliding Music Calls
Sometimes, it's not quite so easy to fix the popping.. sometimes, you'll get a CyclesTaken of ~30,000 (~1.5 frames) or ~10,000 (0.5 frames). With these, it's not a simple matter of adding an extra PlayMusic call .. or of removing one.
In these cases, what we can do is to use a few frames to "slide" the PlayMusic call. The half-frame variance is coming from that we're calling PlayMusic on different rasterlines in two different parts of the demo. So, for example, one part might have an IRQ at rasterline 255 where PlayMusic is called each frame. The next part might make the same call on rasterline 50. For the first frame of part two, our CyclesTaken is going to be off.
To fix this, we just need a bunch of frames where we'll slowly "slide" the PlayMusic call... if we slide over 11 frames, for example, we could call on rasterlines 255, 235, 214, 194, 173, 153, 132, 112, 91, 71, 50. Over these 11 frames, we would have CyclesTaken at ~18,600. The more frames you use for the slide the closer it's going to be to where it should be ... but it's a balance between smoothing the music and not interrupting the demo for too long, right?
---
## Wrapping Up
No need to go overboard with improving the timings of the music calls during transitions and so on .. come up with a threshold within which you'd like the MusicPlay calls to be and just aim for that .. I'd say that you should try to be as close as possible to 19,656 for most frames .. and perhaps aim for 5-10% variance from there, above or below, for transitions and part-changes. Speak to the musician, if you can, and ensure that they're happy with the result.
---
# Side Border Bitmap Scroller
- URL: https://c64demo.com/side-border-bitmap-scroller/
- Author: Raistlin (Genesis Project)
- Published: 2022-12-03
- Series: Memento Mori
- Level: insane
- Tags: 6502, c64, sprites, borders, bitmap, scrollers, loading
- Licence: CC BY 4.0 for text, CC BY 4.0 or MIT for code (https://creativecommons.org/licenses/by/4.0/)
- Releases: Memento Mori by Genesis Project (2020) https://csdb.dk/release/?id=195841
> The Memento Mori end part: a bitmap scrolling through the C64 side borders at 25fps while streaming from disk with Sparkle and SPOT.
Assumes: Opening the side borders; 20px sprite interleave (https://c64demo.com/sprite-interleave/); Multicolour bitmap mode; IRQ loading
## Summary
Probably the effect that garnered the largest applause from our demo [Memento Mori](https://csdb.dk/release/?id=195841) was the final part. This featured a beautiful, huge bitmap scrolling up through the full screen AND the sideborders while streaming extra data from disk… all at 25 frames per second. Definitely not an easy feat, and something that had never been done before on the C64.
The effect was developed by myself ([Raistlin](https://csdb.dk/scener/?id=848)) with a tremendous amount of help from [Sparta](https://csdb.dk/scener/?id=29482) to get it working at 25fps.
The visible screen is 408 x 192px – 320 x 192px for the main full-colour bitmap part of the screen plus 48 x 192px for sprites in the left border, 40 x 192px for sprites in the right border.
Take a look at it here:-
Video:
*Video: [Memento Mori by Genesis Project](https://www.youtube.com/watch?v=ob5GHijbWSg), the full demo. The side border bitmap scroller is the final part.*
---
## Initial Border-Opening Code
As with most of my demo parts, I started this with a detailed plan of attack… in order for the effect to work, I would need several IRQ routines that would open the side borders – but with all the bitmap scrolling code, sprite multiplexing and more interleaved into this .. all without exceeding the relatively small memory footprint available.
Most of the coding here is done using my C++-based ASM-code-generator. I’d like to call it a “library” or a “suite”.. but, honestly, it’s more a hodge-podge of barely working functions that I slowly mould over time, as I need more and more features, into an even bigger bowl of spaghetti code. But anyway..!
Initially, I started by placing the top row of 4 sprites on screen and then started on the border-opening IRQ.. filling gaps between the $d016 writes with pad code (NOPs). I knew that I would need all this space later on for efficient bitmap scrolling – so there’s no need to do anything clever here, simply add NOP (1 byte, 2 cycles) and NOP $ff (2 bytes, 3 cycles) in order to space the $d016 writes correctly.. eg.:-
```asm6502
IRQ_MainCall_0:
nop $ff //; 2 ( 2) bytes 3 ( 3) cycles
nop //; 1 ( 3) bytes 2 ( 5) cycles
nop //; 1 ( 4) bytes 2 ( 7) cycles
ldy #D016_Value_40Rows_MC //; 2 ( 59) bytes 2 ( 115) cycles
ldx #D016_Value_38Rows_MC //; 2 ( 61) bytes 2 ( 117) cycles
stx VIC_D016 //; 3 ( 64) bytes 4 ( 121) cycles
sty VIC_D016 //; 3 ( 67) bytes 4 ( 125) cycles
```
Next up is the code to add the additional sprite rows (adding 21 to the y-coordinate of all 4 sprites) and then continuing the border code .. 10 rows of sprites are needed in total to cover 210 pixels.
With that done, the next part was to make the screen scroll every couple of frames – changing $d011 to smooth-scroll upwards. With this, I would also move the sprites by the same amount. Together, this means that the same border-opening IRQ code will work despite moving badlines – we just adjust the IRQ trigger v-pos ($d012) to follow the scroll.
Now we have a working scrolling sprite-multiplex with side borders always open.
---
## Interleaved Bitmap Scroll
There are 3 sets of data that need to be moved in order to achieve smooth bitmap scrolling:-
- the bitmap (.map) data, 8000 bytes
- the screen (.scr) data, 1000 bytes
- the colour (.col, $d800) data, 1000 bytes
If you’ve worked with C64 bitmaps before (I’m assuming that you have – if you haven’t, you’re probably lost already about what the heck this is all about) then you will know that the bitmap and screen data can be double-buffered. The colour data, however, can’t.
We scroll at 1 pixel per 2 frames and we copy all the data 8 pixels up the screen.. so we have 16 frames before we need to flip buffers. Since the colour data can’t be double-buffered, we “just” update that on the 15th frame, right before the buffer flip. We “chase the rasterbeam” with this, making sure that we only write to colour memory once the VIC has finished reading that whole line. If we don’t do this right, there’ll be some nasty flickering every 16 frames.
So… we actually end up with 3 different routines:-
1. copy 1/15th of the bitmap data from buffer A to buffer B
2. copy 1/15th of the bitmap data from buffer B to buffer A
3. copy the colour data
Here’s an example section from our code for the first routine:-
```asm6502
lda BitmapAddress0 + $01c7,x //; 3 ( 59) bytes 4 ( 88) cycles
sta BitmapAddress1 + $0087,x //; 3 ( 62) bytes 5 ( 93) cycles
lda BitmapAddress0 + $01d6,x //; 3 ( 65) bytes 4 ( 97) cycles
sta BitmapAddress1 + $0096,x //; 3 ( 68) bytes 5 ( 102) cycles
lda BitmapAddress0 + $01e5,x //; 3 ( 71) bytes 4 ( 106) cycles
sta BitmapAddress1 + $00a5,x //; 3 ( 74) bytes 5 ( 111) cycles
nop //; 1 ( 75) bytes 2 ( 113) cycles
D016_40Cols_Load_0:
ldy #D016_Value_40Rows_MC //; 2 ( 77) bytes 2 ( 115) cycles
dec VIC_D016 //; 3 ( 80) bytes 6 ( 121) cycles
sty VIC_D016 //; 3 ( 83) bytes 4 ( 125) cycles
//; Line $32
lda BitmapAddress0 + $01f1,x //; 3 ( 86) bytes 4 ( 129) cycles
sta BitmapAddress1 + $00b1,x //; 3 ( 89) bytes 5 ( 134) cycles
lda BitmapAddress0 + $0200,x //; 3 ( 92) bytes 4 ( 138) cycles
```
We use X for our frame index (0-14). It’s a little bit awkward, sure, as 15’s not such a nice number to work with .. our raster code needs to be consistently timed so that we hit the exact cycles needed to open the borders, we need to make sure that none of those LDA, x’s cross a 256-byte page boundary (if they do, a cycle is lost, turning LDA, x from a 4 cycle instruction to a 5 cycle one).
If you examine the numbers closely in the above, you’ll see that we copy from $1e5, x and $1f1, x .. so we actually have an overlap here of 3 bytes ($1f1, $1f2 and $1f3 will be copied twice). This is a very tiny “waste” of cycles .. but this only happens on the first copy section (where we copy BitmapAddress0 + [$140,$1ff] to BitmapAddress1 + [$000,$0bf]).
For all other sections, we copy almost the full 256-byte page.. 17 indexed copies will copy 17 * 15 = 255 bytes.. the remaining byte we do outside the IRQ code as a standalone non-indexed byte copy. So:-
```asm6502
lda BitmapAddress0 + $0200,x //; 3 ( 92) bytes 4 ( 138) cycles
sta BitmapAddress1 + $00c0,x //; 3 ( 95) bytes 5 ( 143) cycles
lda BitmapAddress0 + $020f,x //; 3 ( 98) bytes 4 ( 147) cycles
... more code ...
lda BitmapAddress0 + $02e1,x //; 3 ( 204) bytes 4 ( 308) cycles
sta BitmapAddress1 + $01a1,x //; 3 ( 207) bytes 5 ( 313) cycles
lda BitmapAddress0 + $02f0,x //; 3 ( 210) bytes 4 ( 317) cycles
sta BitmapAddress1 + $01b0,x //; 3 ( 213) bytes 5 ( 322) cycles
//; note: BitmapAddress0 + $02ff isn't copied
```
Similar code is used to copy the screen data:-
```asm6502
lda ScreenAddress0 + $0100,x //; 3 ( 4577) bytes 4 ( 6815) cycles
sta ScreenAddress1 + $00d8,x //; 3 ( 4580) bytes 5 ( 6820) cycles
lda ScreenAddress0 + $010f,x //; 3 ( 4583) bytes 4 ( 6824) cycles
sta ScreenAddress1 + $00e7,x //; 3 ( 4586) bytes 5 ( 6829) cycles
... more code ...
```
Across 15 frames, there should be plenty of CPU time to do all this copying – we need spare CPU, after all, to additionally copy the sprite data, which I come back to add in later on (after 20px sprite interleave is setup).
---
## 20px Sprite Interleaving
The next tricky aspect to cover is how we manage to create an efficient sprite multiplex layout that allows for easy scrolling through the side borders. In this instance, I chose, again, to use 20px sprite interleave. This means updating the sprite indices every 20 rasterlines. I make the sprites mimic the screen scrolling, simply moving them 0-7 pixels up the screen before resetting on the frame flip ..
The positives to this method are that it’s relatively easy to multiplex the sprites without having tears – we just need to ensure that the sprites are placed such that the 20px point never occurs on bad lines – and we only need 1px of overlap, meaning that we save a little on memory compared to other methods (such as 16px sprite interleave) and we save on the amount of data that we need to copy to scroll the sprites.
With 20px interleave, we need 11 rows of sprites – meaning 44 sprites (~2.8kb of RAM) per buffer (so, with double buffering, 5.6kb).
You can read up about 20px sprite interleave here: [https://codebase64.org/doku.php?id=base:sprite_interleave](https://codebase64.org/doku.php?id=base:sprite_interleave)
Here’s how some of our sprite-data copy code looks:-
```asm6502
dec VIC_D016 //; 3 ( 6325) bytes 6 ( 9446) cycles
sty VIC_D016 //; 3 ( 6328) bytes 4 ( 9450) cycles
//; Line $fa
lda SpriteDataAddress0 + $071e,x //; 3 ( 6331) bytes 4 ( 9454) cycles
sta SpriteDataAddress1 + $0706,x //; 3 ( 6334) bytes 5 ( 9459) cycles
lda SpriteDataAddress0 + $0721,x //; 3 ( 6337) bytes 4 ( 9463) cycles
sta SpriteDataAddress1 + $0709,x //; 3 ( 6340) bytes 5 ( 9468) cycles
lda SpriteDataAddress0 + $0724,x //; 3 ( 6343) bytes 4 ( 9472) cycles
sta SpriteDataAddress1 + $070c,x //; 3 ( 6346) bytes 5 ( 9477) cycles
lda SpriteDataAddress0 + $0727,x //; 3 ( 6349) bytes 4 ( 9481) cycles
sta SpriteDataAddress1 + $070f,x //; 3 ( 6352) bytes 5 ( 9486) cycles
lda SpriteDataAddress0 + $082a,x //; 3 ( 6355) bytes 4 ( 9490) cycles
nop //; 1 ( 6356) bytes 2 ( 9492) cycles
dec VIC_D016 //; 3 ( 6359) bytes 6 ( 9498) cycles
sty VIC_D016 //; 3 ( 6362) bytes 4 ( 9502) cycles
```
So, yeah, very similar to the bitmap copying .. but complicated slightly by the reordering of lines due to the 20px interleave method.
With this added, our IRQ code should now have pretty much all the NOPs in our border code replaced with blit code. So we’re no longer “wasting” so much CPU.
---
## Colour Copy Frame
As mentioned earlier, the final frame of every 16, we copy the colour data. No indexing in this case so we just do this the brute-force way with something like:-
```asm6502
stx VIC_D016 //; 3 ( 3335) bytes 4 ( 4545) cycles
sty VIC_D016 //; 3 ( 3338) bytes 4 ( 4549) cycles
//; Line $91
sta VIC_ColourMemory + $017c //; 3 ( 3341) bytes 4 ( 4553) cycles
lda VIC_ColourMemory + $01a5 //; 3 ( 3344) bytes 4 ( 4557) cycles
sta VIC_ColourMemory + $017d //; 3 ( 3347) bytes 4 ( 4561) cycles
lda VIC_ColourMemory + $01a6 //; 3 ( 3350) bytes 4 ( 4565) cycles
sta VIC_ColourMemory + $017e //; 3 ( 3353) bytes 4 ( 4569) cycles
lda VIC_ColourMemory + $01a7 //; 3 ( 3356) bytes 4 ( 4573) cycles
sta VIC_ColourMemory + $017f //; 3 ( 3359) bytes 4 ( 4577) cycles
lda VIC_ColourMemory + $01a8 //; 3 ( 3362) bytes 4 ( 4581) cycles
sta VIC_ColourMemory + $0180 //; 3 ( 3365) bytes 4 ( 4585) cycles
lda VIC_ColourMemory + $01a9 //; 3 ( 3368) bytes 4 ( 4589) cycles
sta VIC_ColourMemory + $0181 //; 3 ( 3371) bytes 4 ( 4593) cycles
stx VIC_D016 //; 3 ( 3374) bytes 4 ( 4597) cycles
sty VIC_D016 //; 3 ( 3377) bytes 4 ( 4601) cycles
```
As mentioned before, we just need to make sure that VIC has finished with each line before we start writing to it. C64 is great for such things, of course, as you can calculate exactly where the raster beam is at every point in the code (with good, stable, predictable demo-style code, anyway ;p).
---
## New Line Update
Alongside copying bitmap/screen/colour data, we also need to update the bottom line with new data. For this, I use a separate function outside of the sideborder-opening IRQ code. The source data format will be explained later – please just accept it for what it is in this sample of the code:-
```asm6502
UpdateNewData_SRC0_DST0:
ldx ZP_BitmapUpdateSRCIndex //; 2 ( 2) bytes 3 ( 3) cycles
ldy ZP_BitmapUpdateDSTIndex //; 2 ( 4) bytes 3 ( 6) cycles
lda ScrollData_Buffer0 + $00a0,x //; 3 ( 7) bytes 4 ( 10) cycles
sta BitmapAddress0 + $1e00,y //; 3 ( 10) bytes 5 ( 15) cycles
lda ScrollData_Buffer0 + $00dc,x //; 3 ( 13) bytes 4 ( 19) cycles
... more code ...
ldx ZP_SrcStreamedScrDataOffset //; 2 ( 138) bytes 3 ( 207) cycles
cpx #$ff //; 2 ( 140) bytes 2 ( 209) cycles
beq NoScrDataUpdate_SRC0_DST0 //; 2 ( 142) bytes 2 ( 211) cycles
lda ScrollData_Buffer0 + $0aa0,x //; 3 ( 145) bytes 4 ( 215) cycles
sta ScreenAddress0 + $03c0,y //; 3 ( 148) bytes 5 ( 220) cycles
lda ScrollData_Buffer0 + $0aaf,x //; 3 ( 151) bytes 4 ( 224) cycles
sta ScreenAddress0 + $03cf,y //; 3 ( 154) bytes 5 ( 229) cycles
lda ScrollData_Buffer0 + $0ab9,x //; 3 ( 157) bytes 4 ( 233) cycles
sta ScreenAddress0 + $03d9,y //; 3 ( 160) bytes 5 ( 238) cycles
NoScrDataUpdate_SRC0_DST0:
ldx ZP_SrcStreamedSpriteDataOffset //; 2 ( 162) bytes 3 ( 241) cycles
bmi NoSpriteDataUpdate_SRC0_DST0 //; 2 ( 164) bytes 2 ( 243) cycles
ldy ZP_SpriteDataIndex //; 2 ( 166) bytes 3 ( 246) cycles
lda ScrollData_Buffer0 + $0be0,x //; 3 ( 169) bytes 4 ( 250) cycles
sta SpriteDataAddress0 + $0918,y //; 3 ( 172) bytes 5 ( 255) cycles
lda ScrollData_Buffer0 + $0c0c,x //; 3 ( 175) bytes 4 ( 259) cycles
... more code ...
sta SpriteDataAddress0 + $0a2d,y //; 3 ( 217) bytes 5 ( 323) cycles
NoSpriteDataUpdate_SRC0_DST0:
rts //; 1 ( 218) bytes 6 ( 329) cycles
```
We have 8 functions similar to this – for all combinations of (SRC0, SRC1, SRC2, SRC3) and (DST0, DST1). 4 source-data buffers and 2 destination targets (because we’re double-buffering). We could have saved some memory, actually, by using indirect zeropage addressing – but at the expense of losing some CPU cycles. By my calculations, we would’ve saved ~1.2k at the expense of ~40-50 cycles per frame.
Note: The early-outs (NoSrcDataUpdate and NoSpriteDataUpdate) are so that we can call these functions every frame – and they’ll simply skip forward on frames where there’s no work to do.
---
## IRQ Loading – Sparkle and Spindle
In early versions of this demo part, I was using [LFT](https://csdb.dk/scener/?id=16473)‘s Spindle for streaming data from disk. With this, it actually wasn’t quite fast enough to give me 25fps scrolling… had I stuck with Spindle, as it was at the time at least, we would’ve had 16.666fps instead (1px scrolling per 3 frame).
I made the switch to Sparkle, a brand new IRQ loader created by Sparta (the one-man member of the demo “group” OMG (One Man Group)), and found that the part was much, much closer to hitting the holy grail of 25fps.. but it still wasn’t quite there.
One thing with these IRQ loaders for me was that they always just seemed to work but you never quite knew what they were doing under the hood.. they loaded data quickly.. but, if you needed that data just a tiny bit faster, what did you need to do in order to help that happen?
- Increase the buffer size perhaps? It might sound strange – but if you double the amount of data, chances are it will be less than double the amount of time to load.. so “on average” you have your data faster;
- Reorder the data for better compression?;
- Split the data up, removing empty parts?;
- Merge data segments together, adding in padding?
Without a more detailed understanding, it was going to be very difficult to figure out .. so I reached out to Sparta to find out whether he could advise. I’d previously done similar with LFT – but with no such luck (in fairness to LFT, he’s a coding and hardware genius and always very very busy in both his professional and hobby life – damn, the guy recently created a working *accordion* using 2x C64s and some old disk cases!).
Sparta and I had some long chats, bouncing ideas back and forth about how to better lay the data out (you can read detailed notes on this below) and from there became great friends .. he even joined our demo group, Genesis Project, meaning that I could then show him exactly what I was making without worrying about it leaking to rival demo crews before release ;p
---
## Data Streaming Buffers
For each new line of our scrolling bitmap, we need 320 bytes for the bitmap data, 40 bytes for screen data and 20 bytes for colour data (we save 50% by pairing 4bit colours) .. giving 380 bytes in total. The most optimal format that we found was to split the buffers:-
```clike
//; Stream Buffer 0
unsigned char COLData_Blocks01234567[20][8]; //; 20 bytes, 8 blocks
unsigned char MAPData_Blocks0123[320][4]; //; 320 bytes, 4 blocks
unsigned char MAPData_Blocks4567[320][4]; //; 320 bytes, 4 blocks
unsigned char SCRData_Blocks0123[40][4]; //; 40 bytes, 4 blocks
unsigned char SCRData_Blocks4567[40][4]; //; 40 bytes, 4 blocks
unsigned char SpriteData_Blocks0123[8][11][4]; //; 8 pixels high, 11 columns wide, 4 blocks
unsigned char SpriteData_Blocks4567[8][11][4]; //; 8 pixels high, 11 columns wide, 4 blocks
```
Pretty strange, I know, but there’s some “magic” going on here. Within each stream buffer we have 8 full lines of data (ie. 408 x 64px). We batch like this as it gives us easy indexing – without needing to have individual functions to deal with each block – and also some locality to help with data compression. Getting this layout right was crucial to ensuring that the part ran at 25fps.
The streaming buffers are also double buffered… so we also have a second set of 8 lines of data reserved in memory – in the same format of course – and we alternately stream into one buffer while the other is being read from to fill new bitmap data as the screen scrolls.
Annoyingly, one of our streaming buffers needed to go under ROM .. we puzzled over this for a long time as, yeah, this is never a nice thing to deal with .. but it seemed unavoidable, we just couldn’t reorganize the memory in any way that would help.
So.. we had to do some clever trickery (costing valuable cycles) in order to use this. For the COL data, we needed to read this memory under ROM.. but then we had to also write to ROM to update the colour memory ($d800).
Here’s how nice the colour update code is when we’re using the buffer that’s -not- under ROM:-
```asm6502
VSBB_FastScrollColourMemory1:
.for (var Index = 0; Index < 20; Index++)
{
ldx ScrollData_Buffer1 + Index, y
stx VIC_ColourMemory + 1000 - 40 + (Index * 2) + 0
lda $9f00, x
sta VIC_ColourMemory + 1000 - 40 + (Index * 2) + 1
}
rts
```
(nb. the LDA $9f00, x is using a precomputed table that simply divides X by 16 – this is how we compress our COL data into 20 bytes instead of 40)
Here’s the same code using the buffer that’s under ROM – using some quite hacky self-modifying code and some “magic numbers” to hit the right memory addresses (shoot us!):-
```asm6502
VSBB_FastScrollColourMemory0:
inc $00
dec $01
.for (var Index = 19; Index >= 0; Index--)
{
ldx ScrollData_Buffer0 + Index, y
.if (Index != 0)
{
stx ColourBlitCode + (11 * Index) + 1 - 2
}
}
inc $01
dec $00
ColourBlitCode:
.for (var Index = 0; Index < 20; Index++)
{
.if (Index != 0)
{
ldx #$ff
}
stx VIC_ColourMemory + 1000 - 40 + (Index * 2) + 0
lda $9f00, x
sta VIC_ColourMemory + 1000 - 40 + (Index * 2) + 1
}
rts
```
So, yeah, as you can see, quite long winded … but … it works. The order of the data is intended to create a good balance between being in a nice format for quick blitting to the bottom of the screen and such that it compresses well to squeeze down the number of blocks to load from disk on each data streaming call. Getting this balance right took a lot of trial and error – with almost all the ideas here coming from our IRQ loading king, Sparta 🙂
---
## Memory Layout
Here’s how our final memory layout turned out for this demo part. There’re really very few little pockets of memory left – and, again, we’ve pretty much maxxed out the CPU. Given the amount of time it took to make this demo part, we were pretty lucky not to be looking at a large chunk of wasted time! (the counter to this is that, instead, we had something pretty damn special once it was all working)
```clike
//; MEMORY MAP
//; - Loaded
//; ---- Generated at runtime
//; ---- $02-04 Sparkle (Only during loads)
//; ---- $20-2f Various ZP variables
//; - $0280-$03ff Sparkle (ALWAYS)
//; ---- $0400-07ff Reserved demo stuff
//; - $0800-1fff Music
//; - $2000-7fff Code
//; ---- $8000-8aff Sprite Data 0
//; ---- $8c00-8fff Screen 0
//; - $9000-9dff Bitmap Data Buffer 0
//; - $9f00-9fff Nibble Conversion Table (Val = (Val >> 4))
//; ---- $a000-bf3f Bitmap 0
//; ---- $c000-caff Sprite Data 1
//; ---- $cc00-cfff Screen 1
//; - $d000-ddff Bitmap Data Buffer 1
//; ---- $e000-ff3f Bitmap 1
```
---
## SPOT – Improving Bitmap Colour Compression
In order to help file compression – vital for getting the data streaming working fast enough to hit the 25fps sweet spot – we needed some additional tricks. This is possibly a whole other blog post for Sparta to write at some point but, essentially, Sparta added some tricks to our bitmap conversion process to reorder and remap colours within the bitmap data – without changing the resultant bitmap (what you see on screen) at all.
My initial convertor used a “dumb” conversion.. for each char-square, it would scan to see what colours are used and it would place them into the SCR and COL data in the order that they appear. Sparta pointed out that this was far from optimal .. if we had, for example, a run of 4 chars using colours 3, 4 and 7, I could be generating SCR data of $34, $37, $43, $47 and COL data of $07, $04, $07, $03. A cleverer conversion would give use nicely compressable runs of colour – eg. SCR data being $34, $34, $34, $34 and COL data being $07, $07, $07, $07.
SPOT, Sparta’s Picture Optimizing Tool, started with this .. but added quite a few other tricks to improve compression.
We tested the tool against others that were available – and that have been made available since – and, trust me, it beat all of them in our test cases by quite a margin.
---
## Switching Between Single/Multicolour Bitmap Scrolling
The images used in the final demo were created by [Razorback](https://csdb.dk/scener/?id=27344) (of Genesis Project), aka Kristoffer Frisk. Some absolutely stunning work here, many commenting that this is the best art they’ve seen presented on the C64 in any form (demo, game or standalone graphics release). I have to wholeheartedly agree. Absolutely jawdropping work. In the below, the main multicolour bitmap is shown on the left .. and the hires bitmap on the right.
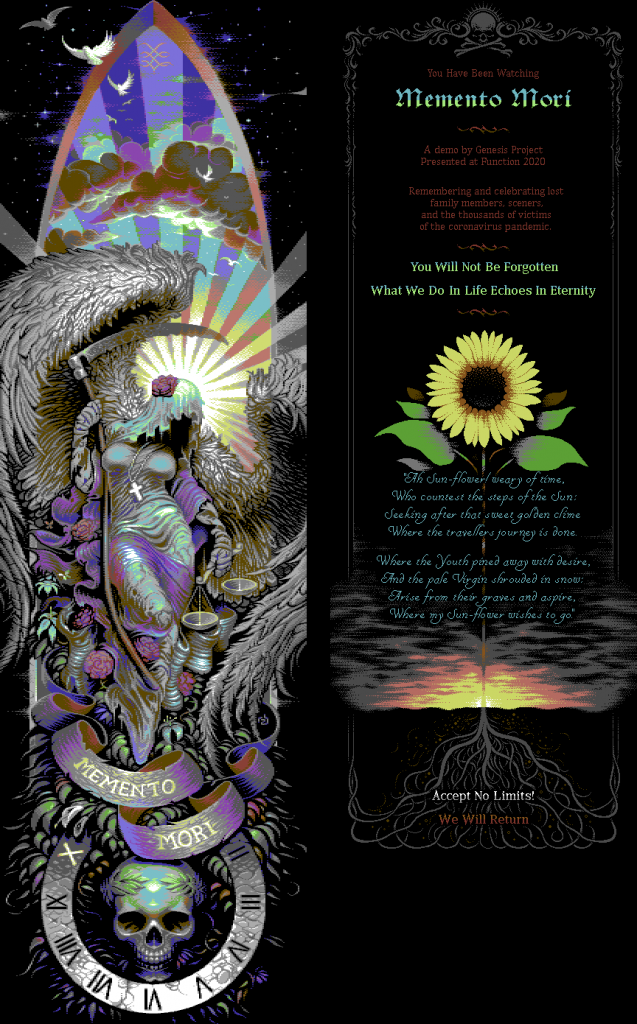
Here’s how we handled the switch between single and multicolour.. since the border-opening was all hardcoded into our fully unrolled assembly, we needed to use self-modifying-code (SMC) to inject the correct values to be setting on $d016 to enable/disable multicolour mode. Most of our D016 writes were using either dec/inc pairs (where the colour mode would persist – ie. we don’t need to change anything here)… but on occasion we had slightly different code, which did need changing, due to register value loss and/or needing slightly different timed instructions (eg. on badlines we would use an indexed write in order to lose an extra cycle (remember: C64/6510 doesn’t have a single cycle instruction, even NOPs take 2 cycles).
We did that using some code that looked like this:-
```clike
//; singlecolour mode
ldx #D016_Value_38Rows_HI
ldy #D016_Value_40Rows_HI
lda #$0e //; $16 - D016_Value_40Rows_HI(8)
stx ZP_D016_38Rows
sty ZP_D016_40Rows
jmp PatchD016Code
//; multicolour mode
ldx #D016_Value_38Rows_HI + $10
ldy #D016_Value_40Rows_HI + $10
lda #$be
stx ZP_D016_38Rows
sty ZP_D016_40Rows
jmp PatchD016Code
PatchD016Code:
stx D016_38Cols_Load_0 + 1
stx D016_38Cols_Load_1 + 1
... more code ...
sty D016_40Cols_Load_0 + 1
... more code ...
sta D016_IndexedSTA_74 + 1
rts
```
And here’re some examples of where this is getting injected:-
```clike
D016_IndexedSTA_7:
sta VIC_D016 - D016_Value_40Rows_MC,y //; 3 ( 2013) bytes 5 ( 3001) cycles
sty VIC_D016 //; 3 ( 2016) bytes 4 ( 3005) cycles
```
```clike
D016_40Cols_Load_0:
ldy #D016_Value_40Rows_MC //; 2 ( 77) bytes 2 ( 115) cycles
dec VIC_D016 //; 3 ( 80) bytes 6 ( 121) cycles
sty VIC_D016 //; 3 ( 83) bytes 4 ( 125) cycles
```
```clike
D016_38Cols_Load_7:
lda #D016_Value_38Rows_MC //; 2 ( 2504) bytes 2 ( 3734) cycles
sta VIC_D016 //; 3 ( 2507) bytes 4 ( 3738) cycles
sty VIC_D016 //; 3 ( 2510) bytes 4 ( 3742) cycles
```
---
## Wrapping Up
There’s quite a bit to take in from the above… it does show the amount of passion and energy that we put into this. All the little optimisation, data reorganisations, data mangling, the work done on Sparkle (the IRQ loader) and SPOT (picture optimiser), the sprite interleaving and so on .. every little piece was crucial to hit 25fps.
I had this effect working myself at 16.666fps and was “fairly” close to being able to do it at 25fps… but without the help from Sparta I would’ve failed.. and that would’ve definitely made this effect much, much less impressive. So my heartfelt thanks go to him.
Also, thanks to Razorback for this stunning piece of art. He delivered it early, before I even knew 100% for sure that the effect was possible – it actually spurred me on to get it done as, yeah, no way could I let this go to waste!
---
# Big Animating Sprite Logo
- URL: https://c64demo.com/big-animating-sprite-logo/
- Author: Raistlin (Genesis Project)
- Published: 2022-04-13
- Series: Memento Mori
- Level: intermediate
- Tags: 6502, c64, sprites, multiplexing, raster irqs, code generation
- Licence: CC BY 4.0 for text, CC BY 4.0 or MIT for code (https://creativecommons.org/licenses/by/4.0/)
- Releases: Memento Mori by Genesis Project (2020) https://csdb.dk/release/?id=195841
> How the big animating Genesis Project sprite logo in Memento Mori works on the C64: a 20px interleaved sprite carpet and delta-blitted frames.
Assumes: 20px sprite interleave (https://c64demo.com/sprite-interleave/); Stable raster IRQs
## Summary
Another effect that was well-liked from Memento Mori was the large, animating sprite logo – where we had “Genesis” and “Project” swinging on a circular arc around a large skull-themed picture.
This one is actually much easier to accomplish than most effects in the demo – though, of course, it was still quite a bit of work to get done.
Video:
*Video: [Memento Mori by Genesis Project](https://www.youtube.com/watch?v=ob5GHijbWSg), the full demo, including the Genesis Project sprite logo swinging around the skull.*
---
**How Does It Work?**
There are 2 main parts to this effect:-
- a sprite block/carpet of 8×9 24x21px sprites using 20px interleave (which in some ways makes it 8×10 sprites);
- a method of “blitting” our swinging text to the sprite data.
That’s all that is needed, really, and then all the glue that goes with that.
---
## The Sprite Carpet
Easy part first .. we need to implement a sprite carpet. In order to keep things simple, we went for the 20px technique so that we didn’t need to be concerned about badlines. This is done using some perfectly timed code. Here’s our main IRQ function:-
```asm6502
RotatingGP_MainIRQ:
:IRQManager_BeginIRQ(0, 0)
RotatingGP_SpriteLayerIndex:
ldy #$00
bne NotZero
lda #$ff
sta VIC_SpriteEnable
NotZero:
lda Row_SpriteYVals, y
.for (var SpriteIndex = 0; SpriteIndex < 8; SpriteIndex++)
sta VIC_Sprite0Y + (SpriteIndex * 2)
.for (var NOPs = 0; NOPs < 8; NOPs++)
nop
ldx Row_SpriteVals, y
lda #$fb
.for (var SpriteIndex = 0; SpriteIndex < 4; SpriteIndex++)
{
sax SpriteVals + SpriteIndex
stx SpriteVals + SpriteIndex + 4
.if (SpriteIndex != 3)
inx
}
cpy #0
bne Not0
//; --- do some non-timing crucial things here .. eg. update sprite X values
Not0:
iny
cpy #10
bne Not10
inc Signal_CustomSignal0 //; <-- signal for the non-IRQ blitting code to begin
lda #$f0
WaitMore:
cmp VIC_D012
bcs WaitMore
lda #$00
sta VIC_SpriteEnable
//; --- play music, update framecounters and other demo-specific gubbings here...
ldy #$00
Not10:
sty RotatingGP_SpriteLayerIndex + 1
:IRQManager_EndIRQ()
rti
```
Pretty simple stuff, really. Note lines 16 and 17 – these are important. For me, this gives me the exact HSYNC that I need, the exact point on the rasterline, where I need to (rapidly) update all the SpriteVals. This needs to be cycle-exact – get it at the wrong position and you’ll see glitching in your sprites every 20th line.
Also note: D012 values coming into this function are spaced by 20px… the values that I use are:-
```asm6502
Row_D012Vals:
.byte $00 //; first IRQ each frame has lots of time to setup the first row of sprites
.fill 1, $3a + (20 * (i + 1)) - 1 //; second IRQ is on line 77
.fill 8, $3a + (20 * (i + 2)) - 2 //; subsequents are every 20 lines - 96, 116, 136, 156, 176, 196, 216 and 236
```
---
## Firing Off The Blitter
With that done, we have 10 fairly low impact IRQs breaking up our frame. Outside of IRQs, we can do the grunt work of the animation.
This means that the non-IRQ function is essentially looping around a wait-blit-wait loop:-
```asm6502
WaitForSignal:
lda Signal_CustomSignal0
beq WaitForSignal
jsr DoBlitWork
lda #$00
sta Signal_CustomSignal0
beq WaitForSignal
```
Our final code was very slightly more complicated than that, in order to respond to the “our effect is finished” signal .. but that’s pretty much it.
---
## Delta Animation
Now… we need to consider how “DoBlitWork()” actually does the animation.. which is of course the crux of this effect. The answer? Very easily.
Here’re the pre-built animation frames that Jon Egg kindly made for this (I prototyped the effect with my own hacky animation – and Jon did the honours of turning it into something that looked awesome):-

That’s 16 frames of animation, 192x189px each.
The image below shows the “hit-mask” for the animation (red coloured area on the LHS) and the “static” part (the skull picture on the RHS) across the 16 frames. Although both of these are of course easy to determine, my C++ code was setup to cope with any animation – the hit-mask and static image are computed and so don’t need to be provided manually.

With that in place, the remaining work is very simple.
Note: technically, the animation is done at 25fps – we alternate between drawing the top part (Genesis) and bottom (Project). Personally I’m not a big fan of effects running at less than 50fps – but we can hide this somewhat by swinging the whole sprite array in X at full 50fps).
The blit code is nothing more than:-
```asm6502
BlitRotatingGP0:
lda BlitDataAddress + 0,x //; 3 ( 3) bytes 4 ( 4) cycles
sta SpriteMem + (4 * 64) + 3 //; 3 ( 6) bytes 4 ( 8) cycles
lda BlitDataAddress + 16,x //; 3 ( 9) bytes 4 ( 12) cycles
sta SpriteMem + (3 * 64) + 7 //; 3 ( 12) bytes 4 ( 16) cycles
lda BlitDataAddress + 32,x //; 3 ( 15) bytes 4 ( 20) cycles
sta SpriteMem + (3 * 64) + 8 //; 3 ( 18) bytes 4 ( 24) cycles
//; ... rest of blitting for logo 0 ...
sta SpriteMem + (25 * 64) + 40 //; 3 ( 5358) bytes 4 ( 7144) cycles
lda BlitDataAddress + 13520,x //; 3 ( 5361) bytes 4 ( 7148) cycles
sta SpriteMem + (25 * 64) + 42 //; 3 ( 5364) bytes 4 ( 7152) cycles
rts //; 1 ( 5365) bytes 6 ( 7158) cycles
BlitRotatingGP1:
lda BlitDataAddress + 27056,x //; 3 ( 5368) bytes 4 ( 7162) cycles
sta SpriteMem + (75 * 64) + 59 //; 3 ( 5371) bytes 4 ( 7166) cycles
lda BlitDataAddress + 27072,x //; 3 ( 5374) bytes 4 ( 7170) cycles
sta SpriteMem + (76 * 64) + 57 //; 3 ( 5377) bytes 4 ( 7174) cycles
//; ... rest of blitting for logo 1 ...
lda BlitDataAddress + 13536,x //; 3 (10828) bytes 4 ( 14442) cycles
sta SpriteMem + (46 * 64) + 10 //; 3 (10831) bytes 4 ( 14446) cycles
rts //; 1 (10832) bytes 6 ( 14452) cycles
```
Which ended up as 10,832 bytes and 14,452 cycles (7158 and 7294 cycles for logos 0 and 1 respectively).
Yes, we had plenty of spare CPU in this part.
The only remaining thing to explain, although I doubt an explanation is really needed, is that the BlitDataAddress stuff is generated from the delta animation data. We simply work our way from top to bottom of each logo, creating a table of the 16 values that hit each byte.
For additional optimisation, you can again look for duplicates of these 16 value blocks and reduce them down – due to the nature of the effect, there usually aren’t many.. but it all helps, it’s always worth doing a little extra work to save crucial memory.
Note that, to choose the frame of animation for each logo, which comes into the BlitRotatingGP functions in the X register, we use another sine-table with values in the [0, 15] range (to include the 16 frames of animation).
---
## Wrapping Up
As mentioned at the beginning, this part is really very simple indeed… a true smoke-and-mirrors animation effect – which we know that some groups love to make. Impressing the audience doesn’t always need to be about squeezing every byte, every cycle and every VIC trick out of the machine. Sometimes, you just need a good idea and a nice implementation.
---
# Big Layered Logo Mover
- URL: https://c64demo.com/big-parallax-logo-mover/
- Author: Raistlin (Genesis Project)
- Published: 2022-03-30
- Series: Memento Mori
- Level: hard
- Tags: 6502, c64, sprites, multiplexing, raster irqs, code generation
- Licence: CC BY 4.0 for text, CC BY 4.0 or MIT for code (https://creativecommons.org/licenses/by/4.0/)
- Releases: Memento Mori by Genesis Project (2020) https://csdb.dk/release/?id=195841
> How the huge swinging Memento Mori logo works on the C64: a packed charset logo over an x-expanded sprite layer, with interleaved IRQ code.
Assumes: 20px sprite interleave (https://c64demo.com/sprite-interleave/); Cycle-timed IRQ code with interleaved work (https://c64demo.com/memento-mori-all-border-double-dypp/); Charset splits with $d018
## Summary
In Memento Mori, we presented something that people hadn’t really seen on C64 before – a huge logo swinger with a huge sprite swinger as well… filling pretty much the whole screen for each layer. Take a look here:-
Video:
*Video: [Memento Mori by Genesis Project](https://www.youtube.com/watch?v=ob5GHijbWSg), the full demo, including the big Memento Mori logo swinging over its out-of-phase sprite layer.*
It was funny seeing people’s reactions to this .. for example, ChisWicked ([https://www.twitch.tv/chiswicked](https://www.twitch.tv/chiswicked) showed it during his Twitch stream, with Shallan50k ([https://www.twitch.tv/shallan50k](https://www.twitch.tv/shallan50k)) saying that it must be VSP (Variable Screen Position). I could’ve used VSP for this, I guess.. but I didn’t… I rarely use VSP, actually, as it’s one of those VIC bugs that has proven to be just a little bit unstable – some C64s needing repair in order to make them “VSP safe”… or, of course, LFT’s SafeVSP method can be used – but that’s so restrictive that it’s near-impossible to use for most demos and games, certainly if they want to do anything more complicated.
---
## How Does It Work?
There are 2 layers in use here:-
- full-screen charset-logo;
- near-full-screen underlaid x-expanded single colour sprite carpet.
The logo is a 3-colour (2 colours plus transparency) MC one at 2264x192px (1132×192 double pixels). Made by Facet.\

The sprite underlay comes from a 1024x160px image – once x-expanded, the “effective” size is of course 2048x160px:-

---
## Memory Considerations
Considering the above, there are several things we need to think about – and whether they can be compressed:-
- the big logo, uncompressed, would be 54,336 bytes (2264 * 192 / 8);
- the sprite underlay, 20,480 bytes (1024 * 160 / 8).
Neither is, of course, acceptable. So we compress…
---
## Compressing the Logo
For the logo, we started by packing it into multiple charsets – with the proviso that we had to fit a whole char-line into each charset. We start from the top char-line, pack that into a charset, then try adding the 2nd charline, 3rd, 4th, etc .. until it no longer fits.
Our first version used 8 charsets I believe (16k)… but we could do better .. so we had our tech artist, Ksubi, make some very minor modifications in order to align things better for packing. When finished, the changes were minor – you really couldn’t see them unless you directly compared the logos side by side, with a magnifying glass). And… the whole thing now fit into 3 charsets – a HUGE improvement.
Split into charsets, we of course needed a table of the char indices – at 2264x192px, this would be 283×24 chars .. ie. 6,792 bytes for our table. Optimising for duplicate strips, we get that down to 6144 bytes (256×24 – meaning that there were 27 dupe strips) plus 283 bytes for our dedupe table. Not a -massive- saving – but necessary – it brings the number of columns that we have to a perfectly round 256 (making it easy to index, of course).
---
## Compressing the Sprite Layer
The sprite layer we compress by the fact that the right half is just a 180-degree rotated copy of the left. That’s all that we do in this case, bringing it down to 10,240 bytes by storing just the 512x160px image.
There’s a small other change that I make to the sprite data – but I’ll go into that later on when I’m explaining how the sprite blit code works.

---
## Creating the IRQ Interleaved Code
My approach for this effect was much like my all-border double DYPP. I would have function(s) for doing all of the VIC-timed work – changing $d018 to split the charset at the appropriate points, multiplexing the sprites and so forth – and then interleaving within that the code for updating the screen as the logo scrolled.
This required:-
- changing $d018 at the correct moment (calculated by looking at how many char lines fit into each charset – in our case, it was 7, 9 and 8 char lines respectively.. so we would change $d018 at ~ lines 50, 50+(7*8) and 50+((7+9)*8)… ie. 50, 106 and 178;
- updating sprite y values around every 21 rasterlines – anywhere within the current sprite row will do;
- very precisely changing the sprite values every 20 rasterlines. We use the 20px sprite interleave technique – which means that for the 160px tall sprite carpet, we only need an array of 8×8 sprites (64 sprites in total, ie. 4k of memory);
- spare cycles used for plotting the screen.
I double-buffered the screen – so I needed 2 copies of the above, one for each. In total I had 12,782 bytes for this IRQ code.
Here’s a snippet of my code – again, generated using my “Raistlin Code Generator”:-
```asm6502
ldy ScreenColumns + 4 //; 3 ( 691) bytes 4 ( 919) cycles
lda PackedStrips + ( 0 * 256),y //; 3 ( 694) bytes 4 ( 923) cycles
sta ScreenAddress1 + ( 0 * 40) + 4 //; 3 ( 697) bytes 4 ( 927) cycles
lda PackedStrips + ( 1 * 256),y //; 3 ( 700) bytes 4 ( 931) cycles
sta ScreenAddress1 + ( 1 * 40) + 4 //; 3 ( 703) bytes 4 ( 935) cycles
lda PackedStrips + ( 2 * 256),y //; 3 ( 706) bytes 4 ( 939) cycles
sta ScreenAddress1 + ( 2 * 40) + 4 //; 3 ( 709) bytes 4 ( 943) cycles
lda #$f7 //; 2 ( 711) bytes 2 ( 945) cycles
Bank0_Row1_SP01:
ldx #$09 //; 2 ( 713) bytes 2 ( 947) cycles
sax SpriteVals0 + 0 //; 3 ( 716) bytes 4 ( 951) cycles
stx SpriteVals0 + 1 //; 3 ( 719) bytes 4 ( 955) cycles
Bank0_Row1_SP23:
ldx #$19 //; 2 ( 721) bytes 2 ( 957) cycles
sax SpriteVals0 + 2 //; 3 ( 724) bytes 4 ( 961) cycles
stx SpriteVals0 + 3 //; 3 ( 727) bytes 4 ( 965) cycles
Bank0_Row1_SP45:
ldx #$29 //; 2 ( 729) bytes 2 ( 967) cycles
sax SpriteVals0 + 4 //; 3 ( 732) bytes 4 ( 971) cycles
stx SpriteVals0 + 5 //; 3 ( 735) bytes 4 ( 975) cycles
Bank0_Row1_SP67:
ldx #$39 //; 2 ( 737) bytes 2 ( 977) cycles
sax SpriteVals0 + 6 //; 3 ( 740) bytes 4 ( 981) cycles
stx SpriteVals0 + 7 //; 3 ( 743) bytes 4 ( 985) cycles
nop //; 1 ( 744) bytes 2 ( 987) cycles
lda PackedStrips + ( 3 * 256),y //; 3 ( 747) bytes 4 ( 991) cycles
sta ScreenAddress1 + ( 3 * 40) + 4 //; 3 ( 750) bytes 4 ( 995) cycles
lda PackedStrips + ( 4 * 256),y //; 3 ( 753) bytes 4 ( 999) cycles
```
ScreenColumns is a 39-byte table that I update as the logo moves – it contains the column-indices stored within our 283-byte deduped column data… PackedStrips contains the unique columns from our logo – stored in a 256×24 arrangement for easy indexing:-
```clike
unsigned char PackedStrips[24][256];
```
So we can access any row of the data using:-
```asm6502
lda PackedStrips + (row * 256), y
```
Please also note lines 8-24 in the ASM above. With 20px interleave, there are 2 tricky things to overcome:-
- where you start to change SpriteVals needs to be precisely timed;
- you should change them all as quickly as possible.
So, yeah, this SAX trickery is needed to satisfy that last point. You don’t have time to be loading all 8 sprite indices, or using INX or other. Note: SAX stores X&A – so by setting A to #$f7 as I do, I’m blanking out bit 3 (8)… meaning that the above is setting the sprite indices to $01, $09, $11, $19, …, $39 respectively. We only save 8 cycles by using SAX – but 20px sprite interleave doesn’t work if you don’t do that.
Note: for a typical screen, we have sprite indices placed in a layout something like:-
| | | | | | | | |
|:---:|:---:|:---:|:---:|:---:|:---:|:---:|:---:|
| $00 | $08 | $10 | $18 | $20 | $28 | $30 | $38 |
| $01 | $09 | $11 | $19 | $21 | $29 | $31 | $39 |
| $02 | $0a | $12 | $1a | $22 | $2a | $32 | $3a |
| $03 | $0b | $13 | $1b | $23 | $2b | $33 | $3b |
| $04 | $0c | $14 | $1c | $24 | $2c | $34 | $3c |
| $05 | $0d | $15 | $1d | $25 | $2d | $35 | $3d |
| $06 | $0e | $16 | $1e | $26 | $2e | $36 | $3e |
| $07 | $0f | $17 | $1f | $27 | $2f | $37 | $3f |
But… as we swing the sprite layer, we scroll and wrap these indices also – so we could also have (for example) $18, $20, $28, $30, $38, $00, $08, $10 on the top row.
---
## Sprite Blitting
With all of that done, the final thing to consider is the blitting of the sprite data. Our max scrollspeed is 8px per frame – so we will only ever need to update one column of the sprite data at a time.
As we’re using 20px sprite interleave, it gets quite complicated. Here’s a snippet from the start of our code:-
```asm6502
DoLeftBlit:
ldy #(0 * 64 + 0 * 3) //; 2 ( 2) bytes 2 ( 2) cycles
lda BlitData + ( 0 * 64),x //; 3 ( 5) bytes 4 ( 6) cycles
sta (ZP_SpriteBlitPtr0),y //; 2 ( 7) bytes 5 ( 11) cycles
ldy #(0 * 64 + 0 * 3) //; 2 ( 9) bytes 2 ( 13) cycles
lda BlitData + ( 84 * 64),x //; 3 ( 12) bytes 4 ( 17) cycles
sta (ZP_SpriteBlitPtr1),y //; 2 ( 14) bytes 5 ( 22) cycles
ldy BlitData + ( 1 * 64),x //; 3 ( 17) bytes 4 ( 26) cycles
lda FlipByteTable,y //; 3 ( 20) bytes 4 ( 30) cycles
ldy #(0 * 64 + 1 * 3) //; 2 ( 22) bytes 2 ( 32) cycles
sta (ZP_SpriteBlitPtr0),y //; 2 ( 24) bytes 5 ( 37) cycles
ldy BlitData + ( 85 * 64),x //; 3 ( 27) bytes 4 ( 41) cycles
lda FlipByteTable,y //; 3 ( 30) bytes 4 ( 45) cycles
ldy #(0 * 64 + 1 * 3) //; 2 ( 32) bytes 2 ( 47) cycles
sta (ZP_SpriteBlitPtr1),y //; 2 ( 34) bytes 5 ( 52) cycles
ldy #(0 * 64 + 2 * 3) //; 2 ( 36) bytes 2 ( 54) cycles
lda BlitData + ( 2 * 64),x //; 3 ( 39) bytes 4 ( 58) cycles
sta (ZP_SpriteBlitPtr0),y //; 2 ( 41) bytes 5 ( 63) cycles
ldy #(0 * 64 + 2 * 3) //; 2 ( 43) bytes 2 ( 65) cycles
lda BlitData + ( 86 * 64),x //; 3 ( 46) bytes 4 ( 69) cycles
sta (ZP_SpriteBlitPtr1),y //; 2 ( 48) bytes 5 ( 74) cycles
```
And here’s some from a point where the sprite interleaving has just kicked in (the first change due to the interleave happens at rasterline 41):-
```asm6502
ldy #(1 * 64 + 19 * 3) //; 2 ( 679) bytes 2 ( 1038) cycles
lda BlitData + ( 40 * 64),x //; 3 ( 682) bytes 4 ( 1042) cycles
sta (ZP_SpriteBlitPtr0),y //; 2 ( 684) bytes 5 ( 1047) cycles
ldy BlitData + (103 * 64),x //; 3 ( 687) bytes 4 ( 1051) cycles
lda FlipByteTable,y //; 3 ( 690) bytes 4 ( 1055) cycles
ldy #(1 * 64 + 19 * 3) //; 2 ( 692) bytes 2 ( 1057) cycles
sta (ZP_SpriteBlitPtr1),y //; 2 ( 694) bytes 5 ( 1062) cycles
ldy #(1 * 64 + 20 * 3) //; 2 ( 696) bytes 2 ( 1064) cycles
lda BlitData + ( 20 * 64),x //; 3 ( 699) bytes 4 ( 1068) cycles
sta (ZP_SpriteBlitPtr0),y //; 2 ( 701) bytes 5 ( 1073) cycles
ldy #(1 * 64 + 20 * 3) //; 2 ( 703) bytes 2 ( 1075) cycles
lda BlitData + (104 * 64),x //; 3 ( 706) bytes 4 ( 1079) cycles
sta (ZP_SpriteBlitPtr1),y //; 2 ( 708) bytes 5 ( 1084) cycles
ldy #(2 * 64 + 0 * 3) //; 2 ( 710) bytes 2 ( 1086) cycles
lda BlitData + ( 42 * 64),x //; 3 ( 713) bytes 4 ( 1090) cycles
sta (ZP_SpriteBlitPtr0),y //; 2 ( 715) bytes 5 ( 1095) cycles
ldy #(2 * 64 + 0 * 3) //; 2 ( 717) bytes 2 ( 1097) cycles
lda BlitData + (126 * 64),x //; 3 ( 720) bytes 4 ( 1101) cycles
sta (ZP_SpriteBlitPtr1),y //; 2 ( 722) bytes 5 ( 1106) cycles
```
Note line 10 above.. it breaks the pattern as we go from (40*64), back to (20*64) and then continue as normal with (42*64).
Let me just give you my entire C++ function for generating the above:-
```clike
void BigMMLogo_OutputBlitCode(LPTSTR Filename)
{
CodeGen code(Filename);
for (int Loop = 0; Loop < 2; Loop++)
{
if (Loop == 0)
{
code.OutputFunctionLine(fmt::format("DoLeftBlit"));
}
else
{
code.OutputFunctionLine(fmt::format("DoRightBlit"));
}
for (int SpriteIndex = 0; SpriteIndex < 4; SpriteIndex++)
{
int MinYSrc0 = (SpriteIndex + 0) * 20;
int MaxYSrc0 = MinYSrc0 + 20;
int MinYSrc1 = (SpriteIndex + 4) * 20;
int MaxYSrc1 = MinYSrc1 + 20;
for (int YPixel = 0; YPixel < 21; YPixel++)
{
int SrcY0 = ((SpriteIndex + 0) * 21) + YPixel;
if (SrcY0 > MaxYSrc0)
SrcY0 -= 21;
int SrcY1 = ((SpriteIndex + 4) * 21) + YPixel;
if (SrcY1 > MaxYSrc1)
SrcY1 -= 21;
if (Loop != 0)
{
SrcY0 = 159 - SrcY0;
SrcY1 = 159 - SrcY1;
}
if ((SrcY0 & 1) == Loop)
{
code.OutputCodeLine(LDY_IMM, fmt::format("#({:d} * 64 + {:2d} * 3)", SpriteIndex, YPixel));
code.OutputCodeLine(LDA_ABX, fmt::format("BlitData + ({:3d} * 64)", SrcY0));
code.OutputCodeLine(STA_IZY, fmt::format("ZP_SpriteBlitPtr0"));
}
else
{
code.OutputCodeLine(LDY_ABX, fmt::format("BlitData + ({:3d} * 64)", SrcY0));
code.OutputCodeLine(LDA_ABY, fmt::format("FlipByteTable"));
code.OutputCodeLine(LDY_IMM, fmt::format("#({:d} * 64 + {:2d} * 3)", SpriteIndex, YPixel));
code.OutputCodeLine(STA_IZY, fmt::format("ZP_SpriteBlitPtr0"));
}
if ((SrcY1 & 1) == Loop)
{
code.OutputCodeLine(LDY_IMM, fmt::format("#({:d} * 64 + {:2d} * 3)", SpriteIndex, YPixel));
code.OutputCodeLine(LDA_ABX, fmt::format("BlitData + ({:3d} * 64)", SrcY1));
code.OutputCodeLine(STA_IZY, fmt::format("ZP_SpriteBlitPtr1"));
}
else
{
code.OutputCodeLine(LDY_ABX, fmt::format("BlitData + ({:3d} * 64)", SrcY1));
code.OutputCodeLine(LDA_ABY, fmt::format("FlipByteTable"));
code.OutputCodeLine(LDY_IMM, fmt::format("#({:d} * 64 + {:2d} * 3)", SpriteIndex, YPixel));
code.OutputCodeLine(STA_IZY, fmt::format("ZP_SpriteBlitPtr1"));
}
code.OutputBlankLine();
}
}
code.OutputCodeLine(RTS);
code.OutputBlankLine();
}
}
```
Let’s talk about lines 42-48 and 55-61 now – since these include a “cunning plan” that I hinted at in the “Compressing the Sprite Layer” block above… here, on alternate pixel lines, I am x-flipping the pixel data. If you remember, the right side of our background sprite image is the same as the left side but rotated by 180 degrees… which is the same as flipping the image in both X and Y. A flip in X will result in all the bits of our data being flipped left-to-right as well. If we had 2 functions for “flipped or not”, the version needing to flip the data would be much more expensive than the other – meaning that we’d be using much more cycles drawing the right-side the left.
We balance that by flipping exactly half of our data – so that we -always- need to flip half the data, and not the other half, whether we’re drawing the left or the right side… so, we have 2 blit functions, DoLeftBlit and DoRightBlit, that use the exact same number of cycles (2174 cycles in this case).
The flip happens in ASM here:-
```asm6502
ldy BlitData + (103 * 64),x //; 3 ( 687) bytes 4 ( 1051) cycles
lda FlipByteTable,y //; 3 ( 690) bytes 4 ( 1055) cycles
ldy #(1 * 64 + 19 * 3) //; 2 ( 692) bytes 2 ( 1057) cycles
sta (ZP_SpriteBlitPtr1),y //; 2 ( 694) bytes 5 ( 1062) cycles
```
FlipByteTable is just a 256-byte table where I’ve, yeah, x-flipped the bits. Something like this:-
```clike
unsigned char* FlipByteLookup = new unsigned char[256];
for (int Index = 0; Index < 256; Index++)
{
FlipByteLookup[Index] = FlipByte(Index);
}
WriteBinaryFile(L"Out\\6502\\FlipByteLookup.bin", FlipByteLookup, 256);
```
```clike
unsigned char FlipByte(unsigned char Byte)
{
unsigned char Value = 0;
Value |= (Byte & 1) << 7; //; Bit 0 => Bit 7
Value |= (Byte & 2) << 5; //; Bit 1 => Bit 6
Value |= (Byte & 4) << 3; //; Bit 2 => Bit 5
Value |= (Byte & 8) << 1; //; Bit 3 => Bit 4
Value |= (Byte & 16) >> 1; //; Bit 4 => Bit 3
Value |= (Byte & 32) >> 3; //; Bit 5 => Bit 2
Value |= (Byte & 64) >> 5; //; Bit 6 => Bit 1
Value |= (Byte & 128) >> 7; //; Bit 7 => Bit 0
return Value;
}
```
---
## Swinging the Logo and Sprite Data
I won’t go into too much detail here as the remaining code should be pretty self-explanatory…
With updating the columns for the logo swinger, I simply use the following function – where input X is set to be the x-char position of our swing:-
```asm6502
SetScreenColumns:
.for (var XChar = 0; XChar < 39; XChar++)
{
lda LogoStripIndices + XChar, x
sta ScreenColumns + XChar
}
rts
```
To use this, of course, we then just need 2 sintables – one with the value that goes into $d016 (which should be something like “7 – (sinx % 8)”, the other with the char distance (“sinx / 8”).
Finally, here’s my code for swinging and issuing the call to blit the sprite data to the edges of the screen:-
```asm6502
SpriteBlitAddresses_Lo:
.byte 0, 1, 2
.byte 0, 1, 2
.byte 0, 1, 2
.byte 0, 1, 2
.byte 0, 1, 2
.byte 0, 1, 2
.byte 0, 1, 2
.byte 0, 1, 2
SpriteBlitAddresses_Hi:
.byte >(Base_BankAddress + 0 * 8 * 64), >(Base_BankAddress + 0 * 8 * 64), >(Base_BankAddress + 0 * 8 * 64)
.byte >(Base_BankAddress + 1 * 8 * 64), >(Base_BankAddress + 1 * 8 * 64), >(Base_BankAddress + 1 * 8 * 64)
.byte >(Base_BankAddress + 2 * 8 * 64), >(Base_BankAddress + 2 * 8 * 64), >(Base_BankAddress + 2 * 8 * 64)
.byte >(Base_BankAddress + 3 * 8 * 64), >(Base_BankAddress + 3 * 8 * 64), >(Base_BankAddress + 3 * 8 * 64)
.byte >(Base_BankAddress + 4 * 8 * 64), >(Base_BankAddress + 4 * 8 * 64), >(Base_BankAddress + 4 * 8 * 64)
.byte >(Base_BankAddress + 5 * 8 * 64), >(Base_BankAddress + 5 * 8 * 64), >(Base_BankAddress + 5 * 8 * 64)
.byte >(Base_BankAddress + 6 * 8 * 64), >(Base_BankAddress + 6 * 8 * 64), >(Base_BankAddress + 6 * 8 * 64)
.byte >(Base_BankAddress + 7 * 8 * 64), >(Base_BankAddress + 7 * 8 * 64), >(Base_BankAddress + 7 * 8 * 64)
DontBlit:
rts
FillNewSpriteData:
ldy FrameOf256
FillNewSpriteData_Y:
Ptr_SinTable_2:
ldx SinTables_BlitInputColumn, y
bmi DontBlit
Ptr_SinTable_1:
lda SinTables_BlitOutputColumn, y
tay
lda SpriteBlitAddresses_Lo, y
sta ZP_SpriteBlitPtr0 + 0
sta ZP_SpriteBlitPtr1 + 0
lda SpriteBlitAddresses_Hi, y
sta ZP_SpriteBlitPtr0 + 1
ora #$01
sta ZP_SpriteBlitPtr1 + 1
cpx #$40
bcc LeftBlit
txa
eor #$7f
tax
jmp DoRightBlit
LeftBlit:
jmp DoLeftBlit
```
So we have 2 tables …
- SinTables_BlitInputColumn contains:-
- $ff if we don’t need to blit (eg. for the extremities of the logo – beyond the first row of all-zeros)
- $00-$3f for the column index for left-blitting
- $40-$7f for the column index for right-blitting (we EOR it with $7f so it’s flipped back to $00-$3f)
- SinTables_BlitOutputColumn contains the spritedata column (0-23) into which we need to blit.
I should really leave that as a “for the user to do” section .. but, hell, here’s my function for generating all the sine data that I use for this effect – please don’t laugh too hard at my outdated C++ …
```clike
void BigMMLogo_CalcSinTables(LPTSTR OutSinBINFilename)
{
static const int SinTableLength = 512;
static const double Amplitude = 1024.0 - 160.0;
int SinTable[SinTableLength];
for (int Index = 0; Index < SinTableLength; Index++)
{
double Angle = ((double)Index * 2 * PI) / (double)SinTableLength + 48 * PI / 32;
double SinVal = sin(Angle);
double XVal = SinVal * Amplitude + Amplitude;
int iXVal = (int)XVal;
SinTable[Index] = iXVal;
}
int LogoSinTable[SinTableLength];
for (int Index = 0; Index < SinTableLength; Index++)
{
double Angle = ((double)Index * 2 * PI) / (double)SinTableLength + 50 * PI / 32;
double SinVal = sin(Angle);
double XVal = SinVal * 980 + 980;
int iXVal = (int)XVal;
LogoSinTable[Index] = iXVal;
}
unsigned char cSinTables[6][SinTableLength];
for (int Index = 0; Index < SinTableLength; Index++)
{
int LastIndex = (Index + SinTableLength - 1) % SinTableLength;
int XVal = SinTable[Index];
int XColumn = XVal / 16;
int LastXVal = SinTable[LastIndex];
int LastXColumn = LastXVal / 16;
XVal = max(0, XVal);
int SpriteX = 47 - (XVal % 48);
cSinTables[0][Index] = (unsigned char)SpriteX;
int SpriteIndex = 7 - (XVal / 48) % 8;
cSinTables[1][Index] = (unsigned char)SpriteIndex;
int InputBlitColumn = 0xff;
int OutputBlitColumn = 0x00;
if (XColumn < LastXColumn)
{
InputBlitColumn = max(0, min(127, XColumn));
OutputBlitColumn = (23 - (((SpriteIndex + 7) % 8) * 3 + SpriteX / 16)) % 24;
}
if (XColumn > LastXColumn)
{
InputBlitColumn = max(0, min(127, XColumn + 23));
OutputBlitColumn = (23 - (((SpriteIndex + 7) % 8) * 3 + SpriteX / 16) + 23) % 24;
}
cSinTables[2][Index] = (unsigned char)OutputBlitColumn;
cSinTables[3][Index] = (unsigned char)InputBlitColumn;
int LogoXPosThisFrame = min(LogoSinTable[Index], 245 * 8 - 1);
int LogoXPosNextFrame = min(LogoSinTable[(Index + 1) % SinTableLength], 245 * 8 - 1);
cSinTables[4][Index] = (7 - (LogoXPosThisFrame & 7)) + 0x10;
cSinTables[5][Index] = (LogoXPosNextFrame / 8);
}
WriteBinaryFile(OutSinBINFilename, cSinTables, sizeof(cSinTables));
}
```
---
## Wrapping Up
And there we have it … if anything, this effect should demonstrate quite nicely that you don’t need complex VIC trickery in order to pull off cool and dramatic demo effects. The work done in C++ in generating the assembly code, the compressed and half-flipped data formats and so on and so forth .. all of that is equally as important, if not more than, the resultant 6510 ASM code.
Until next time!
PS. Since I mentioned ChisWicked’s Twitch stream above .. feel free to checkout his viewing of Memento Mori, and commentary, here:-
Video:
*Video: [Function 2020 demo party C64 review by ChisWicked](https://www.youtube.com/watch?v=4h3Dn1v7r-w), with his stream's viewing of and commentary on Memento Mori.*
---
# Star Wars Scrollers
- URL: https://c64demo.com/star-wars-scrollers/
- Author: Raistlin (Genesis Project)
- Published: 2022-03-22
- Level: hard
- Tags: 6502, c64, demoscene, scrollers, bitmap, code generation
- Licence: CC BY 4.0 for text, CC BY 4.0 or MIT for code (https://creativecommons.org/licenses/by/4.0/)
- Releases: Rivalry by The Seniors (Bonzai, Censor Design, Fairlight, Genesis Project and Offence) (2019) https://csdb.dk/release/?id=177023; The Dive by Genesis Project (2019) https://csdb.dk/release/?id=179128
> How to make a Star Wars scroller on the C64 with bit-picked font data and cyclic scroll buffers, plus a short history of the effect.
Assumes: Setting up charset, bitmap and sprite screens; Unrolled LDA/ORA/STA plotting from pre-shifted font data (https://c64demo.com/dxycp-scrollers/)
## Summary
We’ve all seen the openings to the Star Wars movies, with the scrawl starting just below the camera and moving out into the distance, the text slowly getting smaller and smaller until it fades away. Here’s one that I made earlier, featured in 2019’s Rivalry demo by The Seniors (Bonzai, Censor, Fairlight, Genesis Project and Offence), released at Revision 2019 (and winning the Oldschool Demo Competition):-
Video:
*Video: [Rivalry by The Seniors](https://www.youtube.com/watch?v=P9CfUbRuMGc), the full demo, including the Star Wars scroller aimed at Censor Design.*
This is what I would call a “classic” Star Wars scroller. In this case, following the theme and nature of the demo, it’s making a jibe at Censor Design who, just 6 months or so prior to this, had release “The Star Wars Demo” and managed to do so without incorporating a Star Wars Scroller – much to the chagrin of many (not that it mattered – their demo still took home the coveted 1st place at X2018).
---
## History of Star Wars Scrollers
It’s worth looking back at the various different Star Wars scrollers that have been created before.
## Argon Gew Up by Argon (1989)
Possibly the first such scroller (thanks to Bjorn Odendahl for pointing out that I’d omitted it in an earlier version of this blog). Really nice ROL/ROR-based scroller. No Y-packing, unfortunately, so it does look a little bit strange along with the coolness 😉 :-
Video:
*Video: [Argon Grew Up by Argon (1989)](https://www.youtube.com/watch?v=mYFAkBrHVe8): a ROL/ROR scroller with no Y-packing.*
## Bring Me Edelgas by Masters’ Design Group (1989)
Not quite a Star Wars scroller – but very similar. A very different technique used here, too, with expanded sprites, in a kind of “who needs smooth timing?” x-position tech-tech and scaling using precalculated sprites of various sizes. I really like it, actually, definitely very very nice for 1989.
NB. Sorry everyone, the YouTube video that I was linking to was removed by the author… and there seem to be no more recordings of this demo on there right now…
## Eldorado by Origo Dreamline (1990)
Another ROR/ROL scroller, with perspective. Looks a little bit messy and hard to read the further back the text goes, especially with the text so tightly packed in Y, but still very impressive for it’s time.
Video:
*Video: [Eldorado by Origo Dreamline (1990)](https://www.youtube.com/watch?v=OBNDlIULVVE): a ROL/ROR scroller with perspective.*
## Trick and Treat by Fairlight, Offence and Prosonix (2012)
Stein Pedersen was the next to give the scrawl a go… and he came up with something silky-smooth. By using a 3×5 font, he was able to make the scroller work at 50fps. Blocky, yes, but it’s a thing of beauty running at this framerate:-
Video:
*Video: [Trick and Treat by Fairlight, Offence and Prosonix](https://www.youtube.com/watch?v=aT3pkqmxxLY): the 3x5 font scrawl at 50fps.*
## The Phoenix Code by Bonzai (2016)
In the X2016 winning demo, Ricky of Bonzai presented a really nice, proper-font scrawl. None of the nasty definition loss as the scroller moved into the distance. Not 50fps, sure, there’s just too much data being blit per frame here, but it’s hard to tell that at first glance. Here, the text is possibly just a little bit too much spaced out in Y but, otherwise, can’t be faulted at all:-
Video:
*Video: [The Phoenix Code by Bonzai](https://www.youtube.com/watch?v=L9HUSKzy918): a full-font scrawl that keeps its definition into the distance.*
## The Dive by Genesis Project (2019)
Three or four months after the release of Rivalry, I recycled the scrawl code in The Dive – but with a slight difference. I reversed the direction of the scroller, so that it was coming out of the screen rather than heading into it, and I added a wibbly reflection of the scroller on the water as well. JackAsser liked it, anyway, as you’ll hear from the whoops in the live recording from Gubbdata 2019 here:-
Video:
*Video: [The Dive by Genesis Project, live recording](https://www.youtube.com/watch?v=PTZ3Uiv55cs): the reversed scrawl with its reflection on the water.*
---
## Prerequisites
You probably need to know at least the very basics of C64 demo coding, such as how to:-
- setup charset, bitmap, sprites
That’s probably all that you need, this time around… nothing too technical to describe here – it’s all just about clever data and ASM generation.
---
## How It Works
The way my own Star Wars scrollers work is to essentially have all the font-date pre-packed into all the forms needed to do simple LDA/ORA/STA work in drawing the scrawl. If you take a look at the image below, you can see each text-column highlighted in yellow/blue. At the bottom, the text is 16px wide, at the top, 8px. Given the minimum width of 8px, that means that each target byte will be affected by at most 2 characters in our scrolltext.
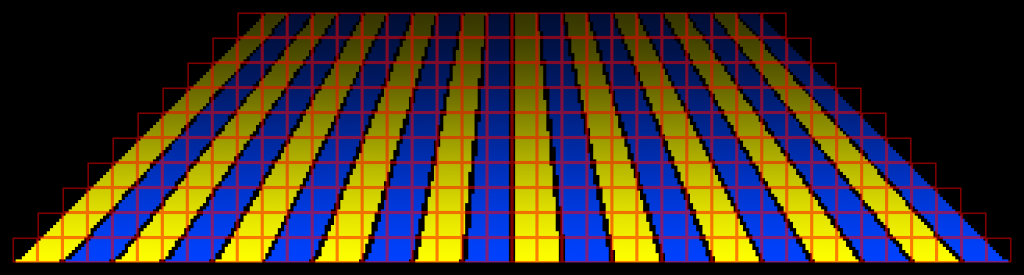
There needs to be a calculation mapping from screenspace (320x80px) to our flat scrollplane (320x128px). The X component of that is easy enough – just do an iteration for the width from 320 to 160px across the height (80px) and then linearly interpolate from -width/2 to +width/2. Use texel-centre math to make it a little smoother. For Y, you really just need to play around until you find something that works – I found a weird inverse calculation that kinda worked well for me:-
```clike
float ZValue = 0.6f + (((float)YScreenPos) / ((float)STARWARS_HEIGHT)) * 0.4f;
int YLookupPos = 499 - (int)(299.0f / ZValue);
```
With this, we can use some very simple code like the following to plot each part of the scroller:-
```asm6502
PlotLine11:
iny //; 1 ( 3798) bytes, 2 ( 5054) cycles
ldx.abs ScrollData + (0 * $100), y //; 3 ( 3801) bytes, 4 ( 5058) cycles
bpl PlotLine11_Yes //; 2 ( 3803) bytes, 2 ( 5060) cycles
jmp.abs PlotLine12 //; 3 ( 3806) bytes, 3 ( 5063) cycles
PlotLine11_Yes:
lda.abs FontData_14, x //; 3 ( 3809) bytes, 4 ( 5067) cycles
sta.abs BitmapAddress + (5 * 320) + (1 * 8) + 7 //; 3 ( 3812) bytes, 4 ( 5071) cycles
lda.abs FontData_15, x //; 3 ( 3815) bytes, 4 ( 5075) cycles
sta.abs BitmapAddress + (5 * 320) + (2 * 8) + 7 //; 3 ( 3818) bytes, 4 ( 5079) cycles
lda.abs FontData_16, x //; 3 ( 3821) bytes, 4 ( 5083) cycles
ldx.abs ScrollData + (1 * $100), y //; 3 ( 3824) bytes, 4 ( 5087) cycles
ora.abs FontData_8, x //; 3 ( 3827) bytes, 4 ( 5091) cycles
sta.abs BitmapAddress + (5 * 320) + (3 * 8) + 7 //; 3 ( 3830) bytes, 4 ( 5095) cycles
lda.abs FontData_9, x //; 3 ( 3833) bytes, 4 ( 5099) cycles
sta.abs BitmapAddress + (5 * 320) + (4 * 8) + 7 //; 3 ( 3836) bytes, 4 ( 5103) cycles
```
nb. don’t worry about how I’m indexing ScrollData here just yet – I’ll explain that later. It’s quite cunning 😉
In order to get our heads around the data format and how the blitting works, let’s isolate a single byte that we need to blit – choosing one deep within the scrawl:-
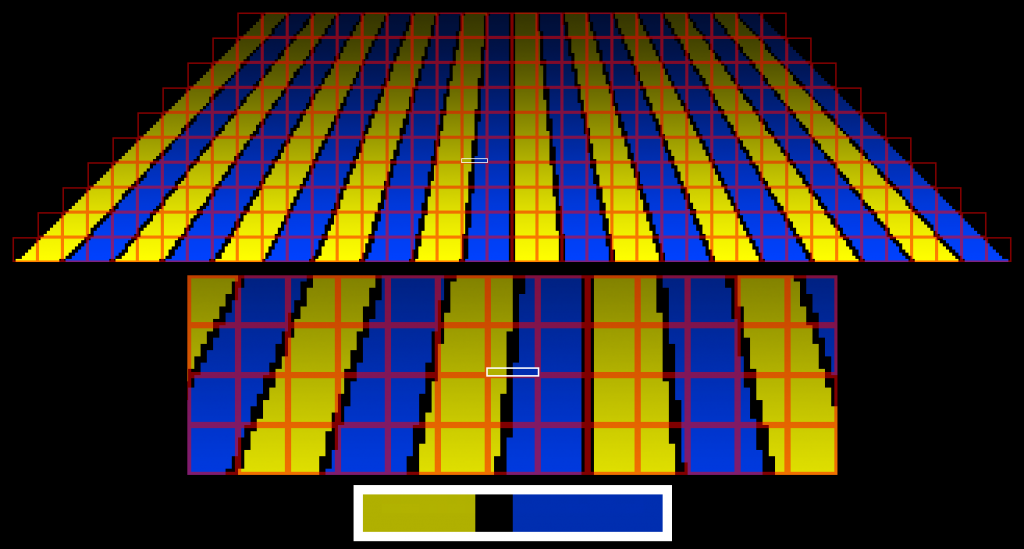
Here, we have 3px of the left hand character, a 1px space and then 4px from the right hand character. So we can consider the two parts that will need to be ORA’d together to be something like this
```clike
xxx----- ([0-15],[0-15],[0-15],UNUSED,UNUSED,UNUSED,UNUSED,UNUSED) //; 3px of left-hand-char
----xxxx (UNUSED,UNUSED,UNUSED,UNUSED,[0-15],[0-15],[0-15],[0-15]) //; 4px right-hand-char
```
Due to the nature of the data, each [0-15] part will be ascending, too. The data that we need for blitting will be the font “compressing” from 16px down to 8px the closer to the top (“far distance”) – so it’s essentially skipping bits. Eg. at 8px, we might have (0,2,4,6,8,10,12,14). It doesn’t make any difference to our code that the data falls out in this form – but it means that we’re likely to need a lot less memory for our precalculated bitfield data.
Taking the example above again, we could have bits (11, 13, 15) for the left (yellow) and bits (0, 2, 4, 6) for the right (blue). Our code-generator (C++ code in my case) then stores this into a data table.
---
## Bit-Picked Compressed Font Data
I’ll explain why in the next section, but our font has one very nice characteristic that allows us to compress the data into a very usable form. There are only 28 unique 16x1px segments within the entire font. Ksubi, again, is our technical font-master. He built his font using CharPad, creating 16x1px tiles and using these to build the font characters. We cheated slightly to get the data size down – omitting Q and only including a small number of special characters (dash ‘-‘, dot ‘.’ and ‘4’ (an odd choice, I know, but go hassle F4CG about it, who we wanted to greet in our scroller :-p)).
By doing so, we get our precalculated data down to 28bytes per unique bit-set. It also means that our scrolltext needs to be converted into ~16bytes, becoming the tile index into the 16×1 tileset (nb. this can be done at runtime, of course, as memory is an expensive commodity on C64).
In creating our unique bit-picked font data, we then end up with something like:-
```asm6502
FontData_309: //; 3_4_6_8_9_11_13_14
.byte $00, $7c, $fe, $c7, $83, $ff, $fc, $fe, $87, $fc, $7f, $ff, $c0, $80, $bf, $c3
.byte $30, $03, $07, $c7, $ef, $bb, $bb, $93, $fc, $7e, $c6, $fc
FontData_310: //; 4_6_8_9_11_13_14_255
.byte $00, $f8, $fc, $8e, $06, $fe, $f8, $fc, $0e, $f8, $fe, $fe, $80, $00, $7e, $86
.byte $60, $06, $0e, $8e, $de, $76, $76, $26, $f8, $fc, $8c, $f8
FontData_311: //; 1_3_5_6_8_10_11_13
.byte $00, $3e, $7f, $c3, $c1, $ff, $fe, $ff, $c3, $fe, $3f, $7f, $c0, $c0, $df, $c1
.byte $18, $01, $03, $e7, $f7, $fd, $d9, $c9, $7e, $3f, $67, $7e
FontData_312: //; 9_10_12_14_255_255_255_255
.byte $00, $c0, $e0, $30, $30, $f0, $c0, $e0, $30, $e0, $f0, $f0, $00, $00, $f0, $30
.byte $00, $30, $30, $70, $f0, $f0, $b0, $30, $c0, $e0, $60, $e0
FontData_313: //; 255_255_255_255_255_2_4_5
.byte $00, $03, $07, $06, $04, $07, $07, $07, $04, $07, $03, $07, $06, $04, $04, $06
.byte $00, $00, $00, $07, $07, $05, $04, $04, $07, $03, $07, $03
FontData_314: //; 1_3_4_6_8_9_11_13
.byte $00, $3e, $7f, $e3, $c1, $ff, $fe, $ff, $c3, $fe, $3f, $7f, $e0, $c0, $df, $e1
.byte $18, $01, $03, $e3, $f7, $dd, $dd, $c9, $7e, $3f, $63, $7e
.fill 4, $00 //; pad to 256-byte boundary to prevent page crossing costs
```
In our case, we ended up with 395 of these – 11,232 bytes of memory in total.
---
## Cyclical Scroll Buffers
The Star Wars scrawl in Rivalry was 80px tall. The actual non-perspective data moving through this was taller, however, at 128px. Some of the horizontal pixel lines would be removed in order to compress the scroller in Y – the further that the scroller gets into the distance, the more lines are removed, compressing the text down in Y to create perspective.
As each on-screen character starts at 16px-wide, and we start the scroller at 320px wide, we have 20 individual columns of scrolldata. Into these, we place each tile index of the scroller. In it’s shortest form, that would be 20x 128-byte blocks (2560 bytes total). But … so that we didn’t need to mess around scrolling this data (it would be expensive due to the size), we opted for cyclic memory buffers. To do this, we simply duplicated the data in each buffer – so ScrollData0 would be repeated at ScrollData0 + 128.
When blitting the data to the screen, we then simply set Y to an appropriate value at the top, increase it by an appropriate amount for each line of the screen (not always by 1 – we might increase it by 2 or 3 in order to skip lines, as mentioned above), and we simply read the scrolldata for each column with something like:-
```asm6502
ldx.abs ScrollData + (ColumnIndex * $100), y //; 3 ( 3801) bytes, 4 ( 5058) cycles
```
Where ColumnIndex is a number in the [0, 20) range.
As each line of the scroller is quite costly, and an entire line can be completely empty, we also allow an early-out. Where we can get away with not drawing a whole line, we simply insert a negative number into the scrolldata ($ff for example) and then detect this with:-
```asm6502
ldx.abs ScrollData + (0 * $100), y //; 3 (23552) bytes, 4 ( 31364) cycles
bpl PlotLine75_Yes //; 2 (23554) bytes, 2 ( 31366) cycles
jmp.abs PlotLine76 //; 3 (23557) bytes, 3 ( 31369) cycles
PlotLine75_Yes:
//; ... all the blit code here
PlotLine76:
iny
iny
```
Or something to that effect.
---
## Lazy Rendering
For my Star Wars scrawl, in The Dive, the entire render function was over 32000 cycles and 24000 bytes – plus the 11000+ for the font data. It doesn’t matter so much that this is more cycles than we have in a frame. You can either use the IRQ-in-an-IRQ method or you can issue the rendering from outside IRQs completely. No need to worry about double-buffering, just keep running the plot routine continuously. The nature of these scrollers, you just notice an extra little bit of “wobbling” in the scroller. Call it “tearing” if you like – but, honestly, so long as you don’t vsync before each call to the plot routine, you’re unlikely to notice anything – the tear will be in a completely different position each frame (unless you’re extremely unlucky with your timing – if so, it can be easily fixed anyway).
---
## The Reflection
The Dive’s Star Wars scroller also has that cool-looking reflection at the bottom of the screen. I’ve been asked how that was done – and, honestly, the answer is “easily”.
When blitting to the bitmap (or wherever), we just do a little randomised, scaled operation to decide whether or not, and where, we should repeat the byte that we’ve just written – but writing it to the bottom of the screen instead.
I scale to half-height and use C++’s rand() function like this:-
```clike
if (YPos % 2 == 0)
{
if(rand() % 2 == 0)
{
int YPos1 = 167 - (YPos / 2);
if (YPos0 != YPos1)
{
PlotterCode.OutputCodeLine(STA_ABS, fmt::format("BitmapAddress + ({:d} * 320) + ({:d} * 8) + {:d}", YPos1 / 8, XBytePos, YPos1 % 8));
}
}
}
```
I then just do a bit of raster-trickery to wobble the reflection area by changing $d016 each line too.
Works pretty nicely I think..?
---
## Wrapping Up
Hopefully this gave you some ideas, anyway, and will help you think up even better ways of doing these effects .. will you be the one who creates a smooth-font 50fps Star Wars scroller on C64? I’d love to see that one day.
---
# DXYCP Scrollers
- URL: https://c64demo.com/dxycp-scrollers/
- Author: Raistlin (Genesis Project)
- Published: 2022-03-20
- Level: hard
- Tags: 6502, c64, scrollers, bobs, sprites, multiplexing, code generation
- Licence: CC BY 4.0 for text, CC BY 4.0 or MIT for code (https://creativecommons.org/licenses/by/4.0/)
- Releases: Christmas Megademo by Atlantis, Bonzai, Genesis Project, Lethargy and Offence (2020) https://csdb.dk/release/?id=198283; The Dive by Genesis Project (2019) https://csdb.dk/release/?id=179128
> DXYCP scrollers on the C64: pre-shifted fonts, generated LDA/ORA/STA plot code, and plotting to bitmap, charset or multiplexed sprites.
Assumes: Setting up charset, bitmap and sprite screens; Double buffering
## Summary
With DYCPs being so popular in the early days of the demoscene (and still, to many, today), some looked for new ideas for where to take these next. The most obvious improvement was to allow full X and Y movement – inspired by the Commodore Amiga’s BOBs (Blitter Objects) perhaps.
And so, the DXYCP was born.
In scroller form, these would usually feature relatively small fonts – because to draw these, on C64, could be pretty expensive.
Video:
*Video: [Christmas Megademo](https://www.youtube.com/watch?v=p0ddV07WC8o&t=550s), from 9:10: the Christmas tree DXYCP scroller.*
---
## Types of DXYCP
As with most C64 effects, there are several ways of doing this …
1. how flexible should the plotting be in terms of movement?
- fully-flexible, so that each character can move anywhere within the plot region;
- partially-flexible, eg. having a fixed X Position but having a variable Y
- fixed, such that the plot-shape is static and unchanging
2. where are we plotting to?
- a bitmap screen?
- a fixed charset – usually these will be laid out on screen as something like 32×8 or 16×16 chars
- sprites – offering the ability to draw these on top of bitmap and/or charset logos etc…
3. is this a scroller, an animation, or something else?
These are the main considerations. Over the last 35+ years, I’ve done all of these .. but more recently have focused on one particular type: fixed-shape scrollers onto either sprites or bitmaps. Here’re a few of such, dating from 1991 through to 2022:-
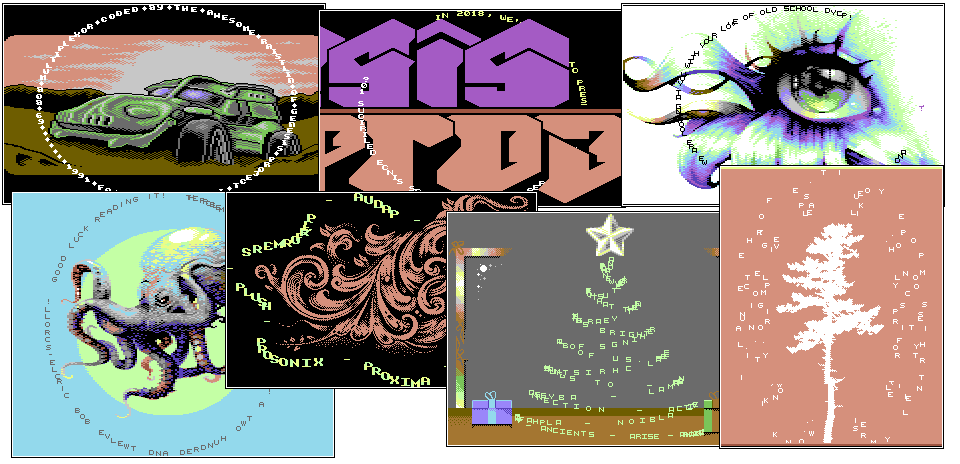
From top-left, we have:-
- 1991’s Delirious 10, in which I had a 96-bob plotter drawing onto a 32-sprite multiplex over a bitmap background. Quite an achievement for the time, I’d say, I don’t believe that anyone had done this before, nor tried to do after? (I may be wrong .. please let me know if so)
- 2018’s Delirious 11. I remade the 96-bob-plotter, adding colour to it and allowing it to wrap in front of and behind a near-fullscreen logo swinger
- 2018’s X Marks the Spot, our entry for the X2018 demo competition (we came 4th). This one had 128 bobs, again on top of a bitmap (ie. the plot was done to multiplexed sprites again) – we threw the gauntlet down for Bonzai to try to beat us in this one 😉
- 2019’s The Dive, with a 212-bob plotter… beating our own record before Bonzai had a chance to.
- 2020’s Memento Mori, in which we made the shape more interesting, increase the font size and made it clip to the background bitmap .. really pushing the boat out to make the effect look truly gorgeous here
- 2020’s Christmas Megademo .. this time we pushed the boundary a little more, creating the shape of a stylish Christmas tree – and this time not being shy to create lots of overlaps and bunching-up of the chars .. my code-generator would optimise for all these cases as best it could
- 2022’s Tree of Peace .. this time going for an Only Sprites affair with a crazy triple-sinus. In static pictures, the scroller looks absolutely unreadable. In motion, it’s slightly less so
---
## Prerequisites
You probably need to know at least the very basics of C64 demo coding, such as how to:-
- setup charset, bitmap, sprites
- double buffer
---
## Pre-Shifted Font Data
The first step is to choose a font, of an appropriate size, and generate some pre-shifted data – we don’t really want to be shifting the font in realtime.. it’s possible, sure, but we have better things to spend those cycles on, right..? Using a 5×5 font as an example, with 32 different chars available (space, A-Z and then 5 special chars), we would end up with a table that is 1920 bytes in size (see explanation/calculation below the following image):-
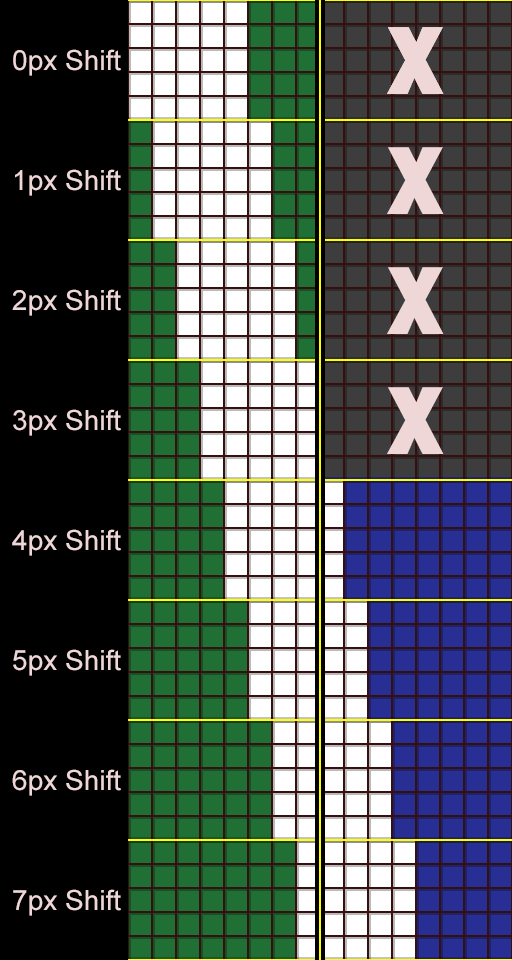
So, we have **32** chars in the font, each char is 5 bytes high.. and for **8** shift values, we have **8** sets of data for the LHS, **4** sets for RHS… giving our total data-size of 32 * 5 * (8 + 4) = 1920 bytes.
As always, I generate this data in C++ – you could of course use macros in your favourite 6510 assembler if that’s your preference. To keep my blit-code ASM tidy, I also prefer to save this data in a format that can be easily read, too… and in a form that’s indexable. So, I’ll end up with something like:-
```asm6502
ShiftedFont_Shift5_Y0_L:
.byte $00, $07, $07, $07, $07, $07, $07, $07, $04, $07, $00, $04, $04, $04, $04, $03
.byte $07, $07, $07, $07, $07, $04, $04, $04, $04, $04, $07, $00, $01, $00, $00, $00
ShiftedFont_Shift5_Y0_R:
.byte $00, $c0, $c0, $c0, $80, $c0, $c0, $c0, $40, $c0, $c0, $40, $00, $40, $40, $80
.byte $80, $c0, $80, $c0, $c0, $40, $40, $40, $40, $40, $c0, $00, $00, $00, $00, $00
```
That’s the first line (Y=0) of the font, shifted 5 pixels to the right – so we have both a Left and a Right side. As always, we should avoid crossing page boundaries – so we should ensure that this data is stored at a 32 byte boundary… easy in most assemblers with something like:-
```asm6502
.align 32
```
---
## Blit Code
The next step is fairly easy, depending on your render target (bitmap, chars or sprites). The simplest to consider first is a bitmap screen.
Taking the Christmas Tree part in Christmas Megademo, here’s how the DXYCP chars (“BOBs”) are placed across 3 frames of animation:-
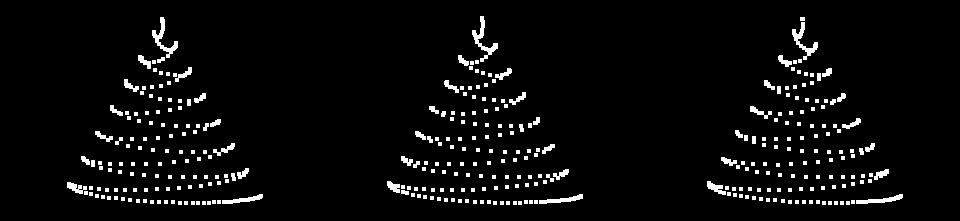
This part included 232 chars. With 3 frames of animation, that gives 696 frames in total for each char to move from bottom-right to the peak of the tree – which will take around 14 seconds at 50fps.
The way that we draw this is to iterate through each of these 232 chars, working out the bytes that we need to change for each to be drawn, and the shifts required. For example, if we have Char231 at (221, 196) then that would be the 27th char and our plot would need a right-shift of 5 (since 221/8 is 27 remainder 5. The simple plot for this would be something like:-
```asm6502
Char231_Frame0:
ldy #$00
sty Char230_Frame0 + 1
lda ShiftedFont_Shift5_Y0_Side0,y
sta BitmapAddress + (24 * 320) + (27 * 8) + 4
lda ShiftedFont_Shift5_Y0_Side1,y
sta BitmapAddress + (24 * 320) + (28 * 8) + 4
lda ShiftedFont_Shift5_Y1_Side0,y
sta BitmapAddress + (24 * 320) + (27 * 8) + 5
//; ... more ...
lda ShiftedFont_Shift5_Y4_Side1,y
sta BitmapAddress + (24 * 320) + (28 * 8) + 8
```
If we have Char230 hitting some of those bytes, we might need to ORA those in as well. In my plot code, I will always allow 2 chars to be overlapped this way:-
```asm6502
Char230_Frame0:
ldx #$00
stx Char229_Frame0 + 1
//; ... some of Char230 plotted here ...
Char231_Frame0:
ldy #$00
sty Char230_Frame0 + 1
lda ShiftedFont_Shift5_Y0_Side0,y
ora ShiftedFont_Shift3_Y3_Side1,x //; <-- overlap point here
sta BitmapAddress + (24 * 320) + (27 * 8) + 4
lda ShiftedFont_Shift5_Y0_Side1,y
sta BitmapAddress + (24 * 320) + (28 * 8) + 4
lda ShiftedFont_Shift5_Y1_Side0,y
ora ShiftedFont_Shift3_Y4_Side1,x //; <-- overlap point here
sta BitmapAddress + (24 * 320) + (27 * 8) + 5
//; ... more ...
lda ShiftedFont_Shift5_Y4_Side1,y
sta BitmapAddress + (24 * 320) + (28 * 8) + 8
```
Furthermore, if there are 3 or more chars hitting the same byte, we would need to do something like this:-
```asm6502
lda BitmapAddress + (24 * 320) + (27 * 8) + 4
ora ShiftedFont_Shift5_Y0_Side0,y
ora ShiftedFont_Shift3_Y3_Side1,x
sta BitmapAddress + (24 * 320) + (27 * 8) + 4
```
Which, yeah, starts to get more costly of course .. but it’s all good – these complex overlaps also make the effect look more impressive.
Note that all of this is generated using the “Raistlin Code Generator” which I mentioned in my last blog post, [All Border Double DYPP](/memento-mori-all-border-double-dypp/). The C++ works out exactly which chars overlap, or not, and the best way to plot these. I iterate over the chars in order – so I’ll always have X, Y loaded with adjacent char indices.
Here’s the actual generated code from a section of the tree scroller just so that you can see there’s nothing more to this:-
```asm6502
Char086_Frame0:
ldx #$00 //; 2 ( 4409) bytes 2 ( 5820) cycles
stx Char085_Frame0 + 1 //; 3 ( 4412) bytes 4 ( 5824) cycles
lda ShiftedFont_Shift1_Y1_Side0,y //; 3 ( 4415) bytes 4 ( 5828) cycles
ora BitmapAddress + (12 * 320) + (14 * 8) + 7 //; 3 ( 4418) bytes 4 ( 5832) cycles
sta BitmapAddress + (12 * 320) + (14 * 8) + 7 //; 3 ( 4421) bytes 4 ( 5836) cycles
lda ShiftedFont_Shift1_Y2_Side0,y //; 3 ( 4424) bytes 4 ( 5840) cycles
ora BitmapAddress + (13 * 320) + (14 * 8) + 0 //; 3 ( 4427) bytes 4 ( 5844) cycles
sta BitmapAddress + (13 * 320) + (14 * 8) + 0 //; 3 ( 4430) bytes 4 ( 5848) cycles
lda ShiftedFont_Shift1_Y3_Side0,y //; 3 ( 4433) bytes 4 ( 5852) cycles
ora ShiftedFont_Shift7_Y0_Side0,x //; 3 ( 4436) bytes 4 ( 5856) cycles
ora BitmapAddress + (13 * 320) + (14 * 8) + 1 //; 3 ( 4439) bytes 4 ( 5860) cycles
sta BitmapAddress + (13 * 320) + (14 * 8) + 1 //; 3 ( 4442) bytes 4 ( 5864) cycles
lda ShiftedFont_Shift1_Y4_Side0,y //; 3 ( 4445) bytes 4 ( 5868) cycles
ora ShiftedFont_Shift7_Y1_Side0,x //; 3 ( 4448) bytes 4 ( 5872) cycles
ora BitmapAddress + (13 * 320) + (14 * 8) + 2 //; 3 ( 4451) bytes 4 ( 5876) cycles
sta BitmapAddress + (13 * 320) + (14 * 8) + 2 //; 3 ( 4454) bytes 4 ( 5880) cycles
Char087_Frame0:
ldy #$00 //; 2 ( 4456) bytes 2 ( 5882) cycles
sty Char086_Frame0 + 1 //; 3 ( 4459) bytes 4 ( 5886) cycles
lda ShiftedFont_Shift7_Y2_Side0,x //; 3 ( 4462) bytes 4 ( 5890) cycles
ora BitmapAddress + (13 * 320) + (14 * 8) + 3 //; 3 ( 4465) bytes 4 ( 5894) cycles
sta BitmapAddress + (13 * 320) + (14 * 8) + 3 //; 3 ( 4468) bytes 4 ( 5898) cycles
lda ShiftedFont_Shift7_Y3_Side0,x //; 3 ( 4471) bytes 4 ( 5902) cycles
ora BitmapAddress + (13 * 320) + (14 * 8) + 4 //; 3 ( 4474) bytes 4 ( 5906) cycles
sta BitmapAddress + (13 * 320) + (14 * 8) + 4 //; 3 ( 4477) bytes 4 ( 5910) cycles
lda ShiftedFont_Shift7_Y4_Side0,x //; 3 ( 4480) bytes 4 ( 5914) cycles
sta BitmapAddress + (13 * 320) + (14 * 8) + 5 //; 3 ( 4483) bytes 4 ( 5918) cycles
lda ShiftedFont_Shift7_Y0_Side1,x //; 3 ( 4486) bytes 4 ( 5922) cycles
ora BitmapAddress + (13 * 320) + (15 * 8) + 1 //; 3 ( 4489) bytes 4 ( 5926) cycles
sta BitmapAddress + (13 * 320) + (15 * 8) + 1 //; 3 ( 4492) bytes 4 ( 5930) cycles
lda ShiftedFont_Shift7_Y1_Side1,x //; 3 ( 4495) bytes 4 ( 5934) cycles
ora BitmapAddress + (13 * 320) + (15 * 8) + 2 //; 3 ( 4498) bytes 4 ( 5938) cycles
sta BitmapAddress + (13 * 320) + (15 * 8) + 2 //; 3 ( 4501) bytes 4 ( 5942) cycles
lda ShiftedFont_Shift7_Y2_Side1,x //; 3 ( 4504) bytes 4 ( 5946) cycles
ora BitmapAddress + (13 * 320) + (15 * 8) + 3 //; 3 ( 4507) bytes 4 ( 5950) cycles
sta BitmapAddress + (13 * 320) + (15 * 8) + 3 //; 3 ( 4510) bytes 4 ( 5954) cycles
lda ShiftedFont_Shift7_Y3_Side1,x //; 3 ( 4513) bytes 4 ( 5958) cycles
ora BitmapAddress + (13 * 320) + (15 * 8) + 4 //; 3 ( 4516) bytes 4 ( 5962) cycles
sta BitmapAddress + (13 * 320) + (15 * 8) + 4 //; 3 ( 4519) bytes 4 ( 5966) cycles
lda ShiftedFont_Shift7_Y4_Side1,x //; 3 ( 4522) bytes 4 ( 5970) cycles
ora ShiftedFont_Shift7_Y0_Side0,y //; 3 ( 4525) bytes 4 ( 5974) cycles
sta BitmapAddress + (13 * 320) + (15 * 8) + 5 //; 3 ( 4528) bytes 4 ( 5978) cycles
```
Yep, it’s really that simple. Each frame of animation code uses ~15,000 cycles and 11,000 bytes.
Note: on this occasion I didn’t double-buffer.. since I had 3 frames, I actually would’ve needed to triple-buffer – because the write-addresses are all hardcoded into my plot function. Regardless, I didn’t want to waste 9,000 bytes by double-buffering (and definitely not 18,000 bytes for triple-buffering). So, with that in mind, there’s some between-frames cleanup needed to blank out the bytes that are used in one frame but not the next … to do that I just have a big block of clearing code:-
```asm6502
DrawShape_Frame0:
lda #$00 //; 2 ( 2) bytes 2 ( 2) cycles
sta BitmapAddress + (1 * 320) + (20 * 8) + 1 //; 3 ( 5) bytes 4 ( 6) cycles
sta BitmapAddress + (5 * 320) + (19 * 8) + 0 //; 3 ( 8) bytes 4 ( 10) cycles
sta BitmapAddress + (6 * 320) + (21 * 8) + 4 //; 3 ( 11) bytes 4 ( 14) cycles
sta BitmapAddress + (7 * 320) + (19 * 8) + 2 //; 3 ( 14) bytes 4 ( 18) cycles
sta BitmapAddress + (7 * 320) + (19 * 8) + 3 //; 3 ( 17) bytes 4 ( 22) cycles
sta BitmapAddress + (7 * 320) + (19 * 8) + 4 //; 3 ( 20) bytes 4 ( 26) cycles
sta BitmapAddress + (7 * 320) + (18 * 8) + 7 //; 3 ( 23) bytes 4 ( 30) cycles
//; ... more ...
sta BitmapAddress + (24 * 320) + (21 * 8) + 6 //; 3 ( 308) bytes 4 ( 410) cycles
```
Note also that, inside my blit code, I automatically scroll the scrolltext through:-
```asm6502
Char086_Frame0:
ldx #$00 //; 2 ( 4409) bytes 2 ( 5820) cycles
stx Char085_Frame0 + 1 //; 3 ( 4412) bytes 4 ( 5824) cycles
```
Each frame’s code scrolls through it’s own text .. and then we simply write into the final-char of each when we move new scrolltext onto the screen.
---
## Blitting To Sprites
In Delirious 10, Delirious 11, X Marks the Spot, The Dive and Tree of Peace I plotted into sprite data rather than bitmap. The latter, Tree of Peace, was as simple as the bitmap plotting, I simply used a sprite carpet. The others, though, were more complicated: they all used a sprite multiplexor.. which meant that in addition to working out where each char would be plotted, I also needed to work out an arrangement of sprites that would work well.
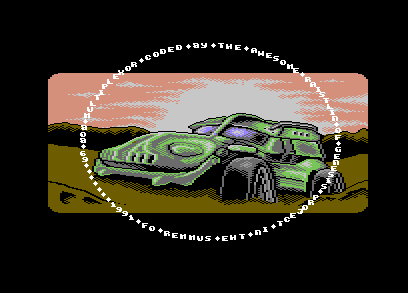
The advantage to blitting to sprites is that you can then easily swing these horizontally on screen (vertically too if you’re so inclined).. and you can place a bitmap, so charset-animation, etc etc in front of or behind the DXYCP – or, of course, both.
On Delirious 10 and 11, I simply used a 32-sprite multiplexor, putting 3 chars into each sprite and working out the best sprite position for these. Delirious 11, coming 27 years after the previous demo, included one major optimisation to my method of determining the sprite position: I wouldn’t just settle for the first position that worked .. I would try up to 7 further x-positions of each sprite, sliding it 1px left each time to find which position gave the code with the least cycles – some positions gave less byte-overlaps and, hence, faster code. Surprisingly, the code was -significantly- faster this way, leaving me more than enough cycles to do the logo-swinger behind (nb. this logo-swinger is drawing with brute-force memory copies, there’s no VSP or such involved here).
With X Marks the Spot and The Dive, having a fixed number of chars per sprite didn’t work – with 32 sprites, there were some positions where you simply couldn’t fit 4+ chars as the chars were too spaced-out. So, instead, I reworked the code to allow for a variable number – it then just comes down to finding the best arrangement of sprites that you can.
Here’s the sprite layout that we ended up with in The Dive (where 2 frames were used):-
---
## Wrapping Up
So, yeah, DXYCPs aren’t as complicated as you might have thought.. it really does just come down to a whole load of LDAs, STAs (and perhaps some ORAs). That’s the grunt work of this.
There’s still a lot of room for innovation with these, though.. even after doing so many of them, there are still some cool ideas that I have for how to take things further. I might write about those one day – *after* they’ve been released in a demo of course ;-p .. I can’t wait to see what others might do, though, it does feel lonely with only myself and Walt/Bonzai really doing these right now, showering each other with scene love 😉

---
# All Border Double DYPP
- URL: https://c64demo.com/memento-mori-all-border-double-dypp/
- Author: Raistlin (Genesis Project)
- Published: 2022-03-15
- Series: Memento Mori
- Level: insane
- Tags: 6502, c64, sprites, borders, dypp, multiplexing, code generation
- Licence: CC BY 4.0 for text, CC BY 4.0 or MIT for code (https://creativecommons.org/licenses/by/4.0/)
- Releases: Memento Mori by Genesis Project (2020) https://csdb.dk/release/?id=195841
> How the all-border double DYPP in Memento Mori works on the C64: open borders, multiplexed sprites and prebaked, deduped font data.
Assumes: Opening the top, bottom and side borders; Sprite multiplexing; A stable raster; Sprite interleave (https://c64demo.com/sprite-interleave/)
## Summary
The “All Border Double DYPP” is one of the effects, used in Memento Mori (which you can [download from CSDb](https://csdb.dk/release/?id=195841)), that I am asked about most often. Here we have 2 DYPPs moving across the whole screen, and through the borders, while wrapping behind some raster bars. I’m going to jump right into how this is pulled off in this, my first blog post on C64 demo coding.
A funny aside… it’s hard when you’ve spent so long working on a single demo effect (months in this case) to reduce it down to be less than 30 seconds of the full demo. But that was a decision that we made with Memento Mori – and I personally think it was a good one.
Video:
*Video: [Memento Mori by Genesis Project](https://www.youtube.com/watch?v=ob5GHijbWSg), the full demo. The all-border double DYPP is on screen for under 30 seconds of it.*
---
## Prerequisites
You probably need to know at least the very basics of C64 demo coding, such as how to:-
- open the borders (top, bottom and sides)
- multiplex sprites
- get a stable raster
It would also be helpful if you can:-
- interleave sprite data (check [sprite interleave on Codebase64](https://codebase64.org/doku.php?id=base:sprite_interleave) if you’re unsure)
---
## In A Nutshell
The image below shows in simple terms what is used for one of the DYPPs in a single frame. At the top and bottom of the DYPP, we’re using 4 sprites (red, cyan, purple and green) and within the rasterbar section we’re only using 2. With 2 DYPPs, then, we have 8 sprites at top and bottom, 4 for the middle section.
One trick that I used – which is why you might notice the DYPP doesn’t quite look 100% clean – is to use double-height sprites. The simple reason for doing this: the DYPP appears larger and we use half the number of blits that would otherwise be needed to draw the scroller.
Note that the DYPP is also 432px wide. Although only 408px can be shown on screen at a time, we need 24px more so that we can smooth-scroll the sprites. Note also that 432px can be covered horizontally with *exactly 18 sprite columns*.

*Sprite coverage for a single DYPP*
The effect uses 2 frames of “animation” (more would be nice – but, for me at least, memory constraints prevented this). Following these 2 frames, the blit data will advance. We blit whole bytes – so it gives us a scroller speed of 4px per frame. That’s too fast for small fonts – but with a 16px font, it’s totally fine. The sinus moves in the opposite direction and at a faster speed so that it nicely rolls across the screen (if the speeds were matched, you would simply see the scroller moving through a static sinus – which would look pretty awful).
---
## Memory Map
Below you can see how we’ve squeezed everything into memory – like many of my demo effects, almost every byte of the C64 is utilised. This can of course be a hurdle on C64 – but that’s half the fun, right? It’s not just about unrolling code and precalculating everything – it’s the balance of doing that while also sticking within the very tight memory constraints.
```clike
//;$0000-0fff RESERVED
//;$1000-1fff Music
//;$2000-9fff Code and Precalc Font Data
//;$b800-bb5f Sprite X Tables
//;$bc00-bd7f Scrolltext0
//;$bd80-beff Scrolltext1
//;$bf00-bfff Fade Sin Table
//;$e000-ffff Sprite Output (nb. avoiding the holes below)
//;$f7f8-f7ff Screen0 Sprite Vals
//;$fbf8-fbff Screen1 Sprite Vals
```
---
## Stages of Development
One thing that I find helps a lot when building complex demo parts is to plan out exactly what is needed to make it happen. With this part, there are several things that will be required:-
- Top and bottom borders to be opened (somewhere around VSYNC=$0f8 and $0ff we will need to change $d011)
- Side borders to be opened for the whole screen ($d016 to be changed at the appropriate HSYNC positions for every raster line)
- Simple sprite multiplexing working – updating sprite Y values as appropriate to match our sprite sinus
- Full sprite multiplexing working – updating sprite X values and sprite indices as appropriate
- Baking out pre-calculated DYPP font data
- Generate some test sprite data – a single frame of prebaked DYPP sprite data to make sure that the sprite multiplexing is implemented correctly
- Interleaving the blit-code into the above raster code
- Adding sinus and scrolltext movement, along with the 2nd frame of animation
So, yeah, it’s a lot to get through… but you can do this in baby-steps with a plan like this – keeping an eye on memory as best as you can as you work through it.
With all of the above, I consider what the end goal is as well – a single function that’s called with a stable raster, at a certain raster position, and that will do all the work without any variable timing – we need to know exactly how many cycles each instruction takes – so we should avoid branching, any indexed loads that might cross page boundaries, etc etc.
I tend to do this by starting at an early raster position, eg. VSYNC=$010, and simply NOP’ing until I get to the exact VSYNC/HSYNC that I want.. since the first stage is to open top/bottom borders, starting at VSYNC=$0f8, that means a large of NOPs. Don’t worry about this though – the plan later on is to replace as many of these as we can with “proper” code.
---
## Screen Off Mode
Badlines are a fantastic thing on C64 – where the VIC uses a bunch of cycles to pull in the next char row of the screen. Extra badlines can be coaxed out of the VIC to create some really nice effects – like FLI for example. But.. when you only want sprites on the screen, such as for the Sprites Only compo, it would be nice to not have to worry about them.
And that’s where this special screen mode comes in… essentially, you disable the screen but then tear it open again by using border-opening tricks. VIC works on trigger points – it starts drawing the border when it (i) believes that it shouldn’t have already started drawing the border and (ii) when it believes that it now should be drawing the border. So, essentially, there are 2 points on the screen where it will decide for the top and bottom borders: one for 25 row screens, one for 24 row screens… and top/bottom border opening happens when you switch between these modes at the right VSYNC points.
To open top/bottom borders in screen-off mode, we need to first of all have the screen turned on for a single frame (make sure the screen is clear and set to the same colour as the border to avoid flicker). Then, at around VSYNC=$0f8, we simply:-
```asm6502
lda #$03
sta $d011
```
And at VSYNC=$0ff:-
```asm6502
lda #$0b
sta $d011
```
Note: This has to be done *every single frame*. This is important. If you get your timing wrong – *everything will completely disappear*.
---
## Tearing Open The Side Borders
The next stage is to start opening up the side borders. It’s worth at this point putting 8 y-expanded sprites at their top-most position – sprites affect raster timings so, in doing this, we just make sure that we’re not going to have to re-do the timing work later on.
On PAL machines, we have 63 cycles per raster-line.. and we lose quite a few of those for having 8 sprites enabled. With y-expanded sprites, we will have 42px at the top of the screen where the timing will be different. On these lines, and all lines following, we aim for having the following code at the appropriate HSYNC, close to where the right border is (HSYNC around $038) – this needs to be very accurate and you can either do it by following the VIC Timing chart (by the awesome Linus Akesson, aka LFT) to the word, or simply use trial-and-error like myself.
```asm6502
dec VIC_D016
inc VIC_D016
```
At this point, I should probably mention … to make all of this much, much easier… I use an “ASM generator” written in C++. So I’ll go off on a tangent now and explain a little about what this is …
---
## Raistlin’s ASM Generator
To cut a long story short, in order to allow myself to quickly build these sort of effects, I have a self-written toolset that helps me generate 6510 ASM code that is cycle-timed so that I know exactly at which HSYNC and VSYNC code will execute. CPP functions are used for adding cycle-wasting code – so if I call, for example, WasteCycles(1000), it might spit out 500 lines of NOPs.
This generator comes into it’s own when it comes to interleaving code – so, later on, we want to interleave the code that blits the DYPP data into the sprites.
I have a “*Master Routine*” which adds in all the code that must be very precisely timed – the border opening stuff, for example, and the raster bars. It also “loosely” multiplexes the sprites – sprite Y coordinates updating as appropriate to fill the full screen height (you have 20-21 raster lines where this can happen – hence why I say “loosely”), sprite X coordinates updating, sprite indices, etc. It’s important to try not to dirty registers in this code, if it can be avoided, so that the interleaved blit code doesn’t end up having to reload data – it can’t always be avoided, of course. This is one reason why I try to use DEC/INC pairs for changing $d016 – of course, doing STA/STX would be faster but then we’ve probably caused a problem for the blit code.
The Master Routine will then, once we’re ready, allow us to interleave blit code. We do this with something like:-
```clike
iSpareCycles = InterleaveCode(iSpareCycles);
```
Below you can see some of the code that my generator output for the finished version of this effect (don’t worry about what the blit code is doing – I’ll come to that later):-
```asm6502
//; Line $24
lda FontDataDeduped_Line337,x //; 3 ( 391) bytes 4 ( 534) cycles
sta Base_BankAddress0 + ($98 * 64) + (4 * 3) + 2 //; 3 ( 394) bytes 4 ( 538) cycles
lda FontDataDeduped_Line148,x //; 3 ( 397) bytes 4 ( 542) cycles
sta Base_BankAddress0 + ($98 * 64) + (5 * 3) + 2 //; 3 ( 400) bytes 4 ( 546) cycles
lda FontDataDeduped_Line163,x //; 3 ( 403) bytes 4 ( 550) cycles
sta Base_BankAddress0 + ($98 * 64) + (6 * 3) + 2 //; 3 ( 406) bytes 4 ( 554) cycles
lda FontDataDeduped_Line338,x //; 3 ( 409) bytes 4 ( 558) cycles
sta Base_BankAddress0 + ($98 * 64) + (7 * 3) + 2 //; 3 ( 412) bytes 4 ( 562) cycles
nop //; 1 ( 413) bytes 2 ( 564) cycles
dec VIC_D016 //; 3 ( 416) bytes 6 ( 570) cycles
inc VIC_D016 //; 3 ( 419) bytes 6 ( 576) cycles
//; Line $25
lda FontDataDeduped_Line339,x //; 3 ( 422) bytes 4 ( 580) cycles
sta Base_BankAddress0 + ($98 * 64) + (8 * 3) + 2 //; 3 ( 425) bytes 4 ( 584) cycles
lda FontDataDeduped_Line340,x //; 3 ( 428) bytes 4 ( 588) cycles
sta Base_BankAddress0 + ($98 * 64) + (9 * 3) + 2 //; 3 ( 431) bytes 4 ( 592) cycles
lda FontDataDeduped_Line341,x //; 3 ( 434) bytes 4 ( 596) cycles
sta Base_BankAddress0 + ($98 * 64) + (10 * 3) + 2 //; 3 ( 437) bytes 4 ( 600) cycles
lda FontDataDeduped_Line342,x //; 3 ( 440) bytes 4 ( 604) cycles
sta Base_BankAddress0 + ($98 * 64) + (11 * 3) + 2 //; 3 ( 443) bytes 4 ( 608) cycles
nop //; 1 ( 444) bytes 2 ( 610) cycles
dec VIC_D016 //; 3 ( 447) bytes 6 ( 616) cycles
inc VIC_D016 //; 3 ( 450) bytes 6 ( 622) cycles
//; Line $26
lda FontDataDeduped_Line022,x //; 3 ( 453) bytes 4 ( 626) cycles
sta Base_BankAddress0 + ($98 * 64) + (12 * 3) + 2 //; 3 ( 456) bytes 4 ( 630) cycles
ldx ZP_ScrollText0 + 3 //; 2 ( 458) bytes 3 ( 633) cycles
lda FontDataDeduped_Line343,x //; 3 ( 461) bytes 4 ( 637) cycles
```
And here is the pre-DYPP’ed font data that the above code references:-
```asm6502
FontDataDeduped_Line337:
.byte $00, $f8, $f8, $f8, $f8, $f8, $f8, $f8, $78, $78, $f8, $78, $f8, $f8, $f8, $f8
.byte $f8, $f8, $f8, $78, $78, $f8, $f8, $f8, $f8, $f8, $00
FontDataDeduped_Line338:
.byte $00, $fc, $fc, $fc, $f4, $fc, $fc, $fc, $c0, $c0, $fc, $f8, $fc, $fc, $fc, $fc
.byte $fc, $f4, $7c, $f8, $0f, $c0, $fc, $fc, $fc, $fc, $00
FontDataDeduped_Line339:
.byte $00, $ff, $fc, $ff, $f8, $fc, $fc, $ff, $40, $40, $fc, $fc, $ff, $fc, $fc, $ff
.byte $60, $f8, $1f, $f8, $0f, $c0, $fc, $fc, $fc, $fc, $00
FontDataDeduped_Line340:
.byte $00, $ff, $fc, $ff, $f8, $fc, $fc, $ff, $80, $00, $fc, $fc, $ff, $fc, $fc, $ff
.byte $00, $f8, $87, $fc, $0f, $c0, $fc, $fc, $fc, $fc, $80
FontDataDeduped_Line341:
.byte $00, $fc, $fc, $fc, $fc, $fc, $fc, $7c, $f8, $00, $7c, $fc, $fc, $fc, $fc, $fc
.byte $00, $fc, $f8, $fc, $0f, $c0, $7c, $7c, $fc, $fc, $f8
.byte $00, $00, $00, $00, $00, $00, $00, $00, $00, $00, $00, $00, $00 //; pad out to 256 bytes
FontDataDeduped_Line342:
.byte $00, $7c, $7c, $7f, $64, $7f, $64, $1f, $7c, $00, $1f, $7c, $7c, $7c, $7c, $7c
.byte $00, $7c, $7f, $64, $0f, $40, $1f, $1f, $64, $7f, $7c
```
The code for generating this, which hooks into my library functions, looks something like:-
```clike
if (PartOfPlot == 1)
{
if (ALineLoaded != ReadLineA)
{
if (EnoughFreeCycles(NumCyclesToUse, 4))
{
SubtractCycles(NumCyclesToUse, code.OutputCodeLine(LDA_ABX, fmt::format("FontDataDeduped_Line{:03d}", ReadLineA)));
ALineLoaded = ReadLineA;
PartOfPlot++;
}
else
{
return false;
}
}
else
{
PartOfPlot++; //; Skip this part as it's not needed
}
}
if (PartOfPlot == 2)
{
if (EnoughFreeCycles(NumCyclesToUse, 4))
{
SubtractCycles(NumCyclesToUse, code.OutputCodeLine(STA_ABS, fmt::format("Base_BankAddress0 + (${:02x} * 64) + ({:d} * 3) + {:d}", ABDDYPP_UsableSpriteVals[SpriteVal], SpriteLine, XCharPos % 3)));
PartOfPlot = 0;
CODE_YPos[ScrollerIndex]++;
}
else
{
return false;
}
}
```
Here’s a snippet from the Master Routine, too… ABDDYPP_UseCycles() is the call into the function that inserts the blit code (which only uses the A and X registers by the way).. and then we have the sideborder opening code and the raster-colour code (since we only have 4 sprites on that section of screen, we have enough cycles in between the $d016 changes to update $d021 (screen colour)).
```clike
TotalWastedCycles += ABDDYPP_UseCycles(code, NumCyclesToUse, false, FrameIndex);
code.OutputCodeLine(DEC_ABS, fmt::format("VIC_D016"));
if (ColourToChangeScreenTo != 0xff)
{
code.OutputCodeLine(LDY_IMM, fmt::format("#${:02x}", ColourToChangeScreenTo));
code.OutputCodeLine(STY_ABS, fmt::format("VIC_ScreenColour"));
LastScreenColour = ColourToChangeScreenTo;
}
code.OutputCodeLine(INC_ABS, fmt::format("VIC_D016"));
code.OutputBlankLine();
```
So, yeah, it’s a powerful toolset, I can’t imagine how something like this effect would be coded without it… but, still, there’s a hell of a lot of work required outside of this in order to get everything working.
---
## Sprite Multiplexing Part 1 – Y Positions
With our code generator, we now want to add some logic that will automatically move all of our sprites down, when needed. Inside my main loop, I keep track of the current VSYNC position, and the current state of Y for all of the sprites. As soon as VSYNC is greater than sprite Y, I know that we can update sprite Y to the next position. Something like this:-
```clike
bool bYLoaded = false;
for (int SpriteIndex = 0; SpriteIndex < 8; SpriteIndex++)
{
int CurrYVal = CurrentSpriteYVal[SpriteIndex];
int NextYVal = CurrYVal + 42;
if (RasterLine > CurrYVal)
{
if (0) //; <-- I do some checks here to remove 4 of the sprites during the rasterbar section...
{
CurrentSpriteYVal[SpriteIndex] = NextYVal;
continue;
}
if (!bYLoaded)
{
if (EnoughFreeCycles(NumCyclesToUse, 2))
{
SubtractCycles(NumCyclesToUse, code.OutputCodeLine(LDY_IMM, fmt::format("#${:02x}", NextYVal & 255)));
bYLoaded = true;
}
}
if (bYLoaded)
{
if (EnoughFreeCycles(NumCyclesToUse, 4))
{
SubtractCycles(NumCyclesToUse, code.OutputCodeLine(STY_ABS, fmt::format("VIC_Sprite{:d}Y", SpriteIndex)));
CurrentSpriteYVal[SpriteIndex] = NextYVal;
}
}
}
}
```
That’s all that’s needed.. more important things are placed within the code to steal cycles first – because we have the luxury of being able to update sprite Y anywhere within 42 lines… so there’s really no rush.
---
## Sprite Multiplexing Part 2 – X Positions
For updating sprite X, due to the nature of our sinus, we have to do it “fairly soon”… so we set this code as higher-priority than updating the Y positions. I’ll just show you some of the code here – it’s quite a complex part of the solution so, yeah, please forgive me that this is real messy:-
```clike
if (NextSpriteColumnIndex != CurrentSpriteColumnIndex[OutputSpriteIndex])
{
if (EnoughFreeCycles(NumCyclesToUse, 6)) //; <-- 6 needs to be higher if we alter sprite colours..
{
code.OutputFunctionLine(fmt::format("ABDDYPP_SpriteX{:d}_Scroller{:d}_Frame{:d}", NextSpriteColumnIndex, ScrollerIndex, FrameIndex));
SubtractCycles(NumCyclesToUse, code.OutputCodeLine(LDY_IMM, fmt::format("#$00")));
SubtractCycles(NumCyclesToUse, code.OutputCodeLine(STY_ABS, fmt::format("VIC_Sprite{:d}X", OutputSpriteIndex)));
code.OutputBlankLine();
//; Some additional code was here to deal with the sprite colours - for my DYPP, each sprite column had a different colour...
bXMSBIsDirty = true;
CurrentSpriteColumnIndex[OutputSpriteIndex] = NextSpriteColumnIndex;
}
}
```
You’ll notice, hopefully, that I’ve added a label for each sprite column (0-17), one for each of our scrollers (0-1) and one for each frame (0-1) .. giving a total of 72 labels. The reason being that, as the sinus moves, and the scroller scrolls, we need to update these values outside our raster code. By using the labels, that outside code can write directly into the code – eg. “sta ABDDYPP_SpriteX13_Scroller0_Frame1 + 1” ..
---
## Sprite Multiplexing Part 3 – Sprite Indices
For my DYPP, I used 16px interleave. This means that, every 32 lines (remember, the sprites are y-expanded) I can update the whole row. I do this with:-
```clike
while ((UpdateSpriteValIndex != -1) && (EnoughFreeCycles(NumCyclesToUse, 12)))
{
int LineVal = YLine / 32 + 1;
int SpriteVal = ABDDYPP_SpriteRemapping[FrameIndex][LineVal][UpdateSpriteValIndex];
if (SpriteVal != -1)
{
SubtractCycles(NumCyclesToUse, code.OutputCodeLine(LDY_IMM, fmt::format("#${:02x}", ABDDYPP_UsableSpriteVals[SpriteVal + 0])));
SubtractCycles(NumCyclesToUse, code.OutputCodeLine(STY_ABS, fmt::format("SpriteVals{:d} + {:d}", CurrentD018, SpriteValsToUse[0][UpdateSpriteValIndex])));
SubtractCycles(NumCyclesToUse, code.OutputCodeLine(LDY_IMM, fmt::format("#${:02x}", ABDDYPP_UsableSpriteVals[SpriteVal + 64])));
SubtractCycles(NumCyclesToUse, code.OutputCodeLine(STY_ABS, fmt::format("SpriteVals{:d} + {:d}", CurrentD018, SpriteValsToUse[1][UpdateSpriteValIndex])));
}
UpdateSpriteValIndex++;
if (UpdateSpriteValIndex == ABDDYPP_MAX_NUM_SPRITES_TO_USE)
{
UpdateSpriteValIndex = -1;
}
}
```
The updates can happen anywhere within around 32 lines as we are setting the values for the next row. We then just need a perfectly-timed $d018 change in order to update the screen-address and reference the correct sprite indices. I handle this with:-
```clike
if ((YLine > 0) && (YLineMod32 == 0))
{
if (EnoughFreeCycles(NumCyclesToUse, 6))
{
SubtractCycles(NumCyclesToUse, code.OutputCodeLine(LDY_IMM, fmt::format("#D018Value{:d}", CurrentD018)));
SubtractCycles(NumCyclesToUse, code.OutputCodeLine(STY_ABS, fmt::format("VIC_D018")));
CurrentD018 ^= 1;
}
}
```
---
## The Blit Code (and data)
I can’t believe I’ve written so much, about a DYPP routine, and haven’t even touched on the basics of how this type of DYPP work yet. I don’t believe anyone’s really defined the different DYPP methods yet – so… let’s go ahead and name this one the Prebaked Blit DYPP.
With this method, we will have our font pre-DYPP’ed and packed down into as small a format as we can easily access.
For starters, here’s the font that we used for this effect – the font was built by Ksubi of Genesis Project, one of my main go-to guys when I want a font with certain technical qualities (I’ll come to those in a minute):-

Before we even start to apply our DYPP sine to this, there’s an easy optimisation to make. If we convert these into 8x16px columns, we can see that there are a few duplicates in this. For example, the left side of ‘A’ and ‘F’. In fact, there are quite a few matches (thanks Ksubi!). The font has 58 columns – deduped, it comes down to just 27 – meaning that we can fit 9 sets of these into each 256-byte memory block (nb. remember that we don’t want to have any data crossing page boundaries – our blit code must have a fixed cycle count)… and we’re only “wasting” 13 bytes per block, which isn’t too bad.
At the next step, I actually did something a bit .. well .. naughty. In code, I effectively scaled Ksubi’s beautiful 16px high font down to 9px – since I’m using Y-expanded sprites, this gives an “effective” size of 18px. From what I can remember, I did this as a nasty-hack at first, hoping to ask Ksubi to later create me a proper 9px high font – but either I forgot to mention it to him, or we just decided that it worked fine .. honestly, I can’t remember which …….. (sorry Ksubi!)
Next up, I pre-DYPP’ified the font data. That is, I took each 8px-wide section of the sinus above and I rendered each char to be displaced as it would be on that sine. That gives this:-
This is 624px tall – so, packing 9 lines per 256 byte block, that’s 17,920 bytes of memory.. and then the same again for the 2nd frame of our DYPP, coming to 35,840 bytes. BAD. Basically, we can’t fit it.
But herein lies the next trick .. we now look for how many of our 27-byte rows are identical. Our C++ code handles this for us too of course. Note: with both the column-data dedupe from the original font, and with the row-data dedupe I’m about to show you, we of course need to keep track of how we are deduping with a reverse lookup table.
Here’s how this turned out:-
On the left, in blue, you see the original font data – this time including the 2nd animation frame as well. In the middle, where you see a red row, that’s because that data line has already appeared somewhere above – so can be taken out of the data. On the right hand size, you see our full deduped data. Deduping has reduced the data from 1248 lines to 478 – a 62% reduction. Meaning we just need 13,824 bytes for data.
For convenience, I output this data as an ASM – I could of course just as easily output in binary format .. but it’s sometimes nice to have the data in human-readable form. Note: I already showed some of this output above when talking about my ASM generator.. you can see how I pad out to 256 bytes every 9 lines here with the extra zeros added between FontDataDeduped_Line341 and FontDataDeduped_Line342.
The final stage is to add in our blit code … and that’s easy now of course. With an “unpacked scrolltext” (we pre-unpack the scrolltext so it’s in our column-format rather than the actual text), we can now use indexed reads into FontDataDeduped and write directly to the correct memory address.
On that last point, the destination address depends on how you choose to go about this … you really have 2 options… (i) use a set of sprite data for each of your frames, (ii) reuse the same sprites for both frames. Option (i) means that you don’t need to clear any data (the frames won’t write to exactly the same bytes).. but option (ii) requires less sprite data, saving you a good chunk of memory.
---
## Conclusion
Hopefully this was useful to some .. and I hope some will see some avenues in the above for further optimisation and improvement – in writing this up I’ve thought of a few myself, actually, but whether I will ever come back to these routines I can’t say (how many DYPPs can one scener make, right?).
Please let me know if you have any questions or suggestions.
Cheers!